cuisinart brew central 14-cup digital coffeemaker manual

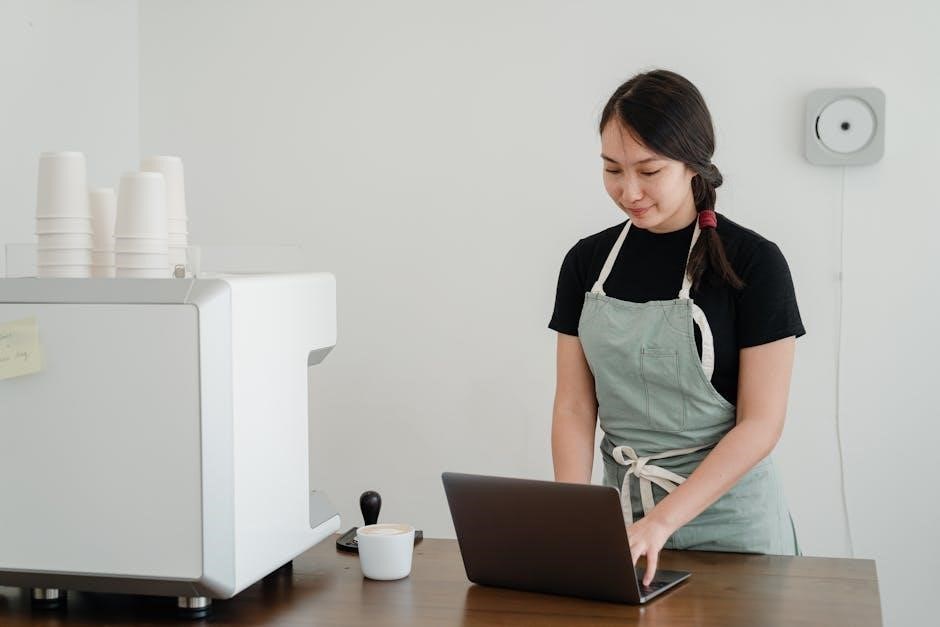
The Cuisinart Brew Central 14-Cup Digital Coffeemaker is a programmable, user-friendly appliance designed for efficient brewing. Its digital features and large capacity make it ideal for home or office use.

1.1 Overview of the Product

The Cuisinart Brew Central 14-Cup Digital Coffeemaker is a programmable, high-capacity coffee maker designed for home and office use. It features a digital clock, adjustable brew strength, and temperature control, offering customizable brewing options. The thermal carafe keeps coffee warm, and the machine’s user-friendly interface simplifies operation. Ideal for coffee enthusiasts, it combines advanced features with reliability, making it a versatile choice for daily use.

1.2 Key Features and Benefits

The Brew Central 14-Cup Digital Coffeemaker offers a 24-hour programmable timer, adjustable brew strength, and temperature control. Its thermal carafe maintains warmth, while the pause-and-serve feature allows mid-brew pouring. The machine includes a large 14-cup capacity, digital display, and automatic shutoff for convenience. These features provide users with precise control over brewing, ensuring a perfect cup of coffee every time with minimal effort required.

Design and Build Quality

The Brew Central 14-Cup Digital Coffeemaker features a sleek, compact design with dimensions of 7.75D x 9W x 14H, ensuring portability and a modern kitchen aesthetic. Built with durable materials, including stainless steel, it combines form and function for long-lasting performance and style.

2.1 Dimensions and Portability

The Cuisinart Brew Central 14-Cup Digital Coffeemaker measures 7.75 inches in depth, 9 inches in width, and 14 inches in height, making it a compact and portable appliance. Its sleek design allows for easy placement on countertops without occupying excessive space, while its durable construction ensures stability and longevity. The unit’s portability is enhanced by its manageable size, making it suitable for both home and office environments.

2.2 Material and Durability

The Cuisinart Brew Central 14-Cup Digital Coffeemaker is constructed with high-quality materials, including stainless steel accents, ensuring durability and a sleek appearance. The thermal carafe is designed to retain heat effectively while being resistant to rust and wear. Built with long-lasting components, this coffeemaker is designed to withstand frequent use, making it a reliable choice for daily brewing needs.

Programmable Features

This coffeemaker offers programmable options for tailored brewing, including a 24-hour timer, adjustable brew strength, and temperature control, ensuring a customizable coffee experience for every user.

3.1 24-Hour Digital Clock and Timer

The Cuisinart Brew Central features a 24-hour digital clock and timer, allowing users to schedule brewing in advance. This convenient feature ensures fresh coffee is ready exactly when needed, making mornings more efficient. The timer can be set up to 24 hours ahead, providing flexibility and consistency in coffee preparation. This function is easy to program and navigate using the control panel.

3.2 Adjustable Brew Strength Settings

The Brew Central 14-Cup Digital Coffeemaker offers adjustable brew strength settings, allowing users to customize their coffee’s boldness. Choose from options like strong or regular brew to suit your preference. This feature ensures a perfect balance of flavor, catering to both delicate and robust coffee lovers. The control panel provides easy access to these settings, enhancing the overall brewing experience with tailored results every time.

3.3 Temperature Control Options

The Brew Central 14-Cup Digital Coffeemaker features precise temperature control, ensuring optimal brewing conditions. Users can adjust the heat settings to achieve the perfect extraction. The machine maintains a consistent temperature, crucial for bringing out the full flavor of coffee beans. This feature is complemented by an automatic shut-off, preventing overheating and ensuring safety while maintaining the ideal temperature for your coffee.

Manual and Setup Instructions

The manual provides a comprehensive guide for unboxing, initial setup, and understanding the control panel; Follow step-by-step instructions for programming and brewing your first pot seamlessly.

4.1 Unboxing and Initial Setup

Begin by carefully unboxing the Cuisinart Brew Central 14-Cup Digital Coffeemaker and inspecting all components. Wash the carafe and brew basket with warm soapy water before first use. Plug in the unit and set the digital clock. Refer to the manual for detailed instructions on initial setup, ensuring all parts are properly assembled and ready for brewing. This step ensures optimal performance and safety.

4.2 Understanding the Control Panel

The control panel features an intuitive layout with buttons for programming, brew strength, and cup size. Key buttons include the “Program” button for setting brew time, “Brew/Off” to start or stop brewing, and the “14 Cup” button for smaller batches. The digital display shows the clock and current settings, while indicators like “CLEAN” alert you when maintenance is needed. Familiarize yourself with these controls to optimize your brewing experience.

4.3 Programming the Coffeemaker

Programming the Cuisinart Brew Central 14-Cup Digital Coffeemaker allows you to customize your brewing experience. Press the “Program” button to set the desired brew time up to 24 hours in advance. Use the arrow buttons to adjust the time, then press “Start” to confirm. You can also set brew strength and select options like delay start. The LED indicators will guide you through the process, ensuring your coffee is ready exactly when you want it. Always refer to the manual for detailed instructions.

Maintenance and Cleaning

Regular cleaning and descaling are essential for optimal performance. Clean the brew basket and carafe after each use, and descale every 3-6 months to prevent mineral buildup.

5.1 Cleaning the Brew Basket and Carafe

Regular cleaning of the brew basket and carafe is crucial for maintaining hygiene and flavor. Rinse both with warm soapy water after each use, and dry thoroughly. For tougher stains, soak in a mild detergent solution before scrubbing gently. Avoid using abrasive materials to prevent scratching. Cleaning these components regularly ensures optimal performance and prevents oil buildup from affecting the taste of your coffee.

5.2 Descaling the Coffeemaker

Descaling your Cuisinart Brew Central 14-Cup Digital Coffeemaker is essential to remove mineral buildup. Use a descaling solution as recommended in the manual. Fill the water reservoir with the solution, then place the carafe in position. Activate the descaling mode, usually by pressing and holding the brew button, and let the machine cycle through. Rinse thoroughly by running multiple cycles with fresh water to ensure no solution remains. Regular descaling every 3-6 months maintains performance and prevents damage.

5.3 Replacing Water Filters

To replace the water filter in your Cuisinart Brew Central 14-Cup Digital Coffeemaker, first locate the filter housing near the water reservoir. Turn off and unplug the machine for safety. Remove the old filter by releasing the clip or twisting it, then dispose of it properly. Take the new compatible filter, rinse it with fresh water to activate it, and insert it securely into the housing. Replace the reservoir, plug in the machine, and run a few cycles without coffee to rinse thoroughly. This ensures optimal performance and taste. Regular replacement every 1-2 months is recommended to prevent mineral buildup and maintain water quality. Always refer to the manual for specific instructions tailored to your model.

Advanced Brewing Options

The Cuisinart Brew Central 14-Cup Digital Coffeemaker offers advanced features like adjustable cup sizes, pause-and-serve functionality, and a thermal carafe, enhancing your brewing experience with flexibility and convenience.

6.1 Adjustable Cup Size Settings

The Cuisinart Brew Central 14-Cup Digital Coffeemaker features adjustable cup size settings, allowing users to choose between 1-4 cups or the full 14-cup carafe. This flexibility ensures precise brewing for any occasion, maintaining flavor consistency regardless of the amount. The digital interface simplifies selection, making it easy to customize your coffee experience while preserving the machine’s efficiency and performance.

6.2 Pause and Serve Function

The Pause and Serve feature allows you to interrupt the brewing cycle, enabling you to pour a cup of coffee before the entire pot is ready. Simply remove the carafe during brewing, and the machine will automatically pause. Replace the carafe to resume brewing. This convenient option is perfect for those who need their first cup quickly without waiting for the full pot.

6.3 Thermal Carafe Benefits

The thermal carafe is designed with double-walled insulation to keep coffee hot for hours without reheating. It maintains flavor and aroma by preserving temperature evenly. The carafe’s design reduces condensation, preventing water from dripping onto surfaces. Its compact shape saves refrigerator space, and it’s dishwasher-safe for easy cleaning. The thermal carafe is BPA-free, ensuring safety and durability. Perfect for entertaining, it keeps coffee warm and fresh, offering consistent temperature control for a satisfying experience.

Safety Precautions

Always unplug the coffeemaker when not in use or before cleaning. Avoid hot surfaces and keep the appliance away from water. Ensure stable placement and never leave it unattended during operation for safety.

7.1 Important Safety Instructions

Always read the manual before use. Keep the appliance away from water and ensure stable placement. Unplug when not in use or cleaning. Avoid touching hot parts. Never leave the coffeemaker unattended during operation. Follow all instructions to prevent accidents and ensure safe usage. Regular maintenance is crucial for optimal performance and safety.

7.2 Electrical Safety Tips

Ensure the coffeemaker is placed on a stable, heat-resistant surface. Avoid overloading power outlets and keep cords away from hot surfaces. Never submerge electrical parts in water or operate with wet hands. Use only Cuisinart-approved replacement parts to maintain electrical integrity. Regularly inspect cords for damage and replace if necessary to prevent hazards. Always follow the manufacturer’s guidelines for safe electrical operation.

7.4 Handling Hot Surfaces Safely

Always use oven mitts or a towel when handling the carafe, brew basket, or other hot components. Avoid touching the coffeemaker’s heating elements or surfaces during operation. Keep children away from hot parts to prevent burns. Allow the machine to cool down before cleaning or maintenance. Never leave the coffeemaker unattended while it is in use, as hot surfaces can cause serious injury if mishandled.

Troubleshooting Common Issues

This section addresses frequent problems like coffee not brewing, digital display malfunctions, or leaks. Follow guided solutions to resolve issues and maintain optimal performance.

8.1 Coffee Not Brewing Properly

If your Brew Central 14 isn’t brewing, check water levels and ensure the reservoir is filled. Verify the brew basket is properly aligned and clean. Descale regularly to prevent mineral buildup. Ensure the power cord is securely plugged in and all buttons are functioning. Refer to the manual for resetting or troubleshooting specific error indicators.

8.2 Digital Display Malfunctions

If the digital display on your Brew Central 14 malfunctions, try resetting the coffeemaker by unplugging it for 30 seconds. Ensure the power cord is securely connected. If issues persist, check for loose connections or debris obstructing the display. Clean the screen gently with a soft cloth. If problems remain, refer to the manual or contact Cuisinart customer support for assistance.

8.3 Leaking or Water Issues

If your Brew Central 14-Cup Digital Coffeemaker is leaking, check for loose connections or blockages in the water reservoir or hoses. Ensure the reservoir is properly aligned and not overfilled. Inspect the brew basket and carafe for misalignment. Clean or replace the water filter if clogged. If leaks persist, consult the manual or contact Cuisinart support for further assistance or potential repairs.

Where to Find the Manual Online

The Cuisinart Brew Central 14-Cup Digital Coffeemaker manual can be found on the official Cuisinart website, third-party manual hosting sites, or downloaded as a PDF online.

9.1 Official Cuisinart Website

The official Cuisinart website provides easy access to the Brew Central 14-Cup Digital Coffeemaker manual. Visit the Support section, enter the product model, and download the PDF manual instantly. This ensures you have the most accurate and up-to-date instructions for your appliance. The website is user-friendly, making it simple to navigate and find the resources you need for optimal performance.

9.2 Third-Party Manual Hosting Sites

Third-party sites like ManualsLib and ManualsPlus host the Cuisinart Brew Central 14-Cup Digital Coffeemaker manual. These platforms offer free access to PDF versions, making it convenient for users to download and print. They are reliable sources for manuals, ensuring easy access even without visiting the official Cuisinart website; Always verify the manual’s authenticity and version to ensure compatibility with your specific model for accurate guidance.

9.3 Downloading the PDF Version

The Cuisinart Brew Central 14-Cup Digital Coffeemaker manual is available as a PDF download from various sources. Users can visit third-party hosting sites like ManualsLib or ManualsPlus to access the file. Simply search for the model number, download the PDF, and save it for future reference. Ensure the version matches your specific model for accurate instructions and troubleshooting guidance. This format is ideal for easy printing or digital access.

User Reviews and Feedback

Users praise the Cuisinart Brew Central 14-Cup Digital Coffeemaker for its reliability and ease of use. Some find the interface initially confusing but appreciate the detailed manual.

10.1 Positive Aspects Highlighted by Users

Users consistently praise the Cuisinart Brew Central 14-Cup Digital Coffeemaker for its programmable features, allowing for tailored brewing experiences. The thermal carafe is a standout, keeping coffee warm for extended periods. Adjustable brew strength and a user-friendly interface enhance satisfaction. Overall, the machine is lauded for its reliability, ease of use, and ability to deliver consistent, high-quality coffee.

10.2 Common Complaints and Concerns

Some users find the interface complex, requiring time to master. Cleaning the carafe and brew basket can be cumbersome. Additionally, a few users report issues with durability over time, such as parts wearing out or malfunctioning. Despite these concerns, the overall performance remains satisfactory for most, though improvements in design and longevity could enhance user satisfaction.

10.3 Overall Satisfaction Ratings

Overall, users express satisfaction with the Cuisinart Brew Central 14-Cup Digital Coffeemaker, praising its programmable features and thermal carafe. While some note minor drawbacks, the majority find it reliable and good value for home brewing. Positive reviews highlight ease of use and consistent coffee quality, making it a popular choice among coffee enthusiasts seeking a dependable machine.

hamilton beach juicer instruction manual

The Hamilton Beach Juicer Instruction Manual is your essential guide for safe and effective operation. It details setup‚ usage‚ and maintenance to ensure peak performance and longevity.

Overview of the Hamilton Beach Juicer

The Hamilton Beach Juicer is a versatile and efficient appliance designed for extracting juice from fruits and vegetables. It features a compact design‚ easy-to-use controls‚ and durable components. The juicer is ideal for making fresh‚ healthy drinks‚ soups‚ and sauces. With its powerful motor and sharp blades‚ it ensures quick and effective juicing while preserving nutrients.

Importance of Reading the Instruction Manual

Reading the Hamilton Beach Juicer manual ensures safe and proper usage‚ helping you understand assembly‚ operation‚ and maintenance. It highlights essential safety precautions‚ like not leaving the juicer unattended and handling sharp blades with care. Following the manual prevents accidents and extends the appliance’s lifespan‚ ensuring optimal performance and juice quality.

Safety Precautions and Warnings

Always read the manual before use. Avoid leaving the juicer unattended while operating. Keep children away from sharp blades and moving parts. Never insert fingers or objects into the feed chute. Ensure the motor stops before disassembling. Avoid using damaged cords or plugs. Handle blades with care‚ and wash hands before and after use for safety.

Unboxing and Initial Setup

Unbox your Hamilton Beach Juicer carefully‚ ensuring all components are included. Remove packaging materials‚ then wash and dry the parts before first use for optimal performance.

What’s Included in the Box

Your Hamilton Beach Juicer box contains the motor base‚ juice pitcher‚ lid‚ strainer basket‚ pulp bin‚ and user manual. These components ensure you have everything needed to start juicing immediately‚ with clear instructions provided for easy assembly and operation.

Preparing the Juicer for First Use

After unpacking‚ remove any packaging materials and wash the strainer basket‚ juice pitcher‚ and pulp bin in warm‚ soapy water. Rinse thoroughly and dry. Ensure all parts are clean and free of debris before assembling and using the juicer for the first time.

Assembly and Parts Identification

Identify key components like the motor base‚ strainer basket‚ and feed chute. Proper assembly ensures safe and effective juicer operation‚ as outlined in the manual.

Understanding the Components of the Juicer

  • Motor Base: The core of the juicer‚ housing the powerful engine for operation.
  • Feed Chute: Where ingredients are inserted for juicing.
  • Strainer Basket: Collects pulp and ensures smooth juice extraction.
  • Pulp Container: Holds the pulp separated during juicing.
  • Juicer Cover: Safely covers the juicer during operation.

Step-by-Step Assembly Instructions

Begin by unpacking and washing all components except the motor base. Attach the strainer basket to the juice container‚ then align and lock the juicer cover. Ensure the feed chute is securely fitted. Plug in the juicer and refer to the manual for detailed assembly to ensure proper functionality and safety during operation.

Operating the Juicer

Plug in the juicer‚ add ingredients through the feed chute‚ and press start. Use the pulse function for tough ingredients and ensure the motor stops before disassembling.

Basic Operating Instructions

Plug in the juicer‚ ensure all parts are securely assembled‚ and add ingredients through the feed chute. Start the machine‚ using the pulse function for tough ingredients. Avoid overloading‚ and never leave the juicer unattended while operating. Stop the motor completely before disassembling or cleaning. Always handle sharp blades with care and wash components regularly for optimal performance.

Choosing the Right Settings for Different Ingredients

Select speed settings based on ingredient hardness. Use lower speeds for soft fruits like berries and higher speeds for harder vegetables or roots. For leafy greens‚ use the pulse function to ensure even extraction. Adjust settings to prevent clogging and maximize juice yield. Always refer to the manual for specific guidance on various produce types.

Preparing Fruits and Vegetables for Juicing

Wash all fruits and vegetables thoroughly before juicing. Remove seeds‚ pits‚ and peels if necessary. Chop larger ingredients into smaller pieces to fit the feed chute. For leafy greens‚ roll them into tight bunches. Ensure all produce is dry to avoid clogging the juicer. Always refer to the manual for specific preparation tips for optimal extraction.

Cleaning and Maintenance

Regular cleaning ensures optimal performance. Wash all detachable parts with warm soapy water after each use. Rinse thoroughly and dry to prevent rust. Check for worn parts.

How to Clean the Juicer After Use

After each use‚ disassemble the juicer and wash all parts except the motor base with warm‚ soapy water. Use a soft brush to remove pulp from the strainer basket. Rinse thoroughly and dry to prevent rust. Regular cleaning ensures optimal performance and longevity of your Hamilton Beach Juicer.

Drying and Storing the Appliance

After cleaning‚ thoroughly dry all parts with a clean towel to prevent rust. Store the juicer in a cool‚ dry place‚ away from direct sunlight. Keep the motor base separate from other components to ensure proper ventilation. Proper storage maintains the appliance’s longevity and ensures safe‚ efficient operation for future use.

Maintenance Tips for Longevity

Regularly inspect parts for wear and tear. Lubricate moving components as needed. Avoid using harsh chemicals‚ which can damage surfaces. Store the juicer in a dry place to prevent rust. Check and replace worn-out blades to maintain efficiency. Proper maintenance ensures optimal performance and extends the lifespan of your Hamilton Beach Juicer.

Safety Precautions During Use

Always keep hands away from moving parts. Avoid overloading the chute to prevent jamming. Ensure the juicer is stable and unplugged when not in use for safety.

General Safety Guidelines

Always supervise the juicer during operation and keep hands away from moving parts. Never insert fingers or objects into the feed chute while in use. Ensure the motor stops completely before disassembling. Avoid using a damaged power cord or plug. Keep the appliance out of reach of children and individuals with reduced physical or sensory abilities. Regularly inspect the juicer for wear and tear to maintain safe functioning.

Precautions While Operating the Juicer

Never leave the juicer unattended while it is operating. Do not insert fingers or objects into the feed chute during operation. Be cautious of sharp blades and avoid touching them. Ensure the power cord and plug are undamaged before use. Keep children away from the appliance. Regularly inspect for wear and tear to ensure safe operation.

Troubleshooting Common Issues

Address common issues like jamming or low juice yield by checking assembly‚ cleaning pulp buildup‚ and ensuring proper ingredient preparation. Reset if motor overheats.

Identifying and Resolving Common Problems

Regularly clean the juicer to prevent pulp buildup and clogs. If the motor stops‚ check for blockages and ensure all parts are securely assembled. For persistent issues‚ unplug the appliance and contact customer support. Always refer to the manual for specific troubleshooting steps to maintain optimal performance and extend the juicer’s lifespan effectively;

When to Contact Customer Support

Contact Hamilton Beach customer support if you encounter issues not resolved by troubleshooting‚ such as damaged parts or unclear instructions. Visit their website for assistance or additional guides. Ensure you have your model number and detailed issue description ready for efficient help. Refer to the manual for contact information and support options.

Warranty and Customer Support

Your Hamilton Beach juicer comes with a comprehensive warranty. For inquiries or issues‚ visit their official website or contact customer support for assistance and detailed warranty information.

Understanding the Warranty Terms

The warranty covers manufacturing defects for a specified period. It typically excludes damage from misuse or wear and tear. Review the manual for duration and specific conditions to ensure compliance and understand what is covered for your Hamilton Beach juicer.

How to Contact Hamilton Beach Support

For assistance‚ visit www.hamiltonbeach.in or refer to the manual for contact details. Reach out via phone‚ email‚ or online support for inquiries‚ troubleshooting‚ or warranty claims. Ensure you have your model number and purchase details ready for efficient service.

Additional Tips for Optimal Use

Maximize juice yield by feeding ingredients slowly and using the correct settings. Experiment with recipes and store the juicer cleanly to maintain its performance and longevity effectively.

Maximizing Juice Yield and Quality

To maximize juice yield and quality‚ feed ingredients slowly‚ use the correct settings‚ and ensure fruits and vegetables are well-prepared. Regularly cleaning and maintaining the juicer also enhances performance and ensures optimal results every time you use it for your favorite recipes and healthy drinks.

Experimenting with New Recipes

Experiment with new recipes by exploring various combinations of fruits‚ vegetables‚ and herbs. The Hamilton Beach Juicer allows you to create vibrant drinks‚ soups‚ sauces‚ and desserts. Use the manual’s tips to inspire your creativity and discover fresh flavors‚ making healthy and delicious meals for every occasion with ease and fun.

Health Benefits of Juicing

Juicing offers numerous health benefits‚ including improved nutrient absorption and a boost to your immune system. Fresh juices provide essential vitamins‚ minerals‚ and antioxidants‚ promoting overall well-being. Incorporating a variety of fruits and vegetables supports healthy digestion and energy levels‚ making it a great way to enhance your diet naturally and effectively.

Environmental Considerations

Environmental considerations highlight the eco-friendly design of the Hamilton Beach Juicer. It features energy-efficient operation‚ minimal waste production‚ and recyclable components‚ promoting sustainable use and responsible disposal.

Eco-Friendly Use of the Juicer

The Hamilton Beach Juicer is designed with eco-conscious practices in mind. It features energy-efficient operation‚ minimal waste production‚ and recyclable components. Proper disposal of packaging and outdated appliances is encouraged‚ aligning with environmental sustainability goals and reducing carbon footprint. The manual emphasizes eco-friendly use to promote a greener lifestyle while maintaining appliance longevity.

Proper Disposal of Packaging and Old Appliances

Dispose of packaging materials responsibly by recycling cardboard‚ plastic‚ and other recyclable components. For old appliances‚ check local e-waste regulations and use designated facilities to ensure environmentally safe disposal. Donate functional parts if possible‚ reducing waste and promoting sustainability. Proper disposal helps minimize environmental impact and adheres to eco-friendly practices.

Final Tips for Effective Juicing

For optimal results‚ always follow the manual’s guidelines. Prepare ingredients thoroughly‚ use appropriate settings‚ and clean promptly. Regular maintenance ensures efficiency and longevity. Experiment with recipes‚ store leftovers properly‚ and enjoy the convenience of healthy‚ homemade juices. Happy juicing!

Encouragement to Explore More Recipes

The Hamilton Beach Juicer is versatile for creating juices‚ soups‚ and sauces. Experiment with diverse fruits and vegetables to craft unique recipes. Regular cleaning ensures optimal performance. For inspiration‚ explore the manual or online resources for creative ideas to enhance your healthy lifestyle.

somatic yoga sequence pdf

Somatic Yoga combines gentle movements with mindfulness to enhance body awareness and release tension. By applying somatic principles, it promotes healing and relaxation, ideal for creating a therapeutic sequence guide.

What is Somatic Yoga?

Somatic Yoga is a gentle, mindful practice that focuses on internal body awareness and subtle movements to release physical and mental tension. Rooted in somatic principles, it emphasizes slow, conscious actions to reconnect with the body’s inner intelligence. Unlike traditional yoga, somatic yoga prioritizes sensation over form, encouraging participants to listen to their bodies and honor their limits. This approach helps improve flexibility, posture, and overall well-being while reducing chronic pain and stress. By integrating breathwork and relaxation, somatic yoga fosters a deeper connection between mind and body, promoting healing and self-awareness. It is particularly beneficial for those seeking therapeutic benefits or recovering from injuries, making it an ideal foundation for creating a personalized somatic yoga sequence guide.

Why Practice Somatic Yoga?

Practicing Somatic Yoga offers numerous benefits, particularly for those seeking to enhance body awareness, reduce chronic pain, and improve overall well-being. This gentle, therapeutic approach helps individuals reconnect with their body’s internal sensations, fostering a deeper understanding of their physical and emotional needs. By incorporating slow, mindful movements, somatic yoga promotes relaxation, flexibility, and posture improvement. It is especially beneficial for individuals recovering from injuries or dealing with stress and anxiety. The practice encourages self-awareness and self-care, making it an excellent addition to daily routines. Regular somatic yoga can lead to greater ease of movement, reduced tension, and a renewed sense of vitality, making it a valuable tool for long-term health and wellness. Its therapeutic nature also supports emotional healing and resilience, contributing to a balanced and mindful lifestyle.

Benefits of Somatic Yoga

Somatic Yoga offers a wide range of benefits, including improved flexibility, enhanced posture, and reduced chronic pain. It promotes deep relaxation, reducing stress and anxiety by calming the nervous system. The practice fosters greater body awareness, allowing individuals to identify and release physical tension. Regular somatic yoga can improve sleep quality, boost energy levels, and support emotional well-being. It is particularly beneficial for those recovering from injuries or managing long-term health conditions. By focusing on mindful movements, somatic yoga encourages self-healing and resilience. Over time, it can lead to a stronger connection between the mind and body, enhancing overall physical and mental health. This therapeutic approach is accessible to all, making it a valuable tool for achieving long-term wellness and vitality.

Understanding Somatic Yoga Sequences

Somatic yoga sequences are structured series of movements focusing on inner body awareness. They enhance flexibility, release tension, and promote relaxation through slow, mindful practices, suitable for all levels.

Key Principles of Somatic Yoga

The core principles of Somatic Yoga include slowing down movements to enhance awareness, releasing tension through gentle contractions and releases, and prioritizing comfort over traditional poses. The practice emphasizes internal sensations, encouraging students to listen to their bodies and honor their limits. It also incorporates mindful breathing to deepen relaxation and improve posture. Somatic Yoga avoids force, focusing instead on subtle, natural movements that restore flexibility and balance. These principles ensure a safe and therapeutic experience, making it accessible to everyone, regardless of age or physical condition. By aligning with these guidelines, practitioners can achieve a profound sense of well-being and long-term physical ease.

How to Structure a Somatic Yoga Practice

Begin your Somatic Yoga practice by setting an intention to focus on internal sensations and release tension. Start with a gentle warm-up, such as subtle neck rolls or shoulder releases, to prepare the body. Progress slowly, allowing time to notice and respond to sensations. Incorporate mindful breathing to deepen relaxation and enhance the release of tightness. Include a mix of floor-based and seated movements to target major muscle groups, ensuring each exercise is done with awareness and control. Conclude with a period of deep relaxation or meditation to integrate the effects of the practice. This structured approach ensures a balanced and therapeutic experience, fostering long-term flexibility and well-being.

Essential Somatic Movements for Beginners

Creating a Somatic Yoga Sequence PDF

A well-structured Somatic Yoga sequence guide helps practitioners follow routines easily. Include essential movements, alignment cues, and visuals for clarity, ensuring a clear and portable practice resource.

Designing a Clear and Effective Sequence

Designing a clear and effective Somatic Yoga sequence involves organizing poses logically, ensuring smooth transitions, and addressing specific goals. Start with gentle warm-ups, progress to deeper movements, and conclude with relaxation. Each pose should be described with clear instructions, emphasizing proper alignment and breathing techniques. Visual aids like diagrams or photos enhance understanding. Consider the skill level of the practitioner, offering modifications for beginners and variations for advanced students. Use simple language and concise directions to avoid confusion. A well-structured sequence ensures a balanced and therapeutic practice, making it accessible for everyone. Organize the PDF with sections or themes, allowing users to navigate easily and focus on their objectives.

Incorporating Visuals and Instructions

Incorporating visuals and clear instructions is essential for creating an effective Somatic Yoga sequence PDF. Use diagrams or photos to illustrate each pose, ensuring proper alignment and movement. Detailed instructions should guide practitioners through transitions, breathing techniques, and duration. Include modifications for different skill levels to make the sequence accessible. Use arrows or symbols to indicate movement flow, and highlight key cues like engagement points or relaxation phases. Consider adding brief explanations of benefits for each pose to enhance understanding. Step-by-step guides and visual aids help practitioners follow the sequence confidently. This approach ensures clarity and safety, making the PDF a valuable resource for both beginners and experienced practitioners.

Best Practices for Sharing Your PDF

When sharing your Somatic Yoga sequence PDF, prioritize clarity and accessibility. Ensure the document is visually appealing, with clear headings and easy-to-read fonts. Use high-quality images or diagrams to illustrate poses for better understanding. Consider offering the PDF in multiple formats (e.g., mobile-friendly) to accommodate different devices. Provide clear instructions for downloading and printing. Include a disclaimer for safety and encourage users to consult a healthcare professional if needed. Share the PDF on platforms like social media, email newsletters, or your website to reach a wide audience. Offer it as a free resource or as part of a paid program, depending on your goals. Lastly, invite feedback to improve future sequences and build a community around your Somatic Yoga practice.

Advanced Tips for Deepening Your Practice

Enhance your Somatic Yoga practice by incorporating advanced breathwork, prolonged holds, and mindful transitions. Customize sequences to target specific areas, fostering deeper release and awareness in each movement.

Using Breathwork in Somatic Yoga

Breathwork is a cornerstone of Somatic Yoga, enhancing mind-body connection and relaxation. Conscious breathing synchronizes with movements, deepening releases and promoting emotional calm. Techniques like box breathing and 4-7-8 breathing are often included in sequences to regulate the nervous system and improve focus. By integrating breathwork, practitioners can access deeper states of relaxation and awareness, making each movement more effective. This approach not only physical but also mental and emotional well-being, creating a holistic practice that fosters resilience and balance. Incorporating breathwork into your Somatic Yoga sequence PDF can guide users to experience profound benefits, making their practice more transformative and sustainable over time.

Integrating Mindfulness and Relaxation

Mindfulness and relaxation are essential components of Somatic Yoga, fostering a deeper connection between body and mind. By cultivating present-moment awareness, practitioners can better sense and release physical tension. Techniques such as guided body scans, gentle stretches, and conscious breathing encourage profound relaxation. These practices help reduce anxiety, improve emotional resilience, and enhance overall well-being. Mindfulness also allows individuals to tune into their unique needs, making their practice more intuitive and effective. Incorporating relaxation into your Somatic Yoga sequence PDF can provide users with a toolkit for managing stress and promoting calm. This integration creates a nurturing environment for healing and self-discovery, making Somatic Yoga a holistic practice that benefits both body and soul.

Customizing Your Sequence for Specific Needs

Customizing a Somatic Yoga sequence allows practitioners to address individual goals and challenges. Whether targeting chronic pain, stress reduction, or improved mobility, tailoring movements ensures a more effective practice. For example, sequences for back pain might focus on gentle spinal releases, while those for stress might emphasize calming breathwork and grounding poses. Modifications and props can be incorporated to accommodate different body types and abilities. Creating a PDF that offers adaptable routines helps users feel empowered to personalize their practice. This approach encourages long-term commitment and enhances the therapeutic benefits of Somatic Yoga, making it accessible and beneficial for diverse needs and preferences. By addressing specific requirements, customized sequences foster a deeper sense of well-being and self-awareness.

Final Thoughts on Somatic Yoga Sequences

Somatic Yoga sequences are a powerful tool for fostering body awareness, releasing tension, and promoting overall well-being. By focusing on mindful movements and breathwork, these practices empower individuals to reconnect with their bodies. The gentle, therapeutic approach of Somatic Yoga makes it accessible to everyone, regardless of fitness level or experience. Consistency is key, as regular practice can lead to lasting improvements in flexibility, posture, and emotional resilience. Whether you’re seeking relief from chronic pain or simply looking to deepen your mindfulness, Somatic Yoga sequences offer a holistic path to healing and self-discovery. Embrace this practice with patience and intention, and witness the transformative impact it can have on your body and mind over time.

Encouragement for Consistent Practice

Consistency is the cornerstone of Somatic Yoga, fostering profound changes in body awareness and well-being. Even a few minutes daily can yield significant benefits, such as reduced pain and improved posture. Embrace the practice as a journey, celebrating small victories and honoring your body’s unique needs. Each session is an opportunity to reconnect and heal, leading to enhanced mindfulness and resilience. Remember, Somatic Yoga is not about perfection but progress. By committing to regular practice, you invest in your long-term health and vitality, creating a foundation for a more balanced and fulfilling life. Stay patient, kind, and dedicated to your practice, and let the transformative power of Somatic Yoga guide you forward.

city of joondalup waste guide 2022/23

The City of Joondalup Waste Guide 2022/23 provides essential information on waste management, including bin schedules, recycling tips, and disposal options for bulk and hazardous materials.

Overview of the Waste Guide

The City of Joondalup Waste Guide 2022/23 is a comprehensive resource designed to help residents manage waste efficiently and sustainably. Available digitally, it reduces paper usage by 1.5 tonnes annually.

The guide includes detailed bin collection schedules, recycling tips, and information on bulk and hazardous waste disposal. It also features an A-Z waste disposal guide, making it easier for residents to understand how to handle various waste types responsibly.

By providing clear instructions and accessible resources, the guide aims to promote environmental sustainability and encourage a cleaner, greener community. It is a key tool for residents to adopt eco-friendly practices and contribute to waste reduction efforts in Joondalup.

Importance of Sustainable Waste Management

Sustainable waste management is crucial for protecting the environment and preserving natural resources for future generations. Proper disposal methods reduce pollution, protect ecosystems, and mitigate climate change impacts. By adopting eco-friendly practices, residents can significantly lower their environmental footprint and contribute to a healthier community.

The City of Joondalup Waste Guide 2022/23 emphasizes the importance of responsible waste handling, encouraging residents to recycle, compost, and correctly dispose of hazardous materials. This approach not only conserves landfill space but also promotes resource recovery, aligning with broader sustainability goals. Educating the community on these practices empowers individuals to make informed choices, fostering a cleaner and greener Joondalup.

Waste Collection Schedules

The City of Joondalup provides detailed schedules for waste collection, including weekly general rubbish and fortnightly recycling and green waste collections, accessible online for resident convenience.

General Rubbish Bin Collection

The City of Joondalup collects general rubbish bins weekly, ensuring efficient waste management for residents. The service operates on a fixed schedule, with bins collected every week without interruption. Residents can check their collection day using the City’s online lookup tool, which provides specific dates based on their address. Proper bin placement and adherence to guidelines are essential for smooth collection. Contaminated or oversized items may not be collected, so residents are encouraged to follow the City’s waste disposal guidelines to maintain service efficiency and support environmental sustainability efforts. This service is a cornerstone of the City’s waste management strategy.

The City of Joondalup offers weekly general rubbish bin collections, ensuring consistent waste management. Residents can verify their collection schedule via the City’s online tool. Proper bin placement and adherence to guidelines are crucial for efficient service. Contaminated or oversized items may not be collected, so residents are advised to follow disposal guidelines. This service supports the City’s commitment to sustainability and maintaining a clean community. Regular collections help reduce waste buildup and promote a healthier environment. By participating, residents contribute to the City’s goal of efficient and environmentally responsible waste management.

Recycling and Green Waste Bin Collection

The City of Joondalup collects recycling and green waste bins on a fortnightly basis, alternating between the two. Recycling bins (yellow-lidded) and green waste bins (green-lidded) are collected on separate weeks. Residents can check the City’s website for specific collection schedules tailored to their address. Green waste, including garden trimmings and branches, is processed at the Wangara Greens Recycling Facility and transformed into mulch for local gardens. This initiative supports sustainability by reducing landfill and promoting eco-friendly practices. Residents are encouraged to ensure only acceptable materials are placed in their bins to maintain the efficiency and environmental benefits of the program.

Bulk and Hazardous Waste Disposal

The City of Joondalup offers bulk waste disposal options, including skip bin bookings and special collections for mattresses and white goods. Hazardous waste, such as batteries and chemicals, must be taken to designated facilities for safe disposal.

Bulk Waste Disposal Options

The City of Joondalup provides convenient options for bulk waste disposal. Residents can book skip bins for large household items or arrange special collections for mattresses and white goods. Additionally, the city offers an annual bulk verge collection service, allowing residents to place items on their verge for pickup. To ensure proper disposal, residents are encouraged to check the city’s website for schedules and guidelines. The city also offers tip passes for disposing of bulk waste at the Tamala Park landfill, with some conditions applying. These services help residents manage bulky items responsibly and efficiently, promoting a cleaner community.

Hazardous Waste Disposal Guidelines

The City of Joondalup provides clear guidelines for disposing of hazardous waste to protect the environment and public health. Residents are encouraged to participate in designated hazardous waste drop-off events, where items like batteries, chemicals, and e-waste are safely collected. The city also offers year-round options for disposing of hazardous materials at approved facilities. It’s important to check the city’s website for specific guidelines on acceptable items and drop-off locations. Proper disposal of hazardous waste helps prevent contamination and ensures a safer community. Always follow the city’s instructions to manage these materials responsibly and sustainably.

A-Z Waste Disposal Guide

The A-Z Waste Disposal Guide is a key resource for residents, providing detailed instructions on managing various household waste items responsibly and sustainably.

Key Features of the A-Z Guide

The A-Z Waste Disposal Guide offers a comprehensive listing of household items, detailing proper disposal methods. It covers everyday items like plastics and glass to specialized materials such as electronics and hazardous waste. The guide provides clear instructions on recycling, drop-off locations, and tips for reducing waste. Residents can easily search for specific items, ensuring responsible disposal. This resource promotes sustainability by encouraging correct waste management practices. The guide is accessible online, making it convenient for residents to access essential information. It serves as a valuable tool for fostering a cleaner, greener community in the City of Joondalup.

Common Household Waste Disposal Tips

Properly separating waste into general rubbish, recycling, and green waste bins is essential for effective disposal. Always rinse recyclable items like plastics, glass, and paper before placing them in the recycling bin. Avoid bagging recyclables, as this can hinder the sorting process. For hazardous waste, such as batteries or chemicals, use designated drop-off points to prevent environmental harm. Check packaging labels for disposal instructions and participate in bulk waste collection events for large items. Utilize mulch vouchers for green waste, turning organic material into nutrient-rich soil. These practices help reduce landfill use and promote a sustainable community. Stay informed through the City’s resources for eco-friendly disposal methods.

Environmental Initiatives and Sustainability

The City of Joondalup promotes sustainability through waste reduction programs, paperless waste guides, and green waste recycling. These initiatives support eco-friendly practices and a greener community.

City of Joondalup’s Waste Reduction Programs

The City of Joondalup implements waste reduction programs to promote sustainability. These include digital waste guides, mulch vouchers, and green waste recycling. Residents can access resources online, reducing paper use. Green waste is collected weekly and converted into mulch for community use. The city also offers workshops and awareness campaigns to educate residents on efficient waste disposal. These initiatives aim to minimize landfill waste and encourage eco-friendly practices. By engaging the community, the city fosters a culture of sustainability, ensuring a cleaner environment for future generations. These programs highlight Joondalup’s commitment to environmental stewardship and responsible waste management practices.

Green Waste Management and Mulch Vouchers

The City of Joondalup offers green waste management services, collecting organic materials weekly. Residents can dispose of garden waste, which is processed into mulch for community use. Mulch vouchers are available annually, enabling residents to collect free mulch from designated facilities. This initiative promotes sustainability by reducing landfill waste and encouraging garden recycling. Vouchers are distributed digitally via the City’s website, aligning with its paperless goals. Green waste collection helps maintain community gardens and parks while fostering eco-friendly practices. This program is part of Joondalup’s broader efforts to support environmental conservation and resident engagement in sustainable living. It’s a key step toward a greener future.

Downloadable Resources

The City of Joondalup Waste Guide 2022/23, mulch vouchers, and green waste tipping options are available for download on the City’s website, saving paper and enhancing convenience.

Accessing the Digital Waste Guide

The City of Joondalup Waste Guide 2022/23 is now available digitally on the City’s website, offering residents convenient access to essential waste management information. By downloading the guide, residents can reduce paper usage and stay informed about bin collection schedules, recycling tips, and bulk waste disposal options. The digital format ensures easy navigation and quick access to key resources. Additionally, residents can download mulch vouchers and greens tipping options directly from the website, further enhancing convenience. This initiative aligns with the City’s commitment to environmental sustainability and reducing paper waste, making it easier for residents to adopt eco-friendly practices. The digital guide is user-friendly and accessible anytime, promoting a cleaner and greener community.

Mulch Vouchers and Greens Tipping Options

The City of Joondalup offers mulch vouchers and greens tipping options to residents, promoting sustainable garden waste management. These vouchers, available for download on the City’s website, enable residents to dispose of green waste responsibly and obtain mulch for their gardens. The mulch is produced from green waste collected and processed at the Wangara Greens Recycling Facility, helping to retain soil moisture and enrich garden soil. By utilizing these resources, residents support eco-friendly practices and contribute to a greener community. This initiative also aligns with the City’s goal to reduce paper usage by providing digital access to these vouchers.

Community Engagement and Education

The City of Joondalup promotes workshops and awareness campaigns to educate residents on sustainable waste practices, supported by libraries and Customer Care assistance for resource access.

Workshops and Awareness Campaigns

The City of Joondalup conducts regular workshops and campaigns to educate residents on proper waste disposal and sustainability. These initiatives aim to empower the community with knowledge on reducing waste, recycling effectively, and managing hazardous materials safely. By engaging residents through interactive sessions and informative materials, the city fosters a culture of environmental responsibility. These efforts are part of broader strategies to achieve long-term sustainability goals and ensure a cleaner, greener future for all.

Support from City Libraries and Customer Care

The City of Joondalup’s libraries and Customer Care team play a vital role in supporting residents with waste management inquiries. Libraries provide access to digital resources, including the waste guide and mulch vouchers, while the Customer Care team assists with downloading these materials. Residents can visit the administration building or contact the team for guidance on waste disposal, bin schedules, and voucher access. This support ensures everyone can navigate the waste management system efficiently, fostering a community-wide commitment to sustainability and proper waste practices.

The City of Joondalup Waste Guide 2022/23 effectively promotes sustainable waste practices, encouraging a cleaner, greener community through proper waste management and environmental conservation efforts.

Benefits of the 2022/23 Waste Guide

The 2022/23 Waste Guide offers numerous benefits, including convenient access to essential waste management information, promoting sustainability and resource conservation. It provides clear schedules for bin collections, tips for recycling, and guidelines for disposing of bulk and hazardous waste. By going digital, the guide reduces paper usage, saving 1.5 tonnes annually. Residents can easily download mulch vouchers and access green waste management options. The guide also educates the community on proper waste practices, fostering a cleaner and greener environment. These initiatives align with the City’s commitment to environmental sustainability, ensuring efficient and responsible waste management for all residents.

Encouraging a Cleaner and Greener Community

The City of Joondalup Waste Guide 2022/23 plays a vital role in fostering a cleaner and greener community by promoting sustainable practices. By providing detailed information on waste management, including recycling, green waste disposal, and bulk collections, residents are empowered to make environmentally conscious decisions. The guide’s digital accessibility ensures convenience, reducing paper waste and encouraging wider participation. Educational content and initiatives like mulch vouchers and green waste management programs help residents adopt eco-friendly habits. These efforts contribute to a collective goal of reducing the community’s environmental footprint, creating a cleaner, greener, and more sustainable future for all residents of Joondalup.

owner manual 2010 ford f150 fuse box diagram

Welcome to the comprehensive guide for the 2010 Ford F-150 fuse box diagram. This manual covers fuse locations, amperage ratings, and essential maintenance tips for your vehicle.

Location of Fuse Boxes

The 2010 Ford F-150 features two primary fuse boxes. The Passenger Compartment Fuse Panel is located on the driver’s side, while the Power Distribution Box is under the hood.

2.1 Passenger Compartment Fuse Panel

The Passenger Compartment Fuse Panel is conveniently located on the driver’s side of the vehicle. It is situated below the dashboard, near the steering column, making it easily accessible for maintenance. This panel houses fuses that control essential interior functions such as lighting, electronics, and safety features. To access it, open the driver’s side door and locate the small compartment behind the trim. Gently push the trim panel to release it, then remove it to expose the fuse box. Inside, you’ll find a diagram that identifies each fuse by its amperage rating and corresponding system. Always ensure the ignition is off before removing or replacing fuses to avoid any potential risks;

2.2 Power Distribution Box (Under Hood)

The Power Distribution Box (PDB) in the 2010 Ford F-150 is located under the hood, on the driver’s side, near the battery. This box is crucial for distributing power to various electrical systems in the vehicle. It contains high-current fuses and relays that control components like the engine, transmission, and electrical accessories. The PDB is designed to handle higher amperage requirements compared to the passenger compartment fuse panel. To access it, open the hood and locate the box secured by screws or clips. Inside, you’ll find a diagram that identifies each fuse and its corresponding circuit. Always disconnect the battery before servicing the PDB to ensure safety and prevent electrical shocks or damage to the system.

Understanding the Fuse Box Diagram

The fuse box diagram provides a visual representation of fuse locations, labels, and corresponding circuits. It helps identify which fuse controls specific vehicle functions, ensuring proper diagnostics and maintenance.

3.1 Reading the Diagram

Reading the fuse box diagram begins with identifying the layout, which typically includes rows or columns of fuses with labels. Each fuse is designated for specific components, such as lights, electronics, or power systems. The diagram may use symbols or abbreviations, which are usually explained in a legend. Start by locating the fuse you need, referencing its position and corresponding system. Always match the amperage rating of a new fuse to the one being replaced to avoid electrical issues. If unsure, consult the owner’s manual or a professional for guidance. Properly interpreting the diagram ensures safe and effective fuse replacement or troubleshooting;

3.2 Amperage Ratings and Fuse Types

Amperage ratings are crucial for ensuring proper electrical function in your 2010 Ford F-150. Each fuse is designed to handle a specific current load, with common ratings ranging from 5 to 40 amps. Using a fuse with the incorrect amperage can lead to electrical damage or fire hazards. The fuse box diagram identifies each fuse’s rating and purpose, helping you select the right replacement. Blade fuses are standard in this model, with some higher-current applications using larger, specialized fuses. Always match the amperage rating of the replacement fuse to the original to maintain safety and system integrity. Never use a fuse with a higher rating than specified, as this can compromise your vehicle’s electrical system. Consulting the owner’s manual or a professional is recommended if you’re unsure about compatibility or ratings.

Replacing Fuses

Turn off the ignition and locate the fuse box. Remove the cover, identify the blown fuse, and replace it with one of the same amperage rating. Secure the cover tightly to ensure proper function.

4.1 Tools Needed

To replace fuses in your 2010 Ford F-150, you’ll need a few essential tools:

  • A replacement fuse with the correct amperage rating.
  • A screwdriver or torque screwdriver for removing the fuse panel cover in the passenger compartment.
  • Pliers or a fuse puller for safely removing and installing fuses.
  • Gloves and safety glasses for protection.
  • A flashlight for better visibility in low-light conditions.

Always turn off the ignition and consult your owner’s manual before starting. Ensure the replacement fuse matches the specifications to avoid damage or safety risks.

4.2 Step-by-Step Instructions

Replacing fuses in your 2010 Ford F-150 is straightforward. Start by turning off the ignition and all electrical accessories. Locate the appropriate fuse box based on the issue. Open the passenger compartment fuse panel by removing the cover with a screwdriver. Identify the blown fuse using the diagram on the underside of the cover or in your owner’s manual. Use a fuse puller or pliers to remove the faulty fuse carefully. Insert the replacement fuse with the same amperage rating, ensuring it clicks into place. Replace the fuse panel cover securely. Turn the ignition on and test the affected system to confirm the repair. If the issue persists, consult a professional mechanic for further assistance.

Safety Precautions

Before working with the fuse box, ensure the ignition and all electrical accessories are turned off to avoid electrical shocks or short circuits. Use a fuse puller to remove fuses gently, preventing damage to the fuse box. Never replace a fuse with one of a higher amperage rating, as this could cause electrical fires. Always refer to the owner’s manual or the fuse box diagram for correct amperage ratings. If unsure about any procedure, consult a certified technician to avoid potential risks. Wear protective gloves and safety glasses when handling electrical components. Keep children away from the fuse box to prevent accidental damage or injury. Properly secure the fuse panel cover after servicing to maintain the integrity of the electrical system;

Fuse Box Diagram Variations by Model Year

Fuse box diagrams for the Ford F-150 vary across different model years, including 2009 through 2014. While the 2010 model has specific configurations, other years may differ in fuse locations, amperage ratings, or the number of fuses. These variations occur as Ford updates electrical systems, adds new features, or modifies existing ones. Always refer to the owner’s manual or official Ford resources for accurate diagrams tailored to your vehicle’s model year. Using the correct diagram ensures proper maintenance and avoids potential electrical issues. Resources like Manuals.plus provide detailed guides for various years, helping owners identify the right fuse layouts for their trucks. Understanding these differences is crucial for effective troubleshooting and repairs.

Accessing the Fuse Box

To access the fuse boxes in your 2010 Ford F-150, start by locating the Passenger Compartment Fuse Panel. This is typically found on the driver’s side, near the glove box or on the kick panel. Open it by releasing the latch or removing the cover, which may require a screwdriver. Be gentle to avoid damaging the panel or its clips.

Next, locate the Power Distribution Box under the hood. Open the hood and look on the driver’s side, often near the battery or air filter. Ensure the vehicle is turned off and in park before accessing any fuse boxes to avoid electrical risks or accidental starts.

Consult your owner’s manual for specific instructions and diagrams to help identify the fuse boxes and their components accurately. This will guide you in accessing them safely and efficiently without causing damage to your vehicle’s electrical system.

Troubleshooting Common Fuse Issues

Identifying and resolving fuse-related problems in your 2010 Ford F-150 can be straightforward with the right approach. Begin by consulting the fuse box diagram to locate the fuse associated with the malfunctioning system. Common issues include blown fuses due to electrical overloads or short circuits. If a fuse is blown, it will appear discolored or have a broken filament when inspected.

To address the issue, replace the blown fuse with one of the correct amperage rating. Using the wrong fuse can lead to further damage. If the problem persists, check for underlying electrical issues, such as faulty wiring or malfunctioning components. Always refer to your owner’s manual or the fuse box diagram for guidance to ensure safe and effective troubleshooting.

Importance of Correct Fuse Usage

Using the correct fuse for your 2010 Ford F-150 is crucial to ensure the safety and proper functioning of your vehicle’s electrical systems. A fuse with the wrong amperage rating can lead to system damage or even fire hazards. Always refer to the fuse box diagram or owner’s manual to identify the recommended fuse type and rating for each circuit. Incorrect fuse usage can cause recurring electrical issues, potentially leading to costly repairs. By adhering to the specified guidelines, you protect your vehicle’s components and maintain reliability. Remember, the right fuse ensures optimal performance and prevents unnecessary risks.

Visual Guide to Fuse Box Layout

The visual guide for the 2010 Ford F-150 fuse box layout provides a clear and detailed diagram to help identify each fuse and its corresponding function. Located in both the passenger compartment and under the hood, the fuse boxes are organized with labeled slots for easy reference. The passenger compartment fuse panel is positioned on the driver’s side, while the power distribution box is under the hood. Each fuse is color-coded and labeled to indicate its amperage rating and the system it protects. This visual guide allows you to quickly locate and replace fuses, ensuring efficient troubleshooting and maintenance. Refer to the diagram to understand the layout and connections properly.

Resources for Further Information

For additional details on the 2010 Ford F-150 fuse box diagram, consult the official Ford owner’s manual or visit Ford’s official website for downloadable PDF guides. Websites like ManualsLib and ManualsPlus offer comprehensive fuse box diagrams and troubleshooting tips. Interactive fuse box diagrams are also available online, allowing you to explore the layout and amperage ratings visually. Forums such as Ford-Trucks.com provide user discussions and expert advice. YouTube tutorials and repair manuals further assist with fuse replacement and maintenance; These resources ensure you have everything needed to understand and work with your F-150’s electrical system effectively.

The 2010 Ford F-150 fuse box diagram is an essential tool for maintaining and repairing your vehicle. Understanding its layout and function ensures safe and effective troubleshooting. Always refer to the owner’s manual or official Ford resources for accurate information. This guide has provided a comprehensive overview, from locating fuse boxes to replacing fuses and safety tips. By following these steps, you can confidently manage your F-150’s electrical system. For further assistance, explore additional resources like ManualsLib or Ford’s official website. Remember, proper fuse usage is crucial for your vehicle’s performance and longevity. Stay informed and ensure your F-150 operates at its best with the knowledge provided here.

wwii aircraft glossary pdf

This glossary provides a comprehensive guide to WWII aircraft terminology, offering detailed definitions and insights into the roles, technologies, and historical significance of aircraft during the war.

1.1 Definition and Purpose of the Glossary

The WWII Aircraft Glossary is a detailed reference guide defining key terms, abbreviations, and concepts related to aircraft used during World War II. Its primary purpose is to clarify technical and historical terminology, aiding researchers, historians, and enthusiasts in understanding the complexities of wartime aviation. By standardizing definitions, the glossary ensures accurate communication and provides a foundational resource for studying WWII aircraft, their roles, and technological advancements.

1.2 Importance of Understanding WWII Aircraft Terminology

Understanding WWII aircraft terminology is crucial for grasping the historical and technical aspects of aviation during the war. It provides insight into the development, strategies, and innovations that shaped air combat. Terms like radar, avionics, and jet engines highlight technological advancements, while understanding bomber and fighter roles reveals tactical significance. This knowledge aids enthusiasts, researchers, and historians in analyzing the impact of aircraft on WWII outcomes, making it essential for comprehensive study and appreciation of this era’s aviation history.

Key WWII Aircraft Categories

WWII aircraft are categorized into fighters, bombers, and transport planes, with notable designs from both Allied and Axis forces, showcasing innovation and strategic importance;

2.1 Allied Aircraft: Fighters, Bombers, and Transport Planes

Allied forces utilized iconic aircraft such as the P-51 Mustang, B-25 Mitchell, and C-47 Skytrain. These planes excelled in air superiority, strategic bombing, and logistical support, playing crucial roles in WWII.

2.2 Axis Aircraft: Notable Planes from Germany, Japan, and Italy

Axis forces relied on aircraft like the Messerschmitt Bf 109, Mitsubishi A6M Zero, and Macchi C.205. These planes were known for their agility, range, and tactical versatility, significantly impacting WWII battles.

Aircraft Roles During WWII

Aircraft during WWII served multiple roles, including air combat, strategic bombing, and logistical support, each crucial to military operations and outcomes.

3.1 Fighter Aircraft: Intercepting and Air Superiority

Fighter aircraft played a pivotal role in WWII, primarily tasked with intercepting enemy planes and achieving air superiority. Their speed, agility, and firepower were crucial in dogfights and escort missions. Planes like the P-51 Mustang and Messerschmitt Bf 109 exemplified this role, ensuring dominance in the skies which was vital for both offensive and defensive operations during the war.

3.2 Bomber Aircraft: Strategic and Tactical Bombing Missions

Bomber aircraft were pivotal in WWII, conducting strategic and tactical missions to destroy enemy infrastructure, industrial centers, and troop concentrations. Planes like the B-17 Flying Fortress and B-29 Superfortress carried out high-altitude, long-range bombing campaigns, while smaller bombers performed tactical strikes. These aircraft played a decisive role in weakening enemy capabilities and supporting ground forces, showcasing their versatility and impact on the war’s outcome.

3.3 Transport and Liaison Aircraft: Logistics and Support

Transport and liaison aircraft played a crucial role in WWII, ensuring the movement of troops, supplies, and equipment. Planes like the C-47 Skytrain and Ju 52 were vital for logistical support, while liaison aircraft such as the L-4 Grasshopper facilitated communication and reconnaissance. These aircraft maintained supply lines, evacuated wounded, and supported ground forces, proving indispensable in sustaining military operations across vast and challenging theaters of war.

Technological Advancements in WWII Aircraft

WWII saw significant technological leaps in aviation, including radar, jet engines, and advanced materials, which revolutionized aircraft performance and laid the groundwork for modern aviation advancements.

4.1 Development of Radar and Avionics

Radar technology emerged during WWII, enabling aircraft to detect enemy planes and navigate effectively; Avionics advancements included improved communication systems, targeting devices, and flight instruments, enhancing combat efficiency and safety;

Jet engines debuted during WWII, with aircraft like the Messerschmitt Me 262 pioneering their use. These engines offered superior speed and altitude capabilities, revolutionizing air combat. However, their adoption was limited by fuel shortages and technical challenges. Despite this, jet technology laid the groundwork for modern aviation advancements, marking a significant milestone in military and civilian aircraft development.

4.3 Use of Composite Materials in Aircraft Construction

During WWII, composite materials began to emerge in aircraft production, offering advantages like reduced weight and increased durability. Early composites were used in non-critical components, such as fairings and cowls, due to limitations in technology. This innovation allowed for more efficient aircraft designs and paved the way for modern composite-intensive planes, enhancing overall performance and versatility in military and civilian aviation applications.

Key Manufacturers and Designs

Prominent WWII aircraft manufacturers like North American, Messerschmitt, and Mitsubishi revolutionized aviation, producing iconic planes such as the P-51 Mustang and Bf 109 that shaped air combat.

5.1 North American Aviation: P-51 Mustang and B-25 Mitchell

North American Aviation played a pivotal role in WWII aircraft production. The P-51 Mustang, renowned for its long-range capabilities, excelled in escort missions, while the B-25 Mitchell served as a versatile bomber, conducting strategic and tactical missions. Both aircraft significantly influenced Allied air superiority, with the P-51’s design innovations setting new standards and the B-25 proving its worth in various combat scenarios throughout the war.

5.2 Messerschmitt: Bf 109 and Me 262

Messerschmitt dominated Axis aviation with the Bf 109, a highly maneuverable fighter that became the backbone of the Luftwaffe. The Me 262, the world’s first operational jet fighter, revolutionized air combat with its speed and firepower. Both aircraft showcased German engineering excellence, with the Bf 109 excelling in dogfights and the Me 262 setting the stage for modern jet technology. Their designs and performance played a crucial role in WWII air battles, leaving a lasting legacy in aviation history.

5.3 Mitsubishi: A6M Zero and Ki-67 Hiryu

Mitsubishi was a pivotal manufacturer for Axis forces, producing iconic aircraft like the A6M Zero, a lightweight, long-range fighter renowned for its agility and role in early Pacific victories. The Ki-67 Hiryu, a twin-engine bomber, excelled in speed and durability, serving in various roles, including ground attacks and kamikaze missions. These designs underscored Mitsubishi’s engineering prowess, significantly impacting WWII’s Pacific theater with their strategic versatility and operational effectiveness.

Glossary of WWII Aviation Terms

This section provides definitions for key WWII aviation terminology, including abbreviations, aircraft components, and strategic concepts, essential for understanding the era’s military aviation history and technology.

6.1 Abbreviations and Acronyms Used in WWII Aviation

WWII aviation utilized numerous abbreviations and acronyms to streamline communication. Terms like “AOA” (Angle of Attack) and “BAP” (Bombardirovochny Aviatsionny Polk) were common. These abbreviations were crucial for efficient reporting and record-keeping, especially in operational contexts. They appeared frequently in military documents, pilot briefings, and technical manuals. Understanding these terms is vital for interpreting historical records and grasping the complexity of wartime aviation operations.

6.2 Definitions of Key Aviation Concepts and Components

Key aviation concepts during WWII included terms like airfoil, the shape of wings for lift, and radial engines, commonly used for power. Composite materials were introduced, combining metals and plastics for lightweight strength. Avionics referred to electronic systems for navigation and communication. Payload denoted the weight an aircraft could carry, including bombs or supplies. These concepts were critical for aircraft performance, design, and operational success, shaping the evolution of aviation technology during the war.

Resources for Further Study

Explore detailed PDF guides and historical records for in-depth knowledge of WWII aircraft, including technical specifications, operational histories, and rare archival documents for further research and analysis.

7.1 Recommended PDF Guides and Downloads

Access comprehensive PDF guides detailing WWII aircraft, including technical manuals, historical records, and glossaries. These resources provide in-depth insights into aircraft designs, operational roles, and strategic impacts during the war. Download these materials to explore detailed specifications, rare archival documents, and analyses of key aviation developments. These guides are essential for researchers and enthusiasts seeking a deeper understanding of WWII aviation history and its lasting legacy.

7.2 Online Archives and Historical Records

Explore extensive online archives and historical records to deepen your understanding of WWII aircraft. Reputable sources like the U.S. National Archives and specialized aviation museums offer digitized documents, photographs, and technical drawings. These platforms provide access to primary sources, such as flight logs, maintenance manuals, and combat reports. Additionally, historical societies and educational institutions host databases with detailed aircraft specifications and wartime accounts. These resources are invaluable for researchers and enthusiasts seeking authentic historical insights into WWII aviation history.

The WWII Aircraft Glossary is an invaluable resource, spanning definitions, historical context, and technological advancements. It serves as a legacy, preserving aviation history for enthusiasts and researchers alike.

8.1 The Legacy of WWII Aircraft in Modern Aviation

WWII aircraft significantly influenced modern aviation, with innovations like jet engines, radar, and composite materials becoming foundational. These advancements continue to shape contemporary aircraft design and functionality, ensuring the legacy of WWII aviation endures in today’s technologies and methodologies.

8.2 Final Thoughts on the Importance of the Glossary

The WWII Aircraft Glossary is an essential resource for understanding the terminology and significance of aircraft from this pivotal era. It provides clarity on complex terms, historical context, and technical details, making it invaluable for historians, researchers, and aviation enthusiasts. By offering a comprehensive guide, the glossary bridges the gap between past innovations and modern understanding, ensuring the legacy of WWII aviation remains accessible and relevant for future generations.

manual lymphatic drainage contraindications

Manual Lymphatic Drainage (MLD) is a gentle, non-invasive technique promoting lymphatic circulation. It aids in reducing swelling, improving immunity, and enhancing overall well-being by stimulating lymph flow. Understanding its contraindications is crucial for safe practice.

1.1. Definition and Purpose of MLD

Manual Lymphatic Drainage (MLD) is a gentle, non-invasive technique designed to enhance lymphatic circulation. It involves light, rhythmic strokes to guide lymph fluid through the body, reducing swelling and improving immune function. The primary purpose of MLD is to promote lymphatic health, aiding conditions like lymphedema and post-surgery recovery. It enhances overall well-being by fostering proper lymph flow and toxin removal, making it a valuable therapy for various health concerns.

1.2. Benefits of MLD in Promoting Lymphatic Health

MLD enhances lymphatic function, reducing swelling and promoting immune support. It aids in detoxification, improving circulation and overall well-being. By gently guiding lymph fluid, MLD alleviates congestion and supports the body’s natural healing processes. Regular sessions can boost lymphatic efficiency, benefiting conditions like lymphedema and post-surgical recovery. Its gentle technique makes it suitable for sensitive individuals, offering therapeutic relief and improving quality of life through optimized lymphatic health.

Understanding Contraindications for MLD

Manual lymphatic drainage has specific contraindications where it should be avoided. These are categorized into absolute and relative conditions to ensure safe and effective MLD therapy for all patients.

2.1. Absolute Contraindications for MLD

Absolute contraindications for MLD include conditions where the therapy could worsen health. These involve acute infections, active cancer, severe organ dysfunction, or life-threatening allergies. Performing MLD in these cases risks exacerbating underlying illnesses or triggering severe reactions, making it unsafe for the patient. Proper assessment is essential to avoid complications and ensure therapy is only applied when beneficial. Always consult a healthcare professional before proceeding with MLD in questionable scenarios to prioritize patient safety and well-being.

2.2. Relative Contraindications for MLD

Relative contraindications for MLD involve conditions requiring a cautious approach but not outright prohibiting therapy. These include high blood pressure, cardiovascular instability, heart failure, recent myocardial infarction, pregnancy, and recent surgery. While MLD isn’t entirely contraindicated, these conditions may necessitate modified techniques or professional consultation to mitigate risks. It’s crucial to tailor the treatment to individual health statuses to ensure safety and effectiveness, avoiding potential complications that could arise from unadjusted methods.

Absolute Contraindications for Manual Lymphatic Drainage

Absolute contraindications for MLD include acute infections, active cancer, severe kidney or liver dysfunction, and acute allergic reactions, where lymphatic stimulation could worsen health conditions.

3.1. Acute Infections and Fever

Acute infections and fever are absolute contraindications for MLD. During infections, the lymphatic system works to fight pathogens, and manual drainage could potentially spread the infection. Fever indicates a systemic response, and manipulating lymph flow may exacerbate the condition. Performing MLD in such cases could worsen symptoms or delay recovery. It’s crucial to avoid MLD until the infection is resolved and fever subsides to prevent complications.

3.2. Active Cancer or Metastasis

Active cancer or metastasis is an absolute contraindication for MLD. Manipulating the lymphatic system during active cancer could potentially dislodge cancer cells, spreading them further. This risk outweighs any potential benefits of the therapy. However, MLD may be safely reintroduced in consultation with oncologists for patients in remission or with localized, stable tumors. Always prioritize medical clearance to avoid complications.

3.3. Severe Kidney or Liver Dysfunction

Severe kidney or liver dysfunction is an absolute contraindication for MLD. These organs play a critical role in filtering toxins, which the lymphatic system also helps remove. If either organ is severely impaired, increasing lymphatic flow could overwhelm their reduced capacity, potentially worsening the condition. MLD should be avoided in such cases to prevent further strain on these vital systems.

3.4. Acute Allergic Reactions

Acute allergic reactions are an absolute contraindication for MLD. During such episodes, the lymphatic system is already overwhelmed, attempting to manage the body’s immune response. Stimulating lymphatic flow through MLD could exacerbate the reaction by spreading inflammatory mediators or allergens more rapidly. This may worsen symptoms like swelling, hives, or respiratory distress. It is crucial to avoid MLD until the allergic reaction has fully resolved to prevent potential complications.

Relative Contraindications for MLD

Relative contraindications for MLD include conditions like high blood pressure, heart failure, pregnancy, or recent surgery. These require cautious assessment to ensure safe application.

4.1. High Blood Pressure or Cardiovascular Instability

High blood pressure or cardiovascular instability are relative contraindications for MLD. The gentle technique may still be beneficial, but extreme caution is advised. Patients with uncontrolled hypertension or heart conditions should consult their healthcare provider before undergoing MLD. The therapy must be tailored to avoid exacerbating these conditions, ensuring the pressure applied is light and the session is closely monitored. Proper assessment and medical clearance are essential to safely proceed with MLD in such cases.

4.2. Heart Failure or Recent Myocardial Infarction

Heart failure or recent myocardial infarction are relative contraindications for MLD. Patients with these conditions require careful evaluation. MLD may increase venous return, potentially overloading the heart. Therapy should be modified to avoid exacerbating cardiac strain. Gentle techniques and reduced pressure are essential. Consultation with a healthcare provider is crucial to ensure safe practice. Ignoring these precautions could worsen cardiac function or trigger complications, emphasizing the need for tailored approaches in such cases.

4.3. Pregnancy or Recent Surgery

MLD is a relative contraindication during pregnancy or after recent surgery. Gentle techniques may be used cautiously, but deep pressure should be avoided to prevent complications. Pregnancy requires careful consideration to avoid stimulating lymphatic flow excessively, which could strain the body. Post-surgery, MLD might interfere with healing or increase swelling. Professional consultation is essential to assess risks and benefits, ensuring safe and modified practices tailored to individual conditions.

Medical Conditions Requiring Caution with MLD

Certain medical conditions, such as COPD or severe edema, require cautious MLD application. Professional consultation is essential to modify techniques and ensure safe, effective lymphatic support.

5.1. Chronic Obstructive Pulmonary Disease (COPD)

MLD must be approached with caution in COPD patients, as increased pressure or improper technique may worsen breathing difficulties. Gentle, modified techniques are essential to avoid triggering respiratory distress. Professional consultation is crucial to assess severity and ensure safe application. MLD can aid in reducing inflammation but requires careful adaptation to prevent complications in COPD cases.

5.2. Severe Edema or Lymphedema

Severe edema or lymphedema requires specialized MLD techniques to avoid exacerbating symptoms. While MLD can help reduce swelling, improper application may worsen fluid retention. Trained practitioners should conduct thorough assessments to tailor treatments, ensuring gentle, targeted strokes that support lymphatic function without causing strain. MLD can be beneficial but must be executed with extreme care in such cases to prevent complications.

Why Contraindications Are Important in MLD

Contraindications ensure MLD is applied safely, preventing worsening of conditions or adverse reactions. Ignoring them risks serious health complications, making proper assessment and professional guidance essential.

6.1. Risk of Exacerbating Underlying Conditions

Manual lymphatic drainage (MLD) contraindications are critical to prevent worsening of underlying health issues. Conditions like severe kidney or liver dysfunction, active cancer, or acute infections can deteriorate with improper MLD application, as increased lymph flow may overwhelm compromised systems. Ignoring these risks can lead to severe complications, emphasizing the need for professional consultation to tailor treatments safely and effectively.

6.2. Potential for Adverse Reactions

Ignoring contraindications in MLD can lead to adverse reactions, such as increased swelling, pain, or systemic issues. For instance, MLD during acute infections may spread pathogens, worsening the condition. Similarly, in cancer patients, improper techniques could dislodge cancer cells, potentially leading to metastasis. These risks highlight the importance of tailored treatments and professional expertise to avoid harmful outcomes and ensure safe, effective lymphatic care.

MLD and Lymphedema: Special Considerations

MLD is a cornerstone in managing lymphedema by enhancing lymphatic circulation. However, its application requires careful customization to avoid exacerbating swelling or causing further complications in affected individuals.

7.1. When MLD Is Indicated for Lymphedema

MLD is highly beneficial for managing lymphedema by promoting lymphatic circulation and reducing swelling. It is particularly effective in directing fluid away from affected limbs, enhancing overall lymphatic function. Gentle, specialized techniques are used to improve mobility and comfort, making it a cornerstone in lymphedema treatment plans. Regular MLD sessions can significantly alleviate symptoms and improve quality of life when performed by a trained professional.

7;2. When MLD Should Be Avoided in Lymphedema

MLD should be avoided in acute or severe lymphedema cases, especially if proper diagnosis and medical supervision are lacking. It is contraindicated during active infections, severe swelling, or when lymphedema is untreated. Improper technique can worsen symptoms, so consultation with a certified therapist is essential. Additionally, MLD should not be performed on patients with unstable medical conditions or those undergoing cancer treatment without prior medical clearance.

Consequences of Ignoring Contraindications

Ignoring contraindications can lead to severe health complications, such as exacerbated symptoms, increased risk of infections, and worsening of underlying medical conditions, requiring prolonged recovery.

8.1. Worsening of Symptoms

Ignoring contraindications for MLD can lead to worsening symptoms, such as increased swelling, heightened pain, and exacerbated inflammation; Conditions like severe edema or lymphedema may deteriorate further, complicating treatment. Additionally, underlying health issues such as active infections or cancer could progress, resulting in more severe and potentially life-threatening complications. It is essential to adhere to contraindication guidelines to prevent these adverse outcomes and ensure safe, effective therapy.

8.2. Increased Risk of Complications

Disregarding contraindications for MLD can elevate the risk of serious complications, particularly in individuals with underlying medical conditions. For instance, applying MLD during active infections or cancer metastasis may spread disease or worsen symptoms. Similarly, patients with cardiovascular instability or severe organ dysfunction are at heightened risk of adverse reactions. Such oversights can lead to systemic issues, further compromising lymphatic function and overall health. Professional guidance is essential to mitigate these risks and ensure safe, therapeutic outcomes.

Manual lymphatic drainage offers therapeutic benefits but requires careful consideration of contraindications. Professional consultation is essential to ensure safe and effective treatment, balancing benefits and risks.

9.1. Importance of Professional Consultation

Professional consultation is vital to ensure safe and effective MLD practice. Experts assess individual health conditions, identifying contraindications and tailoring treatments to avoid complications. Their guidance minimizes risks, maximizing therapeutic benefits. Proper training and experience enable professionals to handle complex cases, ensuring lymphatic health is prioritized. Consulting a certified therapist guarantees adherence to contraindication protocols, protecting clients from potential harm. This collaborative approach fosters trust and optimal outcomes, making professional advice indispensable for anyone considering MLD.

9.2. Final Thoughts on Safe MLD Practice

Safe MLD practice requires meticulous attention to contraindications, ensuring therapy benefits outweigh risks. Proper training, client assessment, and adherence to guidelines are essential. Avoiding contraindications prevents complications, enhancing lymphatic health. Collaboration with healthcare professionals guarantees personalized care. By prioritizing safety and knowledge, MLD remains a valuable tool for promoting well-being, offering relief and improving quality of life for many individuals.

th6320u2008 manual

The Honeywell TH6320U2008 is a programmable thermostat designed for efficient temperature control‚ featuring a backlit display and user-friendly interface. It is part of the T6 Pro series‚ offering advanced scheduling and energy-saving options. This thermostat is compatible with various HVAC systems and supports smart home integration‚ making it a popular choice for modern homes. The manual provides detailed instructions to help users maximize its functionality and customize settings for optimal performance.

1.1 Overview of the Honeywell TH6320U2008 Model

The Honeywell TH6320U2008 is a programmable thermostat from the T6 Pro series‚ designed for precise temperature control and energy efficiency. It features a backlit display‚ user-friendly interface‚ and compatibility with various HVAC systems. This model is ideal for homeowners seeking advanced scheduling options and smart home integration. Its design focuses on simplicity and functionality‚ making it a versatile choice for modern heating and cooling needs.

1.2 Importance of the Manual for Proper Usage

The manual for the Honeywell TH6320U2008 is essential for understanding installation‚ programming‚ and troubleshooting. It provides detailed instructions to ensure optimal performance‚ energy savings‚ and safe operation. Without the manual‚ users may miss critical setup steps or advanced features‚ leading to inefficiency or system errors. Regularly consulting the guide helps users maximize the thermostat’s capabilities and maintain their home’s comfort effectively.

Installation and Setup

The Honeywell TH6320U2008 thermostat installation requires turning off power‚ removing the old thermostat‚ and preparing the wall. Use the manual for proper setup and connections.

2.1 Compatibility and Prerequisites for Installation

The Honeywell TH6320U2008 is compatible with most 24V HVAC systems‚ including heat pumps and dual-fuel systems. Ensure your system matches the thermostat’s specifications before installation. A C-wire is required for proper operation. Verify wiring compatibility and consult the manual for specific prerequisites to avoid installation issues. Proper preparation ensures seamless setup and optimal performance of the thermostat.

2.2 Step-by-Step Installation Guide

Begin by turning off the power to your HVAC system at the circuit breaker; Remove the old thermostat and label the wires for identification. Mount the new Honeywell TH6320U2008 thermostat base‚ ensuring it is level. Connect the wires to the appropriate terminals as per the manual. Reattach the faceplate and restore power. Test the thermostat to ensure proper functionality and heating/cooling operation. Consult the manual for detailed diagrams and specific instructions.

Programming the Thermostat

The Honeywell TH6320U2008 allows users to program custom schedules for optimal temperature control‚ with options for daily and weekly adjustments via its user-friendly interface.

3.1 Understanding the Programming Interface

The Honeywell TH6320U2008 features an intuitive programming interface with a backlit display‚ making it easy to navigate and set schedules. The interface includes clear menus and buttons for selecting days‚ times‚ and temperatures. Users can program daily and weekly schedules with precise temperature adjustments. The manual provides step-by-step guidance on using the interface effectively‚ ensuring a seamless setup experience.

3.2 Setting Up Daily and Weekly Schedules

The Honeywell TH6320U2008 allows users to create customized daily and weekly schedules‚ ensuring optimal temperature control throughout the day. With options to set specific times and temperatures for different periods‚ it offers flexibility and energy efficiency. The interface guides users through each step‚ making it easy to program and adjust schedules as needed. By following the manual’s instructions‚ users can maximize their thermostat’s performance and reduce energy consumption effectively;

Key Features of the Honeywell TH6320U2008

The Honeywell TH6320U2008 features a backlit display‚ programmable scheduling‚ energy-saving modes‚ and compatibility with smart home systems. Its user-friendly interface ensures seamless temperature control and customization.

4.1 Backlit Display and User-Friendly Interface

The Honeywell TH6320U2008 features a backlit display‚ enhancing visibility in low-light conditions. Its user-friendly interface simplifies navigation‚ allowing users to easily adjust settings‚ view temperatures‚ and program schedules. The large‚ 5.44 square-inch screen ensures clarity‚ making it accessible for all users. This design prioritizes convenience and ease of use‚ ensuring a seamless experience for homeowners.

4.2 Energy-Saving Modes and Customization Options

The Honeywell TH6320U2008 offers energy-saving modes and customizable settings to optimize efficiency. Users can program daily and weekly schedules‚ adjusting temperatures for different periods. The thermostat also features temperature limits to prevent extreme settings‚ reducing energy waste. Customization options include adjusting hold times and enabling energy-saving modes‚ ensuring the system operates efficiently while maintaining comfort. Energy usage reports further help users track and optimize their consumption.

Advanced Settings and Customization

The Honeywell TH6320U2008 allows users to customize advanced settings‚ such as locking the thermostat and adjusting temperature limits‚ to suit their preferences and energy needs.

5.1 Locking and Unlocking the Thermostat

The Honeywell TH6320U2008 offers a lock feature to prevent unauthorized changes‚ ensuring temperature settings remain consistent. To lock‚ enter a 4-digit PIN via the keypad. Unlocking requires the same PIN‚ providing security and control over thermostat adjustments. This feature is especially useful in shared spaces or for maintaining energy-efficient settings without accidental overrides.

5.2 Adjusting Temperature Limits and Preferences

The Honeywell TH6320U2008 allows users to set temperature limits to ensure optimal comfort while saving energy. Through the menu‚ you can adjust the minimum and maximum temperature settings to prevent extreme temperatures. This feature helps maintain a consistent environment and avoids energy waste. Refer to the manual for step-by-step guidance on customizing these settings to suit your preferences and energy-saving goals.

Troubleshooting Common Issues

The Honeywell TH6320U2008 manual provides solutions for common issues like display problems or connectivity errors. Resetting the thermostat or checking battery connections often resolves these problems quickly.

6.1 Identifying and Resolving Display Problems

Display issues with the Honeywell TH6320U2008 can include a blank screen or flickering. Ensure batteries are installed correctly and connections are secure. If the display remains unresponsive‚ reset the thermostat by disconnecting power and the red wire‚ then waiting 30 minutes. Clean the screen gently with a soft cloth to remove dirt or debris. If problems persist‚ refer to the manual for advanced troubleshooting steps or contact support.

6.2 Resetting the Thermostat to Factory Settings

To reset the Honeywell TH6320U2008 to factory settings‚ remove the batteries and disconnect the red wire. Allow the thermostat to sit for 30 minutes to discharge completely. Reconnect the red wire and reinstall the batteries. The thermostat will revert to default settings‚ restoring original configuration. This process resolves persistent issues and ensures proper functionality. Always refer to the manual for detailed instructions.

Maintenance and Care

Regularly clean the thermostat’s display with a soft cloth to maintain visibility. Avoid harsh chemicals to prevent damage. Replace batteries as needed to ensure proper functionality. Refer to the manual for detailed care instructions.

7.1 Cleaning the Thermostat for Optimal Performance

To ensure optimal performance‚ gently clean the Honeywell TH6320U2008 thermostat using a soft‚ dry cloth. Avoid harsh chemicals or liquids‚ as they may damage the display or internal components. Regular cleaning prevents dust buildup and maintains clear visibility of the backlit display. This simple maintenance step helps preserve the thermostat’s functionality and extends its lifespan effectively. Always refer to the manual for specific care instructions.

7.2 Replacing Batteries and Ensuring Proper Functionality

To replace the batteries in your Honeywell TH6320U2008 thermostat‚ first‚ remove the old AA alkaline batteries from the compartment‚ typically located on the back or front. Insert the new batteries‚ ensuring correct polarity. Reattach the compartment and test the thermostat by adjusting the temperature; If the display doesn’t activate‚ reset by disconnecting the red wire briefly. This ensures proper functionality and maintains accurate temperature control.

Technical Specifications and Compatibility

The Honeywell TH6320U2008 features a 5.44-inch backlit display‚ supporting 7-day programmability and compatibility with HVAC systems‚ including forced air‚ heat pumps‚ and smart home devices.

8.1 Detailed Specifications of the Honeywell TH6320U2008

The Honeywell TH6320U2008 thermostat features a 5.44-inch high-resolution backlit display‚ supporting 7-day programmability and dual fuel compatibility. It operates on 24VAC systems‚ requiring a C-wire for power. The thermostat supports 1-2 stage heating and cooling‚ with optional dehumidification control. It is Energy Star certified for energy efficiency and integrates seamlessly with smart home devices via Wi-Fi connectivity.

8.2 Compatibility with HVAC Systems and Smart Home Devices

The Honeywell TH6320U2008 is compatible with most 24V HVAC systems‚ including 1-2 stage heating and cooling‚ dual fuel‚ and heat pump configurations. It integrates seamlessly with smart home platforms like Amazon Alexa and Google Home‚ enabling voice control and remote temperature adjustments. This thermostat also supports Wi-Fi connectivity‚ allowing users to manage settings via the Honeywell Home app and optimize energy usage.

Customer Support and Resources

Honeywell provides comprehensive support through online FAQs‚ troubleshooting guides‚ and downloadable manuals. Users can access detailed technical information and assistance for the TH6320U2008 thermostat.

9.1 Accessing the Official Honeywell Manual and Guides

The official Honeywell manual for the TH6320U2008 is available on their website‚ offering detailed instructions for installation‚ programming‚ and troubleshooting. Users can download the PDF guide or access it directly online. The manual covers all features‚ ensuring users can maximize the thermostat’s functionality. Additional resources include troubleshooting tips and FAQs to address common issues efficiently.

9.2 Frequently Asked Questions and Support Articles

Honeywell provides extensive FAQs and support articles to address common queries about the TH6320U2008. These resources cover installation‚ programming‚ and troubleshooting‚ ensuring users can resolve issues quickly. Topics include unlocking the thermostat‚ resetting factory settings‚ and understanding energy-saving features. The support section also offers guides for customizing settings and optimizing performance‚ enhancing the overall user experience with detailed solutions.

Energy Efficiency and Savings

The Honeywell TH6320U2008 promotes energy efficiency through programmable schedules‚ reducing unnecessary heating or cooling. Its energy-saving modes optimize usage‚ lowering utility bills and environmental impact effectively.

10.1 How to Use the Thermostat for Maximum Energy Savings

To maximize energy savings with the Honeywell TH6320U2008‚ set weekly schedules aligning with your daily routines. Lower temperatures when sleeping or away and raise them when home. Utilize the programmable features to avoid heating or cooling an empty house. Regularly review and adjust settings to ensure optimal performance and efficiency‚ reducing energy consumption effectively.

10.2 Understanding Energy Usage Reports and Settings

The Honeywell TH6320U2008 provides energy usage reports to track your consumption patterns. These reports help identify opportunities to reduce energy waste. By analyzing the data‚ you can adjust settings to optimize efficiency. Access these reports through the thermostat’s interface or via the official manual for detailed insights. This feature empowers users to make informed decisions‚ enhancing overall energy efficiency and savings.

Safety Precautions and Warnings

Always turn off power before installation or maintenance. Avoid improper wiring to prevent electrical hazards. Follow manual guidelines to ensure safe operation and handling of the thermostat.

11.1 Important Safety Information for Installation and Usage

Ensure the power is turned off at the circuit breaker before installing or servicing the thermostat. Never touch electrical components with wet hands. Use a licensed electrician if unsure about wiring. Keep the thermostat out of reach of children to prevent tampering. Follow all instructions in the manual carefully to avoid potential hazards and ensure safe operation. Always handle batteries and wires with caution.

11.2 Handling Electrical Components Safely

Always turn off power at the circuit breaker before handling electrical components. Avoid touching wires or terminals with wet hands. Use a licensed electrician if unsure about wiring connections. Handle batteries and wires with care to prevent damage. Keep electrical parts away from children. Never force connections or bend wires excessively. Ensure all connections are secure to avoid short circuits. Follow the manual’s guidelines for safe electrical practices.

Warranty and Replacement Information

The Honeywell TH6320U2008 thermostat is backed by a limited warranty covering defects in materials and workmanship. For replacement parts‚ visit the official Honeywell website or contact customer support.

12.1 Understanding the Warranty Terms and Conditions

The Honeywell TH6320U2008 thermostat is covered by a limited warranty‚ typically lasting two years from the date of purchase. This warranty covers defects in materials and workmanship but does not apply to damage caused by misuse or unauthorized modifications. To claim warranty benefits‚ users must register the product and provide proof of purchase. Visit the official Honeywell website for detailed warranty terms and conditions.

12.2 How to Obtain Replacement Parts

Replacement parts for the Honeywell TH6320U2008 can be purchased directly from authorized dealers or through Honeywell’s official website. Users can search by part number or model to find compatible components. Additionally‚ contacting Honeywell customer support can provide guidance on obtaining specific parts‚ ensuring authenticity and compatibility. Always verify the authenticity of parts to maintain warranty validity and ensure proper functionality.

The Honeywell TH6320U2008 offers advanced features for efficient temperature control. Refer to the manual for optimal usage and explore Honeywell’s support resources for troubleshooting. Regular maintenance and proper customization ensure long-term performance and energy savings. Always follow safety guidelines and consider professional assistance for complex installations or repairs.

13.1 Summary of Key Features and Benefits

The Honeywell TH6320U2008 thermostat offers a backlit display‚ programmable scheduling‚ and energy-saving modes. It is compatible with various HVAC systems and smart home devices‚ ensuring flexible control. The user-friendly interface allows for easy customization of temperature settings‚ while the lock feature enhances security. Regular updates and comprehensive support resources further enhance its functionality and user experience‚ making it a reliable choice for home comfort management.

13.2 Best Practices for Long-Term Usage

Regularly clean the thermostat to ensure optimal performance and prevent dust buildup. Replace batteries annually to avoid unexpected shutdowns. Check for firmware updates to access new features and improvements. Review and adjust schedules seasonally to maintain efficiency. Lock the thermostat when not in use to prevent unauthorized changes‚ ensuring consistent temperature control and energy savings.

disney bedtime stories pdf

Disney Bedtime Stories PDFs bring magical tales to life, featuring beloved characters and enchanting adventures. Perfect for bedtime, these digital collections spark imagination and create lasting memories.

What Are Disney Bedtime Stories?

Disney Bedtime Stories are enchanting digital collections of tales featuring beloved Disney characters. These stories are crafted for bedtime, offering concise, engaging narratives perfect for winding down. Available in PDF format, they include classic fairy tales, modern adventures, and heartwarming journeys. From princesses to heroic quests, the stories are designed to captivate young imaginations. Popular collections like Disney Junior 365 Stories and Disney 3-Minute Bedtime Stories provide a variety of themes, ensuring a new adventure every night. These PDFs are easily accessible, making bedtime storytelling a delightful and convenient experience for families worldwide.

The Importance of Bedtime Stories for Children

Bedtime stories are a cherished tradition that fosters a love for reading and enhances language skills in children. They spark creativity, imagination, and emotional intelligence, helping kids understand complex emotions. Disney Bedtime Stories, in particular, use beloved characters to teach moral lessons, making learning values fun and relatable. These tales also create a calming pre-sleep routine, promoting better rest and bonding between parents and children. By sharing magical adventures, bedtime stories inspire curiosity and empathy, shaping young minds while creating lasting memories. They are a simple yet powerful way to nurture growth and connection in a child’s life.

How Disney Bedtime Stories PDFs Became Popular

Disney Bedtime Stories PDFs gained popularity due to their convenience and accessibility. Busy parents sought quick, engaging tales to share with their children, and these digital collections fit perfectly into bedtime routines. The availability of free downloads and official releases from Disney Press and shopDisney.com made them widely accessible. Collections like Disney Junior 365 Stories and Disney 3-Minute Bedtime Stories offered diverse options, catering to families seeking variety and brevity. Their digital format allowed for easy sharing and reading on devices, making them a modern, practical choice for fostering a love of storytelling in the digital age.

Popular Disney Bedtime Stories PDF Collections

Disney Junior 365 Stories: A Story a Day and Disney 3-Minute Bedtime Stories are fan favorites, offering engaging tales for families to enjoy together, anytime, anywhere.

Disney Junior 365 Stories: A Story a Day

This collection offers 365 engaging bedtime stories, one for each day of the year. Featuring beloved Disney Junior characters like Lightning McQueen and Olaf, these tales are designed to captivate young minds with adventures, humor, and heartwarming lessons. Each story is concise and perfect for a nightly routine, fostering a love for reading and imagination. Available in PDF format, this anthology is easily accessible and portable, making it a great companion for families. The stories are accompanied by colorful illustrations, adding visual charm to the storytelling experience. A must-have for parents seeking fun and educational bedtime content.

Disney 3-Minute Bedtime Stories

Disney 3-Minute Bedtime Stories are crafted for quick, engaging reads, perfect for busy families. Each tale features iconic characters, ensuring a delightful experience for children. Available as free PDF downloads, these stories are easily accessible and ideal for winding down before bed. They blend fun with moral lessons, fostering creativity and understanding. The concise format makes them suitable for short attention spans, while the familiar characters keep kids engaged. This collection is a thoughtful way to end the day, offering quality time and cherished memories for parents and children alike.

Classic Disney Tales in PDF Format

Classic Disney Tales in PDF Format offer timeless stories like Snow White, Cinderella, and Sleeping Beauty. These digital versions preserve the magic of original Disney narratives, complete with vibrant illustrations. Parents can easily share these beloved tales with their children, fostering a love for reading. The PDF format ensures accessibility across devices, making bedtime stories portable and convenient. These stories not only entertain but also teach valuable life lessons, making them a cherished part of family traditions. They remain a popular choice for bedtime, blending nostalgia with modern accessibility for new generations to enjoy.

Benefits of Reading Disney Bedtime Stories

Disney Bedtime Stories spark imagination, foster creativity, and teach moral lessons through beloved characters. They enhance family bonding and provide accessible, engaging entertainment for children of all ages.

Spark Imagination and Creativity

Disney Bedtime Stories PDFs transport children to magical worlds, introducing them to enchanting characters and adventures. These tales inspire creativity, encouraging kids to think beyond the ordinary and explore new ideas. Vibrant illustrations and engaging designs in the PDFs captivate young minds, fostering a love for storytelling. Interactive elements like puzzles and quizzes further stimulate imagination, making bedtime a time for both relaxation and mental growth. By immersing children in fantastical scenarios, Disney stories help them develop creative thinking and problem-solving skills, preparing them for a lifetime of innovation and curiosity.

Teach Moral Lessons Through Beloved Characters

Disney Bedtime Stories PDFs are more than just entertainment; they impart valuable moral lessons through iconic characters. Stories like Moana, Aladdin, and Frozen inspire courage, honesty, and kindness. These tales highlight the importance of perseverance, empathy, and doing what’s right. Characters like Simba from The Lion King teach responsibility and overcoming fears, while Cinderella emphasizes kindness despite adversity; By weaving these lessons into engaging narratives, Disney helps children develop a strong moral compass; These stories become a powerful tool for parents to guide their kids toward positive values and behaviors, making bedtime a time for learning and growth.

Enhance Family Bonding Time

Disney Bedtime Stories PDFs foster meaningful family bonding by creating a shared experience. Reading together allows parents and children to explore magical worlds side by side. Interactive elements like colorful illustrations and activity pages encourage collaboration, making storytelling a fun, collective adventure. These stories become a cherished routine, strengthening emotional connections and fostering a sense of togetherness. By engaging in these tales, families create lasting memories and deepen their relationships, turning bedtime into a special moment of unity and joy. This shared tradition helps build a stronger, more loving family bond.

How to Find and Download Disney Bedtime Stories PDF

Discover Disney Bedtime Stories PDFs through official websites, free resources, and popular platforms. Visit shopDisney.com for free downloads, including sleep activity cards and charts. Explore platforms like PDF sharing sites for collections like Disney Junior 365 Stories and Disney 3-Minute Bedtime Stories. Ensure secure downloads from trusted sources to enjoy magical tales legally and safely, making bedtime routines enchanting and convenient. Always verify the authenticity of sources to protect your device and data. Start your journey to a world of Disney stories today!

Free Resources and Official Websites

Discover free Disney Bedtime Stories PDFs through official websites like shopDisney.com, which offers free downloads of sleep activity cards and progress charts. Official Disney platforms provide legal and safe access to enchanting tales. Additionally, websites like PDF sharing sites host collections such as Disney Junior 365 Stories and Disney 3-Minute Bedtime Stories. These resources are perfect for parents seeking convenient bedtime solutions. Explore classic tales like Moana and Aladdin in digital formats, ensuring magical storytelling for children. Always opt for trusted sources to download these free PDFs and enjoy a world of Disney adventures legally and effortlessly.

Popular Platforms for Downloading Disney PDFs

Several platforms offer easy access to Disney Bedtime Stories PDFs. Official websites like shopDisney.com provide free downloads of activity cards and stories. Additionally, platforms like PDF-sharing sites host collections such as Disney Junior 365 Stories and Disney 3-Minute Bedtime Stories. These platforms cater to parents seeking convenient bedtime solutions. You can also explore classic tales like Moana and Aladdin in digital formats. Always opt for trusted sources to ensure legal and safe downloads. These platforms make it easy to access enchanting Disney stories, perfect for creating magical bedtime routines.

Interactive Elements in Disney Bedtime Stories PDF

Disney Bedtime Stories PDFs feature colorful illustrations, engaging designs, and activity pages like sleep progress charts to enhance reading experiences and keep children excited about bedtime routines.

Colorful Illustrations and Engaging Designs

Disney Bedtime Stories PDFs captivate young readers with vibrant, full-color illustrations that bring beloved characters to life. Each page is thoughtfully designed to create an immersive experience, blending visual charm with storytelling magic. The engaging layouts feature familiar Disney heroes, making the tales even more relatable and enjoyable for children. These designs not only enhance the narrative but also make reading fun and interactive, ensuring that bedtime stories become a cherished ritual for the whole family to share and treasure together.

Activity Pages and Sleep Progress Charts

Disney Bedtime Stories PDFs often include activity pages and sleep progress charts, enhancing engagement and routine-building. These features encourage interactive learning, with puzzles, coloring pages, and fun tasks. Sleep progress charts help track bedtime consistency, fostering healthy habits. Families can download these resources from official Disney platforms, adding an educational dimension to storytelling. These elements make bedtime routines more dynamic, blending entertainment with personal growth, and creating a comprehensive experience for children and parents alike.

Disney Bedtime Stories PDFs offer a magical way to end the day, blending storytelling with interactive elements to create lasting memories and foster a love for reading.

Why Disney Bedtime Stories PDFs Are a Must-Have

Disney Bedtime Stories PDFs are a must-have for families, offering a magical way to end the day. These digital collections feature beloved characters and enchanting tales that spark imagination and creativity. With interactive elements like colorful illustrations and activity pages, they engage children and foster a love for reading. PDFs are convenient, portable, and accessible, making bedtime routines easier. They also provide a sense of tradition, creating lasting memories. Whether it’s a 3-minute story or a daily adventure, Disney PDFs are a timeless choice for families seeking quality storytelling and bonding time.