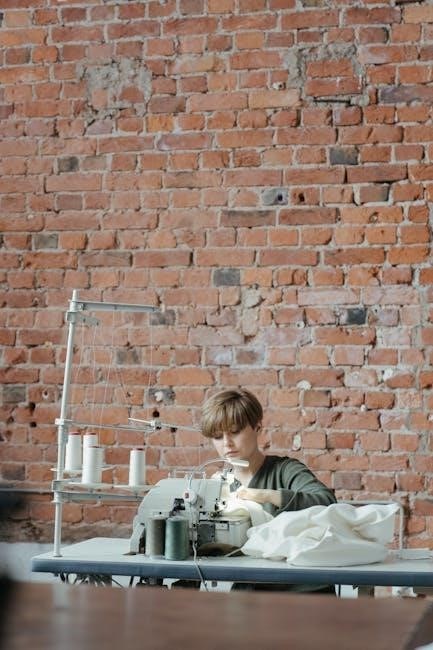
Understanding Thread Guides on a Sewing Machine
Thread guides are essential components that direct the thread from the spool to the needle‚ ensuring smooth operation. They vary by machine model and are crucial for maintaining proper tension and preventing tangles. Using them correctly ensures consistent stitching and reduces the risk of thread breakage during sewing. Proper threading is vital for optimal performance.
Thread guides are small but crucial components on a sewing machine that help direct the thread from the spool to the needle. They are designed to keep the thread in the correct path‚ ensuring smooth operation and consistent stitching. These guides come in different forms‚ such as metal loops‚ hooks‚ or plastic slots‚ and their placement varies depending on the machine model. Proper use of thread guides is essential for maintaining the right tension and preventing tangles or thread breakage. While they may seem subtle‚ thread guides play a vital role in the overall functionality of the sewing machine‚ making them a key focus for sewists of all skill levels.
The Importance of Proper Threading
Proper threading is essential for ensuring smooth and consistent stitching on a sewing machine. When the thread is not correctly guided through the machine‚ it can lead to uneven stitches‚ thread breakage‚ and even machine jams. Improper threading can also cause unnecessary tension‚ which may damage the machine over time. By following the correct threading path‚ as indicated by the thread guides‚ you can maintain optimal tension and prevent tangles. This ensures that the thread flows smoothly from the spool to the needle‚ resulting in professional-quality stitching. Proper threading is a fundamental skill for sewists of all levels‚ as it directly impacts the performance of the machine and the quality of the final product.
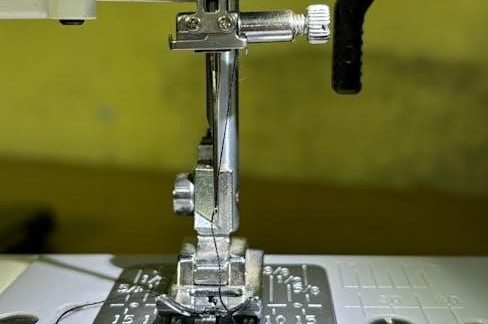
What Are Thread Guides?
Thread guides are essential components on a sewing machine that direct the thread from the spool to the needle. They help maintain proper tension and prevent tangles. Their specific positions vary by machine model‚ ensuring smooth thread flow for consistent stitching.
Definition and Purpose
Thread guides are small mechanical components on a sewing machine designed to direct the thread from the spool to the needle. Their primary purpose is to ensure the thread follows the correct path‚ maintaining proper tension and alignment. This helps prevent tangles‚ knots‚ and breaks‚ ensuring smooth stitching. By guiding the thread through specific points‚ they contribute to consistent stitch quality and reduce the risk of machine malfunction. Proper use of thread guides is essential for achieving professional-grade sewing results. They are often marked or numbered on the machine‚ making it easier to follow the threading process step by step.
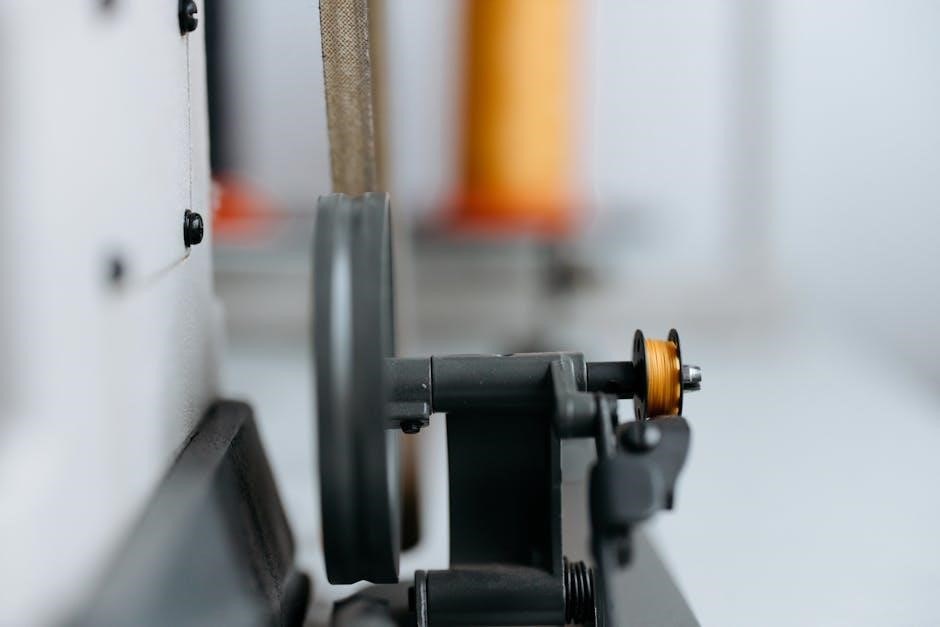
Types of Thread Guides
Thread guides on sewing machines come in various forms‚ each serving a specific function. The most common types include the spool pin guide‚ which holds the thread in place as it unwinds from the spool. Another is the pre-tension disc‚ which helps regulate thread tension before it reaches the needle. Additionally‚ there are looped guides that create a small circuit for the thread to pass through‚ ensuring proper alignment. Some machines also feature automatic threaders with built-in guides that simplify the threading process. Each type of guide plays a crucial role in maintaining thread control and ensuring even stitching. Understanding the different types of thread guides can help users optimize their sewing machine’s performance and achieve better results.
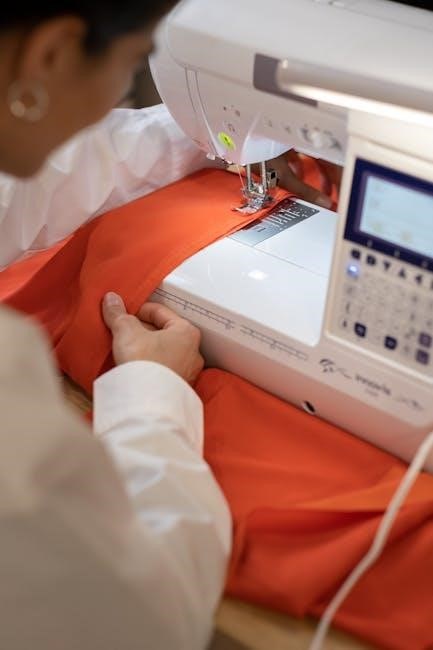
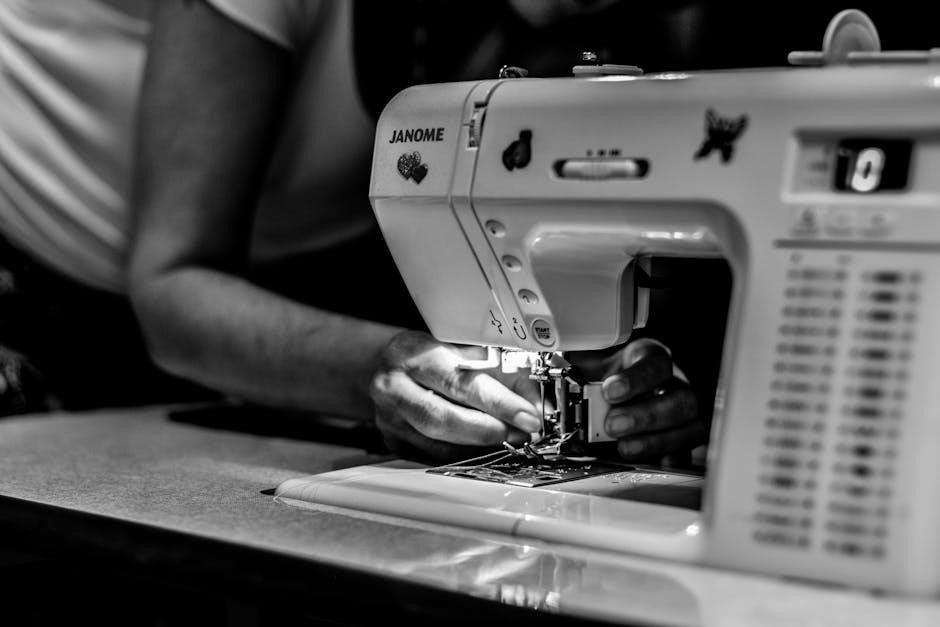
How to Use Thread Guides Effectively
Using thread guides effectively involves following the machine’s specific threading path. Start by turning off the machine for safety. Gently pull the thread through each guide‚ ensuring it’s seated properly in each slot. Avoid pulling too tightly‚ as this can cause misalignment. Keep the thread taut but not overly stretched. If the machine has numbered guides‚ follow the sequence carefully. Properly threading through each guide ensures even tension and prevents tangles. Regularly cleaning the guides from lint and debris also helps maintain smooth thread flow. By adhering to these steps‚ you can achieve consistent stitching and extend the life of your sewing machine.
Step-by-Step Threading Process
To thread your sewing machine effectively‚ start by turning it off and unplugging it for safety. Place the thread on the spool pin and gently pull it to unwind a small amount. Wind the bobbin by guiding the thread through the bobbin winder and securing it. Next‚ pass the thread through each designated guide on the machine‚ following the path indicated by the manufacturer. Lightly tug the thread to ensure it is seated properly in each guide. Finally‚ thread the needle and pull the thread to create a small loop‚ then adjust the tension as needed. Make sure the thread is not twisted and flows smoothly through all guides. Proper threading ensures even stitching and prevents machine jams. Always refer to your machine’s manual for specific guidance.
Common Mistakes to Avoid
One of the most common mistakes when using thread guides is not following the correct threading path outlined by the manufacturer. Failing to seat the thread properly in each guide can lead to uneven tension and tangled threads. Another mistake is pulling the thread too tightly or too loosely‚ which can cause misalignment or breakage. Neglecting to adjust the tension disc or forgetting to raise the presser foot before threading can also result in improper thread placement. Additionally‚ some users overlook the importance of using the correct thread type for their machine‚ which can affect performance. To avoid these issues‚ always refer to your machine’s manual and ensure the thread flows smoothly through all guides without twisting or catching. Proper threading is key to achieving consistent stitches and preventing machine malfunctions.
Advanced Techniques for Threading
Use diagram guides for precise threading paths‚ especially for complex stitches. Adjust tension settings based on fabric type and thread weight to ensure smooth‚ even stitching. Optimize thread flow by lightly tugging the thread after each guide to prevent twists and tangles. This ensures consistent stitching quality and reduces machine downtime.
Using Diagram Guides
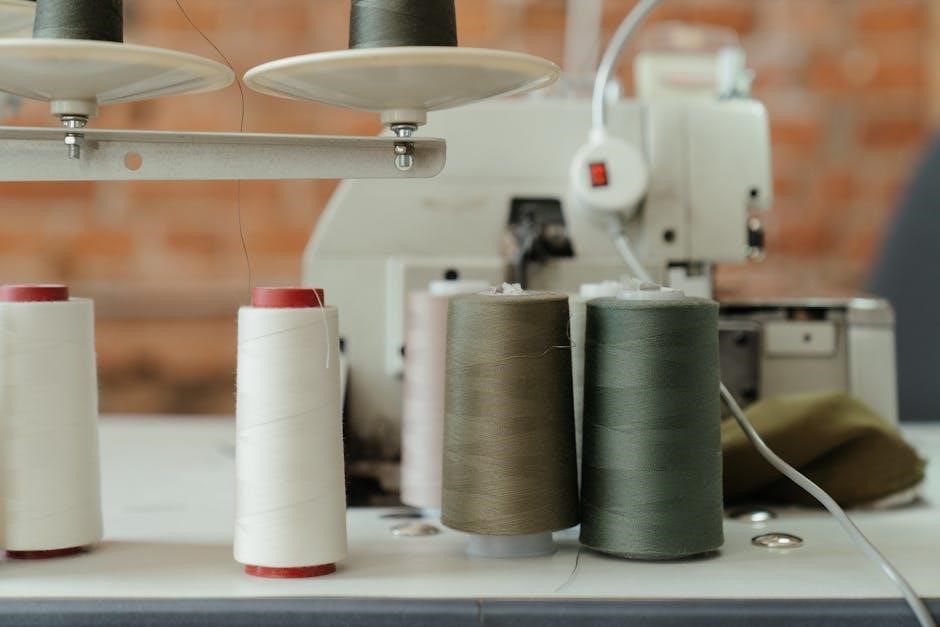
Diagram guides are visual aids on sewing machines that illustrate the correct threading path. These diagrams‚ often located on the machine’s exterior‚ provide step-by-step instructions for routing the thread from the spool to the needle. By following the numbered or marked points‚ users can ensure the thread passes through every necessary guide‚ preventing tangles and misalignment. Diagram guides are especially useful for beginners‚ as they simplify the threading process. They also help experienced sewists maintain consistency‚ particularly when switching thread types or working with specialized stitches. Always refer to the machine’s specific diagram guide‚ as threading paths may vary between models. This ensures optimal performance and reduces the risk of thread-related issues during sewing. Diagram guides are an invaluable tool for achieving professional results.
Adjusting Tension for Optimal Results
Proper thread tension is crucial for achieving consistent stitching and preventing issues like thread breakage or fabric puckering. Thread guides play a key role in maintaining even tension by directing the thread smoothly from the spool to the needle. To adjust tension effectively‚ start by threading the machine correctly‚ following the path indicated by the thread guides. Ensure the thread is not too tight or too loose‚ as this can disrupt the stitching. Most sewing machines have tension dials that can be fine-tuned for different fabric types or thread weights. Always test the tension on a scrap piece of fabric before starting your project. If the tension is uneven‚ adjust the dials slightly and retest. Proper tension ensures professional-looking results and extends the longevity of your sewing machine. Regularly checking and adjusting tension helps maintain optimal performance.
Troubleshooting Thread Guide Issues
- Common issues include thread tangles‚ improper threading‚ and uneven tension.
- Check the thread path‚ ensure correct tension‚ and clean guides regularly.
- Consult your machine’s manual for specific adjustments and solutions;
Identifying and Fixing Thread Tangles
Thread tangles often occur due to improper threading or uneven tension. To identify tangles‚ look for loops or bunching in the thread near the needle or bobbin area. Gently pull the thread to check for resistance‚ which may indicate a tangle. To fix‚ carefully remove the tangled thread‚ ensuring not to pull too hard‚ as this can damage the machine or break the needle. Retrace the thread path‚ ensuring it follows the correct guides and maintains proper tension. If the issue persists‚ rethread the machine entirely‚ referring to the diagram guides for accuracy. Regularly cleaning and inspecting thread guides can prevent future tangles and ensure smooth sewing operations.
Replacing Damaged Thread Guides
Damaged thread guides can disrupt the threading process‚ leading to poor stitch quality or machine malfunction. To replace them‚ first disconnect the machine from the power source for safety. Locate the damaged guide and remove it using a screwdriver or the tool provided with your machine. Purchase a compatible replacement from the manufacturer or a trusted supplier. Install the new guide by aligning it with the mounting points and securing it firmly. Ensure it is positioned correctly to guide the thread smoothly. Reassemble any parts you removed and rethread the machine carefully‚ following the diagram guides. Test the machine by sewing a few stitches to confirm the thread flows evenly. Regular maintenance and inspection of thread guides can prevent future issues and maintain optimal sewing performance.
Understanding and properly using thread guides on a sewing machine is crucial for achieving professional results. These small but vital components ensure the thread flows smoothly from the spool to the needle‚ preventing tangles and maintaining consistent tension. By following the step-by-step threading process and avoiding common mistakes‚ sewers can optimize their machine’s performance. Regular maintenance‚ such as inspecting and replacing damaged guides‚ extends the machine’s lifespan and ensures reliable operation. Whether you’re a beginner or an experienced sewer‚ mastering the use of thread guides will enhance your sewing experience and the quality of your projects. Always refer to your machine’s specific manual for tailored guidance‚ as thread guide designs may vary between models. With proper care and attention‚ your sewing machine will continue to deliver exceptional results for years to come.