cuisinart ice cream machine instructions

The Cuisinart Ice Cream Machine is a fully automatic appliance designed to create homemade ice cream, frozen yogurt, and sorbet with ease and precision․

Overview of the Machine and Its Features

The Cuisinart Ice Cream Machine is a fully automatic appliance with a double-insulated freezer bowl, ensuring efficient churning․ It features easy-to-use controls, a spout for pouring ingredients, and a mix-ins dispenser․ The machine is equipped with safety features like automatic shutdown if overheated․ Its compact design and BPA-free construction make it ideal for homemade ice cream, frozen yogurt, and sorbet․

Popular Models (e․g․, ICE-20, ICE-21, ICE-40BCE)

The Cuisinart ICE-20, ICE-21, and ICE-40BCE are among the most popular models․ The ICE-20 is a basic yet reliable option for homemade ice cream․ The ICE-21 offers similar features with slight improvements․ The ICE-40BCE stands out with its advanced design, including a built-in compressor for faster churning․ These models are known for their ease of use and consistent results, making them favorites among ice cream enthusiasts․

Safety Guidelines and Precautions

Always read the manual before use․ Avoid exposing the machine to water or moisture․ Ensure the freezer bowl is pre-chilled and not overfilled․ The machine features automatic overheating protection for added safety․

Important Safety Tips Before Using the Machine

  • Always read the instruction manual thoroughly before first use to understand proper operation and safety precautions․
  • Ensure the freezer bowl is pre-chilled according to the manufacturer’s instructions to avoid improper function․
  • Avoid exposing the machine or its components to water or excessive moisture to prevent electric shock or damage․
  • Never overfill the freezer bowl, as ingredients expand during churning, which can lead to overflow․
  • Keep children away from the machine while it is in operation and ensure they do not touch moving parts․

Understanding the Machine’s Safety Features

The Cuisinart Ice Cream Machine is equipped with built-in safety features to ensure safe and reliable operation․ These include automatic shut-off if the motor overheats and protections against electric shock․ The machine also features a secure lid to prevent accidental opening during operation․ These features help protect users and maintain optimal performance․ Always consult the manual for detailed safety information․

Assembly and Preparation

Assembly involves unpacking and identifying components, while preparation requires pre-freezing the bowl and initial setup, as detailed in the manual for optimal use․

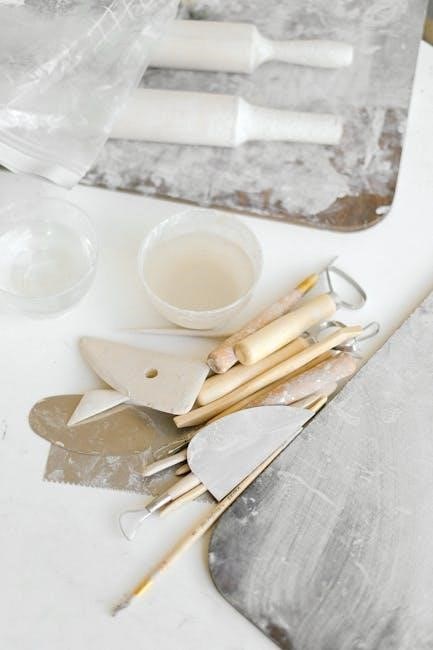
Unpacking and Identifying Components

Carefully unpack the Cuisinart Ice Cream Machine, ensuring all components, including the base, freezer bowl, lid, and mixing arm, are included․ Refer to the manual for identifying each part․ Check for any damage or missing items․ The freezer bowl must be pre-chilled before use, and all components should be washed and dried thoroughly․ Proper assembly ensures safe and efficient operation․

Pre-Freezing the Bowl and Initial Setup

Before use, the freezer bowl must be pre-chilled in the freezer for 6–22 hours․ Ensure the bowl is completely frozen to achieve optimal results․ Place the bowl on the machine base, attach the mixing arm, and secure the lid tightly․ Do not overfill the bowl, leaving at least 1 inch of space․ Wash all components thoroughly before starting․

Operating the Machine

Turn on the Cuisinart ice cream machine, pour the pre-chilled mixture into the frozen bowl, and let it churn for 15–20 minutes until thickened․ Ensure the lid is secure during operation for consistent results and safety․

Step-by-Step Instructions for Making Ice Cream

Start by pre-freezing the bowl for at least 6 hours․ Combine ingredients like cream, sugar, and flavorings in a bowl, then chill the mixture in the fridge․ Pour the mixture into the pre-frozen bowl, turn on the machine, and let it churn for 15–20 minutes․ Add mix-ins through the dispenser during the last 2 minutes if desired․ Once done, transfer the ice cream to an airtight container and freeze for 2 hours to firm up before serving․

Preparing Ingredients and Mixing

Combine heavy cream, whole milk, granulated sugar, and flavorings like vanilla extract in a bowl․ Whisk until the sugar dissolves to ensure sweetness and flavor distribution․ For unique flavors, add cocoa powder for chocolate or fruit purees for fruity variations․ Chill the mixture in the fridge for 1–2 hours before churning to prevent ice crystals from forming during the process․

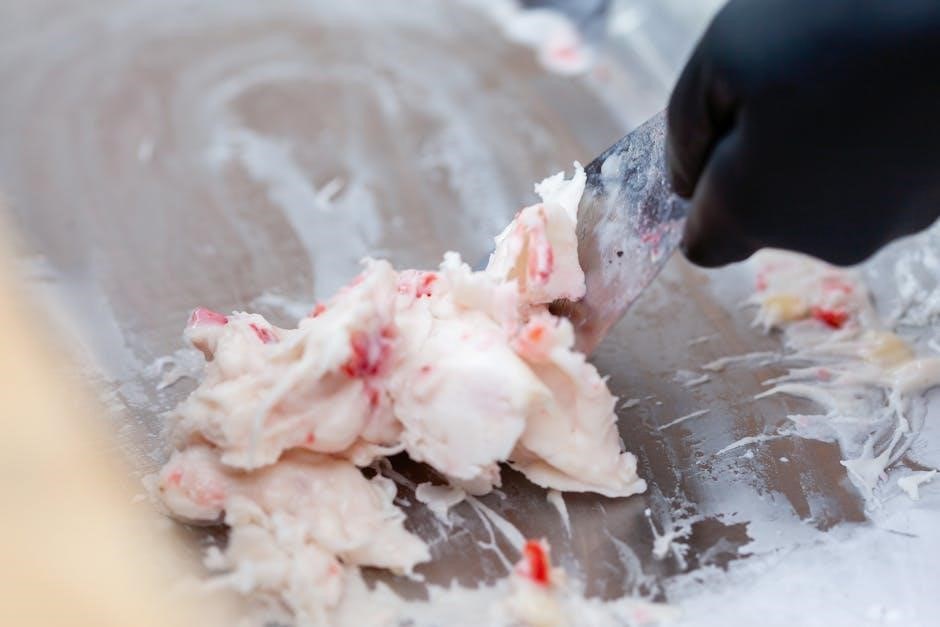
Churning Process and Monitoring

Pour the chilled mixture into the pre-frozen bowl and start the machine․ Monitor the churning process, which typically takes 15–20 minutes․ The machine will agitate the mixture, incorporating air and breaking down ice crystals for a smooth texture․ Stop the machine once the desired consistency is reached, then transfer the ice cream to an airtight container for hardening in the freezer․

Recipes and Customization

Explore a variety of classic and creative recipes for ice cream, sorbet, and frozen yogurt․ Customize flavors with mix-ins, toppings, and unique ingredients․

Classic Ice Cream Recipes

Discover timeless favorites like vanilla, chocolate, and strawberry ice cream․ These recipes are designed for the Cuisinart machine, using fresh ingredients for creamy results․

Follow the manual’s guidance for perfect proportions and churning times․ Classic recipes are simple yet versatile, offering a delicious base for customization․

Explore the included recipe booklet for step-by-step instructions and inspiration to create traditional treats at home․

Adding Mix-Ins and Toppings

Elevate your ice cream creations by incorporating mix-ins like chocolate chips, nuts, or fruit․ The machine’s mix-ins dispenser allows easy addition during churning․

Add toppings such as caramel drizzle or whipped cream after churning for a personalized touch․ Experiment with combinations to create unique flavors․

Refer to the manual for timing mix-ins to ensure even distribution and optimal results․

Sorbet and Frozen Yogurt Options

The Cuisinart Ice Cream Machine also excels at making sorbet and frozen yogurt․ For sorbet, use puréed fruit and minimal sugar, while frozen yogurt requires a base of non-fat plain yogurt with a touch of honey․ Both options churn smoothly in the machine, offering healthier and lighter desserts․ Experiment with flavors to create refreshing treats for any occasion․

Troubleshooting Common Issues

Common issues include the machine not turning on, overheating, or producing inconsistent texture․ Check power connections, ensure proper pre-freezing, and monitor ingredient ratios for optimal results․

Machine Not Turning On or Overheating

If the machine fails to turn on, ensure the power cord is securely connected and the outlet is functioning․ For overheating, the machine may automatically shut off as a safety measure; Allow it to cool down before restarting․ Always pre-freeze the bowl as instructed and avoid overloading it to prevent motor strain․

Inconsistent Texture or Ice Formation

Inconsistent texture or ice formation can occur if ingredients are not chilled properly or if the mixture is over-churned․ Ensure all components are pre-cooled, and avoid adding too much liquid․ Scrape the bowl during churning to evenly mix ingredients․ For ice crystals, check the bowl’s temperature and ingredient ratios, adjusting as needed for smoother results․

Maintenance and Cleaning

Regularly clean the machine after use, ensuring all parts are washed by hand to maintain functionality and hygiene․ Avoid dishwasher use to prevent damage․

Proper Cleaning Techniques

Handwash all parts with mild soap and warm water․ Avoid using abrasive cleaners or scourers․ Dry thoroughly to prevent rust․ Regularly clean the bowl and lid to remove residue․ Do not submerge electrical components in water․ Clean the machine after each use to maintain hygiene and functionality․ Store parts properly after cleaning to ensure long-term performance․

Storage and Long-Term Maintenance

Store the Cuisinart Ice Cream Machine in a cool, dry place․ After cleaning, ensure all parts are completely dry to prevent rust․ The freezer bowl should be stored in the freezer to maintain its temperature for future use․ Regularly inspect and maintain the machine to ensure optimal performance․ Proper storage and maintenance will extend the lifespan of your ice cream maker․

Popular Models and Their Unique Features

Cuisinart offers several models, such as the ICE-20, ICE-21, and ICE-40BCE, each featuring automatic operation, easy cleanup, and the ability to make ice cream, frozen yogurt, and sorbet․

Cuisinart ICE-20 vs․ ICE-21

The ICE-20 and ICE-21 are popular models, both offering automatic frozen dessert making․ The ICE-20 has a 1․5-quart capacity, while the ICE-21 includes an additional feature for mix-ins, allowing users to add toppings during the churning process․ Both models are easy to use and clean, making them ideal for homemade ice cream enthusiasts․

Advanced Features of the ICE-40BCE

The ICE-40BCE features a built-in timer, automatic shut-off, and a unique mixing paddle for consistent results․ It also includes a large 2-quart capacity and a transparent lid for monitoring progress․ The machine is designed with a sleek, compact design and multiple speed settings, making it versatile for various frozen desserts, from ice cream to sorbet․

Additional Features and Accessories

Enhance your ice cream-making experience with optional accessories like extra freezing bowls, lids, and recipe guides․ The mix-ins dispenser adds convenience for customizing flavors effortlessly․

Using the Mix-Ins Dispenser

The mix-ins dispenser allows you to add toppings or ingredients while the machine churns, ensuring even distribution․ Simply pour your mix-ins into the dispenser, and the machine will incorporate them during the churning process․ This feature is perfect for creating custom flavors with ease and efficiency․ Refer to your manual for specific usage instructions to ensure optimal performance and avoid overloading the dispenser․

Optional Accessories for Enhanced Use

Enhance your ice cream-making experience with optional accessories like additional freezer bowls, recipe books, and storage containers․ Extra bowls allow multiple batches without re-freezing, while recipe guides offer inspiration for unique flavors․ Storage containers keep your creations fresh․ These accessories are available on the Cuisinart website or online marketplaces, ensuring you get the most out of your machine․

Frequently Asked Questions

  • Q: How long does it take to make ice cream? A: Typically 15-20 minutes, depending on ingredients and machine model․
  • Q: Can I add mix-ins during churning? A: Yes, use the mix-ins dispenser for even distribution․

Common Questions About Usage and Recipes

  • Q: How long does it take to churn ice cream? A: Churning typically takes 15-20 minutes, depending on the model and mixture․
  • Q: Can I use any type of milk? A: Yes, you can use dairy or non-dairy milks like almond or coconut milk․
  • Q: Why is my ice cream too icy? A: Over-churning or insufficient sugar can cause ice formation; ensure proper ingredient ratios․
  • Q: How do I add mix-ins? A: Add mix-ins during the last 2 minutes of churning for even distribution․

Tips for Achieving the Best Results

  • Use aged ingredients for richer flavors, as they develop better taste over time․
  • Pre-freeze the bowl for at least 6-8 hours to ensure proper churning․
  • Maintain the correct ingredient ratios to avoid icy textures or overly soft ice cream․
  • Add mix-ins during the last 2 minutes of churning for even distribution․
  • Experiment with unique flavors like matcha, lavender, or cocoa for creativity․
  • Refer to the manual for troubleshooting and recipe inspiration․

Resources and Support

Access official Cuisinart resources for manuals, troubleshooting, and recipes․ Visit ManualsLib for 31+ Cuisinart ice cream maker guides․ Contact customer support for assistance today․

Accessing Manuals and Guides Online

Access Cuisinart ice cream maker manuals and guides on official websites like Cuisinart․com or ManualsLib․ Over 31 manuals are available for models like ICE-20 and ICE-21, offering step-by-step instructions, troubleshooting tips, and recipes․ Download PDF versions for easy reference and ensure proper usage, maintenance, and safety of your machine․

Customer Support and Troubleshooting Resources

Cuisinart offers comprehensive customer support through their official website, including a help center and FAQs․ For troubleshooting, refer to the manuals or contact support directly via phone or email․ Additional resources like online forums and communities provide solutions to common issues, ensuring optimal use of your ice cream maker․

death of a salesman pdf

Death of a Salesman, written by Arthur Miller in 1949, is a timeless exploration of the American Dream’s illusion and its impact on the working class. The play revolves around Willy Loman, a struggling salesman, and his family, delving into themes of identity, reality, and personal failure. Available in PDF format, the play is widely accessible for reading and analysis, offering a profound critique of societal expectations and individual aspirations.

1.1 Overview of the Play

Death of a Salesman, written by Arthur Miller in 1949, is a poignant drama that explores the life of Willy Loman, a struggling salesman, and his family. The play delves into themes of identity, illusion, and the American Dream, portraying Willy’s descent into despair as he confronts his failures. Available in PDF format, the play is widely accessible, with editions featuring introductions by scholars like Christopher Bigsby. It is a powerful critique of societal expectations and personal aspirations, offering a deeply human story of struggle and disillusionment. The PDF versions are suitable for academic and personal reading, grades 7–12.

1.2 The Origin of the Story

The origins of Death of a Salesman trace back to Arthur Miller’s early writing experiences. At just 17, Miller wrote a short story that later influenced the character of Biff Loman. The play was further shaped by Miller’s observations of the American working class and his own brief experience as a salesman. These experiences, combined with his exploration of the American Dream’s illusion, formed the foundation of the story. The play’s development reflects Miller’s deep understanding of human struggle and societal pressures, making it a powerful commentary on modern life. The PDF versions of the play highlight these themes in detail.

Themes in “Death of a Salesman”

Death of a Salesman explores the American Dream’s illusion, loss of identity, and the clash between reality and illusion, reflecting Willy Loman’s struggle with societal expectations and personal aspirations.

2.1 The American Dream and Its Disillusionment

The play critiques the American Dream, portraying it as an unattainable illusion for Willy Loman. Willy believes success comes from charm and popularity, not hard work, leading to his downfall. His inability to achieve material prosperity or personal fulfillment exposes the Dream’s emptiness. The PDF versions of the play highlight how Willy’s pursuit of wealth and status blinds him to reality, causing his tragic failure. This theme resonates universally, exploring middle-class anxiety and the gap between societal expectations and individual achievements, making Death of a Salesman a powerful commentary on the American experience.

2.2 Loss of Identity and Personal Struggles

The play delves into the loss of identity and personal struggles, particularly through Willy Loman’s internal conflict. Willy’s inability to accept his declining career and aging body leads to a fragmented sense of self. His delusions of success and past glories mask his failure, creating a disconnect from reality. Biff, his son, also grapples with identity, disillusioned by his father’s false promises of prosperity. The PDF versions of the play highlight how these struggles reflect societal pressures and the breakdown of familial relationships, emphasizing the tragic consequences of chasing unattainable goals and the inability to adapt to change.

2.3 The Conflict Between Reality and Illusion

The play vividly portrays the conflict between reality and illusion through Willy Loman’s delusional perception of his life. Willy constantly escapes into fantasies of past successes and exaggerated promises for his sons’ futures, blurring the line between truth and imagination. His refusal to accept his own failures and the bleak reality of his circumstances leads to a tragic disintegration of his mental state. The PDF versions of the play emphasize how Willy’s inability to confront reality alienates him from his family and accelerates his downfall, highlighting the devastating consequences of clinging to illusions over accepting life’s harsh truths.

Key Characters in the Play

Willy Loman is the tragic protagonist, a salesman grappling with identity and illusion. Biff Loman, his son, struggles with purpose and betrayal. Linda Loman provides emotional stability.

3.1 Willy Loman: The Tragic Hero

Willy Loman, the protagonist of Death of a Salesman, is a complex, flawed character whose delusions of success and identity drive the narrative. As an ageing salesman, Willy clings to the belief that popularity and charm are the keys to prosperity, despite his failing career. His inability to confront reality and adapt to change leads to a tragic downfall, evoking both pity and understanding. Willy’s struggle to reconcile his illusions with the harsh realities of his life makes him a relatable and poignant figure, emblematic of the American Dream’s unattainability for the common man.

3.2 Biff Loman: The Troubled Son

Biff Loman, Willy’s eldest son, is a deeply conflicted character struggling with identity and purpose. Once a promising high school athlete, Biff’s life unraveled after discovering his father’s infidelity, shattering his idolization of Willy. His inability to find meaningful work or direction reflects his inner turmoil and disillusionment. Biff’s journey is marked by a desire to escape the false ideals instilled by Willy, seeking authenticity and self-acceptance. His fractious relationship with Willy highlights the emotional toll of unmet expectations and the clash between illusion and reality, making Biff a poignant symbol of lost potential and the search for truth.

3.3 Linda Loman: The Voice of Reason

Linda Loman serves as the emotional anchor of the family, providing stability amidst chaos. Her unwavering loyalty to Willy and her sons, Biff and Happy, underscores her role as a mediator and caregiver. Linda’s practical nature contrasts sharply with Willy’s illusions, as she tries to ground him in reality while supporting his fragile ego. Her interactions reveal a deep understanding of Willy’s struggles, showcasing her compassion and strength. Despite the family’s financial hardships, Linda remains a source of comfort and truth, often voicing the harsh realities that others evade, making her a pivotal figure in the play’s emotional landscape.

Availability of “Death of a Salesman” in PDF Format

Death of a Salesman is widely available in PDF format, with editions downloadable from sources like the Internet Archive. The 1949 and 2009 versions are popular choices, offering free access to the full text of Arthur Miller’s classic play in English.

4.1 Sources for Downloading the PDF

The PDF version of Death of a Salesman is available for download from various sources. The Internet Archive offers multiple editions, including a 2009 version with an introduction by Christopher Bigsby. Additionally, a complete PDF of the play can be accessed from Ranjiths Pegasus, providing the full text for free. Other platforms, such as online libraries and educational websites, also host downloadable versions of the play. These sources ensure easy access to Arthur Miller’s timeless masterpiece for readers worldwide.

4.2 Editions and Publications

Multiple editions of Death of a Salesman in PDF format are available, catering to different reader preferences. The 1949 original edition and the 2009 edition, featuring an introduction by Christopher Bigsby, are widely popular. Some versions include annotations, scholarly insights, and historical context, enhancing the reader’s understanding. The play is also published in collections of Miller’s works, offering a broader perspective on his literary contributions. These editions ensure that readers can engage with the text in various formats, making the classic play accessible to a diverse audience.

Theatrical and Historical Significance

Death of a Salesman is a masterpiece of American theater, blending realism and expressionism. It explores middle-class struggles and the illusion of the American Dream, leaving a lasting impact on theatrical history and literary analysis.

5.1 Impact on American Theater

Death of a Salesman revolutionized American theater by blending realism with expressionism, offering a raw portrayal of middle-class life. Its exploration of the American Dream’s illusion and the struggles of ordinary individuals resonated deeply, influencing playwrights and shaping modern drama. The play’s critical acclaim and enduring popularity solidified its place as a cornerstone of American literary and theatrical history, continuing to inspire adaptations and analyses. Its impact remains profound, reflecting the societal anxieties and personal aspirations of its time while maintaining relevance today.

5.2 Critical Reception and Analysis

Death of a Salesman received widespread critical acclaim for its profound exploration of the American Dream and its critique of societal expectations. Critics praised Miller’s ability to blend realism with expressionism, creating a deeply emotional and thought-provoking narrative. The play’s focus on the struggles of the common man resonated with audiences, earning it a reputation as a masterpiece of 20th-century theater. Its exploration of themes such as identity, illusion, and personal failure has led to extensive analysis, solidifying its place as a cornerstone of American literary and dramatic tradition. The play’s enduring relevance continues to inspire scholarly and theatrical interpretations.

Death of a Salesman remains a profound exploration of the American Dream’s illusion and its impact on individuals. Through Willy Loman’s tragic journey, Arthur Miller critiques societal pressures and the pursuit of material success. The play’s enduring relevance is evident in its continued adaptation and analysis. Available in PDF format, it offers readers a convenient way to engage with this masterpiece. Its themes of identity, illusion, and personal struggle continue to resonate, making it a cornerstone of modern theater and literature. The play’s influence endures, ensuring its place in cultural and academic discourse for generations to come.

kings 75 litre fridge manual

The Kings 75 Litre Fridge is a portable, dual-zone appliance designed for outdoor enthusiasts, offering efficient cooling with digital controls and a spacious interior for extended trips․

1․1 Overview of the Product

The Kings 75 Litre Fridge is a portable, dual-zone refrigerator designed for outdoor use, offering 75 litres of storage․ It features digital controls, a temperature range of -18°C to 10°C, and operates on 12/24V DC power․ Its lightweight, compact design with a reversible lid makes it ideal for camping and remote adventures․

1;2 Target Audience and Use Cases

The Kings 75 Litre Fridge is ideal for outdoor enthusiasts, campers, and 4WD adventurers․ Its portability and dual-zone design make it perfect for keeping food and drinks cold during extended trips, boating, or remote adventures where reliable refrigeration is essential․

Key Features of the Fridge

Experience the Kings 75 Litre Fridge, featuring a spacious dual-zone design, digital controls, and a temperature range from -18°C to 10°C, perfect for portable refrigeration needs․

2․1 75-Litre Capacity and Portability

The Kings 75 Litre Fridge offers ample storage for up to 113 cans, making it ideal for extended trips․ Its compact, lightweight design ensures easy portability, perfect for camping, 4WD adventures, or outdoor events, providing reliable refrigeration on the go․

2․2 Dual-Zone Design and Versatility

The Kings 75 Litre Fridge features a dual-zone design, allowing each compartment to function independently as a fridge or freezer․ This versatility enables tailored temperature settings for different storage needs, from keeping drinks cold to freezing meats, making it ideal for varied outdoor and travel requirements․

2․3 Temperature Range and Control

The Kings 75 Litre Fridge offers a wide temperature range, from 10°C down to -18°C, allowing precise control for refrigeration and freezing needs․ Digital controls and an LCD screen enable easy adjustments, ensuring optimal storage conditions for food and beverages in various outdoor settings․

2․4 Power Options and Energy Efficiency

The Kings 75 Litre Fridge operates on 12/24V DC and 220-240V AC power, offering versatility for outdoor and home use․ It features a rated current of 7․0A/3․5A, ensuring energy efficiency․ The fridge includes intelligent battery protection to prevent over-discharge, making it ideal for off-grid adventures while minimizing power consumption․

Safety Precautions

Always read the manual thoroughly before use․ Ensure proper handling and storage to avoid damage or injury․ Keep children away from hot surfaces and moving parts․ Proper ventilation is essential to prevent overheating․ Improper use may lead to risks; follow all guidelines carefully․

3․1 Important Safety Warnings

  • Ensure the appliance is used by children aged 8 and above with adult supervision․
  • Keep the fridge away from flammable materials and ensure proper ventilation․
  • Avoid exposure to extreme temperatures and moisture to prevent damage․
  • Do not modify or tamper with the electrical components․

3․2 Proper Handling and Usage Guidelines

Handle the fridge with care to avoid tilting or dropping․ Use the voltage meter (available on 50L and 65L models) to monitor power levels․ Set temperatures between 10°C and -18°C for optimal performance․ Keep the appliance upright during transport and operation to ensure proper cooling․ Avoid exposure to direct sunlight or heat sources․

Unpacking and Installation

Inspect the fridge for damage upon delivery․ Carefully unpack and ensure all components are included․ Place the fridge on a firm, level surface․ Follow manual guidelines for installation and initial setup to ensure proper function and safety․

4․1 Unpacking the Fridge

Inspect the fridge for damage upon delivery․ Carefully remove packaging materials and ensure all components are included․ Place the fridge on a stable, flat surface․ Refer to the manual for specific unpacking instructions and safety precautions to ensure proper handling and preparation for use․

4․2 Placement and Installation Tips

Place the fridge on a flat, stable surface in a well-ventilated area to ensure proper airflow․ Avoid direct sunlight and moisture․ Ensure the fridge is level for optimal performance․ Connect to a suitable power source (12/24V DC or 240V) and secure it in vehicles to prevent movement during transit․ Follow manual guidelines for installation․

Operating the Fridge

Operate the Kings 75L fridge using digital controls with an LCD screen, set temperatures from -18°C to 10°C, and switch modes effortlessly for optimal cooling performance․

5․1 Control Panel Overview

The control panel features a digital interface with an LCD screen, allowing users to set temperatures between -18°C to 10°C․ It includes buttons for adjusting settings, switching modes, and monitoring voltage․ The panel also provides indicators for eco-mode, alarms, and voltage alerts, ensuring easy monitoring and control of the fridge’s operations․

5․2 Setting Up and Starting the Fridge

Connect the fridge to a 12/24V DC or 240V power source․ Allow it to stand upright for 2 hours before use․ Set the desired temperature using the digital controls and let it cool for 24 hours․ Ensure the lid is sealed properly for optimal performance during initial setup․

5․3 Understanding Indicators and Alarms

The Kings 75L fridge includes power indicators to show it’s operational, temperature alarms that sound if set levels are exceeded, and error codes that light up for troubleshooting issues․ It also has visual and audible alerts for low voltage or system malfunctions․ Always consult the user manual for specific code interpretations and recommended solutions to ensure proper functioning and maintenance․

5․4 Switching Between Fridge and Freezer Modes

To switch modes, use the control panel to select the desired zone and choose “Fridge” or “Freezer” from the menu․ Freezer mode can cool as low as -18°C․ Confirm the setting, and the fridge will adjust accordingly․ Allow a few minutes for the temperature to stabilize after switching modes․

Dual-Zone Functionality

The Kings 75 Litre Fridge features independent zones, allowing precise temperature control for each compartment․ Digital controls and an LCD screen enable easy adjustments, optimizing storage for your needs․

6․1 Managing Each Zone Independently

The Kings 75 Litre Fridge allows independent control of its dual zones, enabling users to set different temperatures for each compartment․ Digital controls and an LCD screen provide precise adjustments, while the reversible lid offers flexibility․ This feature is ideal for storing perishables and frozen items separately, ensuring optimal conditions for both zones efficiently․

6․2 Adjusting Settings for Different Needs

The Kings 75 Litre Fridge offers flexibility with its digital controls, allowing users to adjust temperatures between -18°C and 10°C․ The LCD screen displays settings, enabling easy customization for varying needs, such as freezing meat or chilling drinks․ This feature ensures optimal storage conditions for diverse items, enhancing efficiency and user convenience during trips․

Temperature Control and Management

The Kings 75 Litre Fridge features digital controls and an LCD screen, allowing precise temperature adjustments between -18°C and 10°C․ This ensures optimal cooling and freezing performance for various needs․

7․1 Setting and Adjusting Temperatures

The Kings 75 Litre Fridge allows precise temperature adjustments between -18°C and 10°C using digital controls․ Use the control panel to set desired temperatures for each zone․ Ensure settings align with storage needs, monitoring levels through the LCD display for optimal performance․

7․2 Monitoring Temperature Levels

Monitor temperature levels using the LCD display, which shows real-time readings for each zone․ The 75L model lacks a built-in voltage meter, so rely on the display for accurate temperature tracking․ Regular checks ensure optimal cooling and prevent temperature fluctuations, maintaining food freshness and safety․

7․3 Managing Power Consumption

Monitor and manage power consumption by adjusting temperature settings and using power-saving modes․ The fridge operates on 12/24V DC and 220-240V AC, with energy-efficient compressors․ Use the control panel to optimize settings, ensuring minimal energy use while maintaining desired temperatures․ Regularly check voltage levels to avoid power overload or inefficiency․

Maintaining the Fridge

Regular cleaning, defrosting, and organizing the interior are essential for optimal performance․ Ensure all compartments are dry and free from debris to maintain efficiency and longevity․

8․1 Cleaning and Sanitizing

Regularly clean the fridge with a mild detergent and water․ Dry thoroughly after cleaning to prevent mold․ Sanitize all compartments with a food-safe solution․ Avoid harsh chemicals to protect the interior surfaces and maintain hygiene for optimal performance and longevity․

8․2 Defrosting and Maintenance Tips

Turn off the fridge and unplug it before defrosting․ Use a soft cloth to wipe down surfaces with a mild detergent․ Regularly inspect and clean the seals to ensure a tight fit․ Check the drain for blockages and ensure proper ventilation around the unit for efficient operation and longevity․

8․3 Organizing the Interior

Maximize storage space by using baskets or containers to separate items․ Place frequently accessed goods in easy-to-reach zones․ Utilize the dual-zone feature to dedicate areas for specific needs, keeping perishables and drinks organized․ Ensure proper airflow by avoiding overcrowding and arranging items neatly for optimal cooling efficiency and portability․

Troubleshooting Common Issues

Identify common issues like temperature fluctuations or power malfunctions․ Check voltage levels, ensure proper settings, and inspect drains․ Consult the manual for solutions or contact support if unresolved․

9․1 Diagnosing Common Problems

Diagnosing common issues with the Kings 75L fridge involves checking for temperature fluctuations, power malfunctions, and voltage problems․ Ensure proper settings, inspect drain blockages, and verify power connections․ Refer to the manual for troubleshooting guides or contact support for unresolved problems․

9․2 Solutions for Frequently Encountered Issues

For common issues like temperature fluctuations, check power connections and ensure proper settings․ Reset the fridge if it malfunctions․ Address drain blockages by cleaning the drain․ If problems persist, refer to the manual or contact customer support for assistance or repairs․

9․3 When to Contact Customer Support

Contact customer support if issues persist after troubleshooting, for warranty claims, or when encountering defects․ Reach out for complex repairs or if the fridge malfunctions beyond user adjustment․ Call 1800 883 964 for assistance with the Kings 75 Litre Fridge․

Warranty and Support Information

The Kings 75 Litre Fridge is backed by a comprehensive warranty․ For inquiries or repairs, contact customer support at 1800 883 964 for assistance and guidance․

10․1 Warranty Details and Coverage

The Kings 75 Litre Fridge is backed by a comprehensive warranty, ensuring coverage for parts and labor under specified terms․ Detailed conditions are outlined in the user manual, providing clarity on what is included and for how long; For further assistance, customers can contact support at 1800 883 964․

10․2 Customer Support Contact Information

For inquiries or assistance, customers can contact Adventure Kings support at 1800 883 964․ Additionally, support can be reached through the official website or by referring to the provided contact details in the user manual for efficient resolution of concerns․

10․3 Repair and Service Options

The Kings 75 Litre Fridge repair and service options include authorized centers nationwide․ Contact customer support at 1800 883 964 to arrange repairs․ Warranty coverage typically lasts 12 months, ensuring reliable service for defects․ Always use genuine parts for optimal performance and longevity․

User Tips and Hacks

Maximize the Kings 75 Litre Fridge’s potential by organizing its dual zones efficiently, using energy-saving modes, and ensuring proper airflow for optimal cooling performance during outdoor adventures․

11․1 Optimizing Storage Space

Maximize the 75-litre capacity by using dividers or baskets to separate items․ Arrange food and drinks by size and type, ensuring efficient use of both zones․ Utilize vertical space with stackable containers to keep items organized and easily accessible during your adventures․

11․2 Energy-Saving Practices

To maximize energy efficiency, adjust temperature settings to avoid over-cooling․ Use the economy mode for standard cooling needs and switch to eco-mode for lower power consumption․ Keep the fridge in a shaded area and ensure proper ventilation to reduce energy use․ Monitor battery levels using the built-in voltage meter and avoid frequent door openings to maintain efficiency․

11․3 Using in Different Environments

The Kings 75 Litre Fridge is adaptable for various settings, including camping trips, outdoor events, and home use․ Its portability and dual-zone design make it ideal for cars, campsites, or small spaces․ The digital controls and LCD screen ensure easy operation in any environment, while the 12/24V DC and 240V options provide flexibility for different power sources․

Environmental Considerations

The Kings 75 Litre Fridge supports eco-friendly usage with energy-efficient design and proper disposal guidelines, ensuring minimal environmental impact while maintaining optimal performance․

12․1 Eco-Friendly Usage Tips

To minimize environmental impact, use the Kings 75 Litre Fridge efficiently by monitoring voltage, adjusting temperature settings wisely, and ensuring proper door sealing to reduce energy consumption and prolong performance․

12․2 Proper Disposal Methods

Ensure environmentally responsible disposal by consulting local regulations for refrigeration units․ Properly drain refrigerants and safely remove hazardous materials․ Recycle parts when possible to minimize environmental impact and adhere to eco-friendly practices․

12․3 Energy Efficiency Features

The Kings 75 Litre Fridge incorporates energy-efficient compressors and smart sensors to optimize cooling while minimizing power consumption․ Dual-zone functionality allows independent temperature control, reducing unnecessary energy use․ Low-voltage protection ensures efficient operation on 12/24V DC power, making it ideal for off-grid adventures without excessive battery drain․

The Kings 75 Litre Fridge offers a portable, efficient solution for outdoor enthusiasts, combining dual-zone versatility with energy-saving features for reliable performance in remote locations․

13․1 Summary of Key Features

The Kings 75 Litre Fridge features a 75-litre capacity, dual-zone design, and adjustable temperature controls․ It operates on 12/24V DC and 240V, offering portability and energy efficiency for outdoor use, with digital controls and a durable build for reliable performance in various environments․

13․2 Final Tips for Optimal Use

  • Regularly clean and maintain the fridge to ensure efficiency․
  • Optimize storage space by organizing items neatly․
  • Monitor temperature settings to preserve food quality․
  • Ensure proper ventilation for consistent performance․
  • Use dual-zone functionality to separate fridge and freezer needs․
  • Check power sources and voltage for stable operation․

electrolux ultimate care 800 manual

Welcome to the Electrolux Ultimate Care 800 manual. This guide provides comprehensive instructions for installation, operation, and troubleshooting, ensuring optimal performance and care for your appliance.

Overview of the Electrolux Ultimate Care 800 Appliance

The Electrolux Ultimate Care 800 is a cutting-edge washing machine designed for superior cleaning performance. It features advanced washing and drying capabilities, eco-friendly modes, and special care settings for delicate fabrics. With energy-efficient technology, it ensures minimal water and detergent usage while maintaining excellent results. This appliance is built to handle a variety of laundry needs, making it a versatile choice for modern households.

Importance of Reading the Manual for Optimal Performance

Importance of Reading the Manual for Optimal Performance

Reading the Electrolux Ultimate Care 800 manual is essential for understanding its advanced features and ensuring proper usage. It provides detailed instructions on installation, operation, and troubleshooting, helping you avoid errors and maintain performance. The manual also highlights eco-friendly modes, special care settings, and maintenance tips to prolong the appliance’s lifespan. By following the guidelines, you can maximize efficiency, reduce energy consumption, and enjoy optimal results for all your laundry needs.

Where to Find the Electrolux Ultimate Care 800 Manual

The Electrolux Ultimate Care 800 manual is available on the official Electrolux website. Visit their resource section to download or view the manual online.

Official Electrolux Website and Resources

The Electrolux Ultimate Care 800 manual can be easily accessed through Electrolux’s official website. Simply visit the site, navigate to the support section, and enter your appliance’s model code in the search bar. The platform offers a user-friendly interface to download or view the manual directly. Additionally, the website provides troubleshooting guides, FAQs, and detailed product information to help you make the most of your appliance.

Download Options and Availability

The Electrolux Ultimate Care 800 manual is readily available for download as a PDF file directly from the Electrolux website. Users can easily search for the manual by entering the appliance’s model name or code. The PDF format ensures compatibility with most devices, including smartphones, tablets, and computers, allowing users to access instructions anytime, anywhere.

Additionally, the manual is available in multiple languages, catering to a global audience. For convenience, the download process is straightforward, with clear instructions provided on the website. Ensure to check the official Electrolux portal for the most updated version of the manual.

Key Features of the Electrolux Ultimate Care 800

The Electrolux Ultimate Care 800 offers advanced washing and drying capabilities, eco-friendly modes, and special care settings for delicate fabrics, ensuring optimal performance and energy efficiency.

Advanced Washing and Drying Capabilities

The Electrolux Ultimate Care 800 features multiple washing cycles, including delicate, normal, and heavy-duty options, ensuring precise fabric care. The advanced drying system minimizes moisture retention, preventing damage to clothes. Energy-efficient modes reduce consumption while maintaining performance. Smart sensors automatically detect load size and fabric type, optimizing water and detergent usage. This ensures a thorough cleaning process while preserving fabric integrity and extending garment lifespan. The appliance also includes specialized settings for wool, silk, and other sensitive materials, providing tailored care for every fabric type.

Eco-Friendly Modes and Energy Efficiency

The Electrolux Ultimate Care 800 boasts eco-friendly modes designed to minimize environmental impact. With low water, energy, and detergent consumption, it meets modern standards for sustainable appliance operation. The Eco Mode ensures efficient washing while preserving fabric quality. Smart sensors optimize resource usage, reducing waste and lowering energy bills. This appliance is tailored for eco-conscious users, offering advanced features that balance performance with environmental care, making it a responsible choice for everyday laundry needs.

Special Care Settings for Delicate Fabrics

The Electrolux Ultimate Care 800 offers specialized settings for delicate fabrics, ensuring gentle treatment while maintaining cleanliness. The appliance features a dedicated mode for curtains, linens, and silk, with precise temperature control to prevent damage. Advanced sensors detect fabric type, adjusting wash intensity automatically. This ensures minimal wear and tear, preserving the quality of your delicate items. The special care settings are designed to provide a safe and effective washing experience for sensitive fabrics, giving you peace of mind.

Installation and Setup Guide

Ensure proper installation by following the manual’s step-by-step instructions. Position the appliance on a level surface, connect water and power supplies, and secure all hoses tightly for safe operation.

Step-by-Step Installation Instructions

Begin by unpacking and inspecting the appliance for any damage. Place it on a level, stable surface to ensure balance. Connect the water inlet hoses securely to the machine and water supply, ensuring no leaks. Plug in the power cord, making sure it’s accessible and not pinched. Follow the manual’s alignment guide for proper positioning; Double-check all connections before first use to ensure safety and optimal performance. Regularly inspect hoses and connections to prevent issues over time.

Connecting to Water and Power Supply

Connect the water inlet hoses to the machine and the water supply, ensuring they are securely attached. Use the correct hot and cold water taps as specified in the manual. Plug the power cord into a nearby outlet, ensuring it is easily accessible and not damaged. Check for any leaks around the water connections and verify that the power supply meets the appliance’s voltage requirements. Proper connections ensure safe and efficient operation of your Electrolux Ultimate Care 800 appliance.

Operating the Electrolux Ultimate Care 800

Operate your appliance by selecting the desired washing cycle and temperature via the control panel. Choose eco-mode for energy efficiency or special settings for delicate fabrics.

Understanding the Control Panel and Settings

The control panel of the Electrolux Ultimate Care 800 features an intuitive LCD display and touch controls. It allows you to select from various washing cycles, including eco-mode for energy efficiency. Adjust temperature settings to suit different fabric types, ensuring gentle care for delicate items. The panel also provides options for special care settings, such as reducing microplastic release or enabling steam cleaning. Familiarize yourself with the icons and buttons to customize your laundry process effectively.

Washing Cycles and Temperature Options

The Electrolux Ultimate Care 800 offers multiple washing cycles, including quick wash, delicate, and heavy-duty options. Temperature settings range from cold to hot, ensuring precise care for different fabrics. The eco-mode reduces energy consumption while maintaining performance. Special cycles, like wool or steam cleaning, provide additional flexibility. Adjusting these settings according to fabric type and soil level ensures optimal cleaning while preserving garment quality. Refer to the manual for detailed guidance on selecting the right cycle and temperature for your laundry needs.

Care and Maintenance Tips

Regularly clean filters and detergent drawers. Check for blockages and ensure proper ventilation. Maintain optimal performance and longevity of your Electrolux Ultimate Care 800 appliance.

Regular Cleaning of Filters and Detergent Drawers

Regular cleaning of filters and detergent drawers is essential for maintaining your Electrolux Ultimate Care 800’s performance. Remove and rinse filters with water to eliminate debris. Check for blockages in the detergent drawer and clean it periodically. Proper maintenance ensures efficient washing cycles and prevents odor buildup. Follow the manual’s instructions for disassembling and cleaning these parts. Regular care extends the appliance’s lifespan and ensures optimal functionality.

Checking for Blockages and Ensuring Proper Ventilation

Regularly inspect the appliance for blockages in filters, hoses, and vents to ensure efficient operation. Clean or replace filters as needed to maintain airflow and prevent reduced performance. Proper ventilation in the room and within the appliance is crucial for drying efficiency and preventing mold or mildew buildup. Check the venting system for kinks or obstructions and ensure it is securely connected. Regular checks help maintain optimal functionality and prevent potential issues. Refer to the manual for detailed guidance on ventilation maintenance.

Troubleshooting Common Issues

Identify error codes and follow the manual’s solutions. Check for blockages, clean filters, and ensure proper connections. Resolve issues promptly to maintain performance and extend appliance lifespan;

Identifying Error Codes and Solutions

The manual provides detailed guidance on troubleshooting common issues. Error codes like E11, E12, and E13 indicate specific problems, such as water supply issues or drainage blockages. Each code is accompanied by step-by-step solutions to resolve the issue. For example, E11 suggests checking the water supply, while E12 recommends inspecting the drain filter. Always refer to the manual for accurate diagnoses and solutions to ensure optimal appliance performance and extend its lifespan.

When to Contact Professional Assistance

If you encounter complex issues or persistent error codes that cannot be resolved using the manual’s troubleshooting guide, contact Electrolux’s professional support. This is especially recommended for internal malfunctions, electrical problems, or damage requiring specialized tools. Always prioritize safety and avoid DIY repairs unless explicitly instructed in the manual. Consulting a certified technician ensures proper resolution and maintains your appliance’s warranty. For assistance, reach out to Electrolux’s customer service or visit their official website for support options.

Electrolux Ultimate Care 800 Warranty and Support

Your appliance is backed by a comprehensive warranty covering parts and labor. For support, visit the official Electrolux website or contact their customer service team directly.

Understanding the Warranty Terms and Conditions

The Electrolux Ultimate Care 800 warranty covers parts and labor for a specified period, ensuring protection against defects. Proper installation and maintenance are required to maintain warranty validity. Coverage details vary by region and model, so reviewing the terms in the manual or on the official website is essential. Any unauthorized modifications or misuse may void the warranty. For full details, refer to the documentation provided with your appliance or contact Electrolux customer support.

Contacting Customer Service for Assistance

For any inquiries or issues with your Electrolux Ultimate Care 800, contact customer service via phone at 1-800-265-8352 (U.S.) or 1-800-265-8352 (Canada). Visit the official Electrolux website for live chat or email support. You can also log into your MyElectrolux account for personalized assistance. Ensure you have your appliance’s model number and serial code ready for faster resolution. Customer service is available to address warranty claims, technical support, and maintenance queries, providing expert help to keep your appliance running smoothly.

Environmental Considerations

The Electrolux Ultimate Care 800 features eco-friendly modes, reducing energy and water consumption; Its energy-efficient design minimizes environmental impact while maintaining high performance, promoting sustainable laundry care practices.

Eco-Mode and Energy-Saving Features

The Electrolux Ultimate Care 800 offers eco-friendly modes designed to reduce energy and water consumption. These features ensure efficient laundry cleaning while minimizing environmental impact. The appliance incorporates advanced sensors to optimize resource usage, providing superior results with lower energy expenditure. Eco-mode operation is tailored to balance performance and sustainability, making it an eco-conscious choice for households. By utilizing these energy-saving features, users can contribute to environmental conservation while enjoying high-quality washing and drying performance.

Reducing Water and Detergent Usage

The Electrolux Ultimate Care 800 incorporates advanced sensors to detect load size and fabric type, optimizing water and detergent usage. Low-water wash cycles and precise detergent dosing systems minimize waste while maintaining cleaning efficiency. Eco-mode further enhances resource savings by automatically adjusting settings for energy and water conservation. Regularly following care labels and using eco-mode ensures optimal environmental impact without compromising performance.

The Electrolux Ultimate Care 800 manual ensures optimal use of your appliance, enhancing performance and longevity. By following its guidelines, you achieve efficient, eco-friendly, and superior fabric care.

Maximizing the Lifespan of Your Appliance

Regular maintenance is key to extending the life of your Electrolux Ultimate Care 800. Clean filters and detergent drawers frequently, and ensure proper ventilation to prevent blockages. Avoid overloading the machine, as this can strain the motor and affect performance. Always follow the guidelines in the manual for washing cycles and detergent usage. By adhering to these practices, you can enjoy efficient, reliable operation and maintain your appliance in excellent condition for years to come.

Staying Updated with Firmware and Software

Keep your Electrolux Ultimate Care 800 up-to-date by regularly checking for firmware and software updates. These updates enhance performance, add features, and ensure security. Visit the official Electrolux website or use the MyElectrolux app to download the latest versions. Enable auto-update settings if available to maintain optimal functionality. Always follow the manual’s instructions for updating to avoid potential issues; Staying current ensures your appliance runs smoothly and efficiently, providing the best user experience. Regular checks are essential for long-term reliability and advanced capabilities.

isuzu d max owners manual

Welcome to the Isuzu D-Max Owner’s Manual, your essential guide to understanding and maintaining your vehicle․ This manual provides detailed information to ensure safe and optimal use of your D-Max, covering everything from features to maintenance․ Refer to it regularly to maximize performance and longevity․

Purpose and Importance of the Manual

The Isuzu D-Max Owner’s Manual is designed to provide owners with comprehensive knowledge about their vehicle, ensuring safe and efficient operation․ It serves as a vital resource for understanding features, maintenance requirements, and troubleshooting procedures․ By following the manual, drivers can optimize performance, reduce wear and tear, and prevent potential issues․ The manual also emphasizes safety guidelines and emergency procedures, making it indispensable for both new and experienced owners․ Regularly referencing the manual helps owners make informed decisions, ensuring their D-Max remains reliable and performs at its best for years to come․ Keep it handy for quick access to essential information․

How to Navigate the Manual

Navigating the Isuzu D-Max Owner’s Manual is straightforward, with a clear structure designed to help you find information quickly․ The manual begins with a table of contents, outlining key sections such as vehicle specifications, driving tips, and maintenance schedules․ Each section is divided into subsections for easy access, and important information is highlighted with bold text or warning symbols․ Use the index at the end to locate specific topics by keyword․ Digital versions of the manual often include a search function, allowing you to type in keywords for instant results․ Refer to the symbols and abbreviations guide to understand visual cues throughout the manual․ By familiarizing yourself with this structure, you can efficiently locate the information you need to operate and maintain your D-Max effectively․

Key Sections of the Isuzu D-Max Owner’s Manual

The Isuzu D-Max Owner’s Manual features key sections on vehicle specifications, driving tips, model-specific details, safety features, maintenance schedules, and troubleshooting common issues for optimal ownership․

Vehicle Specifications and Features

The Isuzu D-Max Owner’s Manual provides detailed information about the vehicle’s specifications and features․ It outlines engine options, such as the 4JJ1 turbo-diesel, transmission choices (6-speed manual or automatic), and drivetrain configurations (2WD or 4×4)․ The manual highlights suspension systems designed for durability and comfort, along with fuel tank capacity and payload/towing limits․ It also covers advanced features like touchscreen infotainment, Bluetooth connectivity, and driver assistance technologies․ Understanding these details helps owners optimize performance, whether for work or family use․ The manual ensures drivers are aware of their vehicle’s capabilities and how to utilize them effectively․

Driving Tips and Guidelines

The Isuzu D-Max Owner’s Manual offers valuable driving tips to enhance your experience․ It emphasizes smooth acceleration and consistent speeds for better fuel efficiency․ For optimal performance, drivers are advised to avoid excessive idling and use the correct gear for towing or hauling․ The manual also provides guidelines for urban and off-road driving, recommending adjustments to speed and throttle control․ Regular checks of tire pressure and suspension alignment are suggested to maintain stability․ Additionally, it reminds drivers to familiarize themselves with the vehicle’s advanced features, such as driver assistance systems, to ensure safe and confident driving in various conditions․ Always refer to the manual for specific recommendations tailored to your D-Max model․

Model-Specific Information (2012-2021)

The Isuzu D-Max Owner’s Manual provides detailed model-specific information for vehicles manufactured between 2012 and 2021․ Each model year offers unique features, such as the 4JJ1 engine introduced in 2012 for improved power and efficiency․ Later models, including the 2017 and 2021 editions, feature enhanced suspension systems and advanced driver assistance technologies․ The manual highlights specific updates like the 2020 facelift, which included a redesigned interior and improved safety features․ For example, the 2021 model boasts a more powerful engine and refined towing capabilities․ Owners can refer to the manual for year-specific guidance on operation, maintenance, and troubleshooting, ensuring optimal performance for their particular D-Max model․

Safety Features and Precautions

The Isuzu D-Max Owner’s Manual emphasizes understanding warning lights and symbols, ensuring driver awareness and prompt action․ It outlines emergency procedures, such as braking and towing protocols, to enhance safety․

Understanding Warning Lights and Symbols

The Isuzu D-Max Owner’s Manual provides a detailed guide to understanding warning lights and symbols․ These indicators are crucial for monitoring your vehicle’s health and safety․ Common lights include the check engine light, oil pressure warning, and battery alert․ Each symbol is explained with its meaning and recommended actions․ Familiarize yourself with these indicators to address issues promptly․ For example, the check engine light may signal engine problems, while the oil symbol alerts you to low oil levels․ Refer to the manual for a comprehensive list of symbols and their implications․ Understanding these warnings ensures safe driving and prevents potential damage to your vehicle․

Emergency Procedures and Safety Guidelines

Understanding emergency procedures and safety guidelines is vital for safe operation of your Isuzu D-Max․ In case of an emergency, refer to the manual for step-by-step instructions․ Key procedures include proper braking techniques, handling a breakdown, and towing safely․ Always wear seatbelts and ensure all passengers do the same․ If a collision occurs, follow the outlined accident response plan․ Regularly check safety features like airbags and ABS to ensure they function correctly․ Familiarize yourself with the location of emergency tools like the jack and spare tire․ Adhere to these guidelines to protect yourself and others on the road․ Safety should always be your top priority․

Maintenance and Servicing

Regular maintenance is crucial for the longevity and performance of your Isuzu D-Max․ Schedule services as outlined in the manual to ensure optimal functionality․ Always use genuine parts;

Scheduled Maintenance Intervals

Regular servicing is essential to maintain your Isuzu D-Max’s performance and durability․ The manual outlines specific intervals for oil changes, tire rotations, and filter replacements․ Typically, oil changes are recommended every 7,500 to 10,000 miles, while tire rotations should occur every 5,000 to 8,000 miles․ Brake pads and fluids should be inspected at 15,000-mile intervals․ Adhering to these schedules ensures optimal engine health and prevents premature wear․ Always refer to the manual for exact intervals tailored to your model year and usage conditions․ Proper maintenance not only enhances reliability but also safeguards your warranty and maximizes the vehicle’s lifespan․

DIY Maintenance Tips

Maintaining your Isuzu D-Max can be straightforward with simple DIY tasks․ Regularly check tire pressure to ensure proper levels, as specified in your manual․ Replace the air filter every 15,000 miles to improve fuel efficiency and performance․ Inspect the battery terminals for corrosion and clean them if necessary․ Check fluid levels, including oil, coolant, and brake fluid, and top them up as needed․ Additionally, examine belts and hoses for signs of wear and replace them before they fail․ These simple checks can help prevent major issues and keep your vehicle running smoothly․ Always refer to the manual for specific guidelines and recommendations․

Troubleshooting Common Issues

Identify and address common problems with your Isuzu D-Max by consulting the manual․ Check warning lights, engine performance, and transmission issues․ Refer to the manual for solutions and guidelines to resolve issues effectively and safely․

Identifying and Solving Common Problems

Consult the Isuzu D-Max Owner’s Manual to identify and resolve common issues․ Check warning lights and symbols for potential problems․ Address engine performance concerns, transmission issues, or unusual noises promptly․ Regular maintenance, such as oil changes and fluid checks, can prevent many problems․ For issues like faulty gear shifts or electronic system malfunctions, refer to the troubleshooting guide․ DIY maintenance tips are provided for minor fixes, while complex issues require professional assistance․ Always follow safety guidelines when attempting repairs․ Keep the manual handy for quick reference to ensure your D-Max runs smoothly and efficiently․

When to Contact a Professional

If you encounter issues beyond basic troubleshooting, such as persistent warning lights, complex mechanical failures, or advanced electronic system malfunctions, consult a professional․ Experts can diagnose problems like faulty transmissions, engine damage, or electrical system issues․ For warranty-related repairs or model-specific concerns, contact an authorized Isuzu service center․ Always prioritize safety; if a problem affects vehicle stability or performance, seek immediate professional assistance․ DIY repairs are best for minor maintenance, but critical issues require specialized tools and expertise․ Regular servicing by professionals ensures optimal performance and prevents potential breakdowns․ Keep your D-Max in top condition by knowing when to seek expert help․

The Isuzu D-Max Owner’s Manual is an invaluable resource for owners, providing comprehensive guidance to ensure safe, efficient, and enjoyable driving․ By understanding the manual, drivers can optimize vehicle performance, maintain reliability, and address issues promptly․ Regular maintenance, adherence to safety guidelines, and timely professional assistance are key to extending the lifespan of your D-Max․ Whether for daily commuting or heavy-duty tasks, this manual empowers you to make informed decisions․ Keep it handy for quick reference and enjoy the versatility and durability that the Isuzu D-Max is known for․ Happy driving!

city of joondalup waste guide 2022/23

The City of Joondalup Waste Guide 2022/23 provides essential information on waste management, including bin schedules, recycling tips, and disposal options for bulk and hazardous materials.

Overview of the Waste Guide

The City of Joondalup Waste Guide 2022/23 is a comprehensive resource designed to help residents manage waste efficiently and sustainably. Available digitally, it reduces paper usage by 1.5 tonnes annually.

The guide includes detailed bin collection schedules, recycling tips, and information on bulk and hazardous waste disposal. It also features an A-Z waste disposal guide, making it easier for residents to understand how to handle various waste types responsibly.

By providing clear instructions and accessible resources, the guide aims to promote environmental sustainability and encourage a cleaner, greener community. It is a key tool for residents to adopt eco-friendly practices and contribute to waste reduction efforts in Joondalup.

Importance of Sustainable Waste Management

Sustainable waste management is crucial for protecting the environment and preserving natural resources for future generations. Proper disposal methods reduce pollution, protect ecosystems, and mitigate climate change impacts. By adopting eco-friendly practices, residents can significantly lower their environmental footprint and contribute to a healthier community.

The City of Joondalup Waste Guide 2022/23 emphasizes the importance of responsible waste handling, encouraging residents to recycle, compost, and correctly dispose of hazardous materials. This approach not only conserves landfill space but also promotes resource recovery, aligning with broader sustainability goals. Educating the community on these practices empowers individuals to make informed choices, fostering a cleaner and greener Joondalup.

Waste Collection Schedules

The City of Joondalup provides detailed schedules for waste collection, including weekly general rubbish and fortnightly recycling and green waste collections, accessible online for resident convenience.

General Rubbish Bin Collection

The City of Joondalup collects general rubbish bins weekly, ensuring efficient waste management for residents. The service operates on a fixed schedule, with bins collected every week without interruption. Residents can check their collection day using the City’s online lookup tool, which provides specific dates based on their address. Proper bin placement and adherence to guidelines are essential for smooth collection. Contaminated or oversized items may not be collected, so residents are encouraged to follow the City’s waste disposal guidelines to maintain service efficiency and support environmental sustainability efforts. This service is a cornerstone of the City’s waste management strategy.

The City of Joondalup offers weekly general rubbish bin collections, ensuring consistent waste management. Residents can verify their collection schedule via the City’s online tool. Proper bin placement and adherence to guidelines are crucial for efficient service. Contaminated or oversized items may not be collected, so residents are advised to follow disposal guidelines. This service supports the City’s commitment to sustainability and maintaining a clean community. Regular collections help reduce waste buildup and promote a healthier environment. By participating, residents contribute to the City’s goal of efficient and environmentally responsible waste management.

Recycling and Green Waste Bin Collection

The City of Joondalup collects recycling and green waste bins on a fortnightly basis, alternating between the two. Recycling bins (yellow-lidded) and green waste bins (green-lidded) are collected on separate weeks. Residents can check the City’s website for specific collection schedules tailored to their address. Green waste, including garden trimmings and branches, is processed at the Wangara Greens Recycling Facility and transformed into mulch for local gardens. This initiative supports sustainability by reducing landfill and promoting eco-friendly practices. Residents are encouraged to ensure only acceptable materials are placed in their bins to maintain the efficiency and environmental benefits of the program.

Bulk and Hazardous Waste Disposal

The City of Joondalup offers bulk waste disposal options, including skip bin bookings and special collections for mattresses and white goods. Hazardous waste, such as batteries and chemicals, must be taken to designated facilities for safe disposal.

Bulk Waste Disposal Options

The City of Joondalup provides convenient options for bulk waste disposal. Residents can book skip bins for large household items or arrange special collections for mattresses and white goods. Additionally, the city offers an annual bulk verge collection service, allowing residents to place items on their verge for pickup. To ensure proper disposal, residents are encouraged to check the city’s website for schedules and guidelines. The city also offers tip passes for disposing of bulk waste at the Tamala Park landfill, with some conditions applying. These services help residents manage bulky items responsibly and efficiently, promoting a cleaner community.

Hazardous Waste Disposal Guidelines

The City of Joondalup provides clear guidelines for disposing of hazardous waste to protect the environment and public health. Residents are encouraged to participate in designated hazardous waste drop-off events, where items like batteries, chemicals, and e-waste are safely collected. The city also offers year-round options for disposing of hazardous materials at approved facilities. It’s important to check the city’s website for specific guidelines on acceptable items and drop-off locations. Proper disposal of hazardous waste helps prevent contamination and ensures a safer community. Always follow the city’s instructions to manage these materials responsibly and sustainably.

A-Z Waste Disposal Guide

The A-Z Waste Disposal Guide is a key resource for residents, providing detailed instructions on managing various household waste items responsibly and sustainably.

Key Features of the A-Z Guide

The A-Z Waste Disposal Guide offers a comprehensive listing of household items, detailing proper disposal methods. It covers everyday items like plastics and glass to specialized materials such as electronics and hazardous waste. The guide provides clear instructions on recycling, drop-off locations, and tips for reducing waste. Residents can easily search for specific items, ensuring responsible disposal. This resource promotes sustainability by encouraging correct waste management practices. The guide is accessible online, making it convenient for residents to access essential information. It serves as a valuable tool for fostering a cleaner, greener community in the City of Joondalup.

Common Household Waste Disposal Tips

Properly separating waste into general rubbish, recycling, and green waste bins is essential for effective disposal. Always rinse recyclable items like plastics, glass, and paper before placing them in the recycling bin. Avoid bagging recyclables, as this can hinder the sorting process. For hazardous waste, such as batteries or chemicals, use designated drop-off points to prevent environmental harm. Check packaging labels for disposal instructions and participate in bulk waste collection events for large items. Utilize mulch vouchers for green waste, turning organic material into nutrient-rich soil. These practices help reduce landfill use and promote a sustainable community. Stay informed through the City’s resources for eco-friendly disposal methods.

Environmental Initiatives and Sustainability

The City of Joondalup promotes sustainability through waste reduction programs, paperless waste guides, and green waste recycling. These initiatives support eco-friendly practices and a greener community.

City of Joondalup’s Waste Reduction Programs

The City of Joondalup implements waste reduction programs to promote sustainability. These include digital waste guides, mulch vouchers, and green waste recycling. Residents can access resources online, reducing paper use. Green waste is collected weekly and converted into mulch for community use. The city also offers workshops and awareness campaigns to educate residents on efficient waste disposal. These initiatives aim to minimize landfill waste and encourage eco-friendly practices. By engaging the community, the city fosters a culture of sustainability, ensuring a cleaner environment for future generations. These programs highlight Joondalup’s commitment to environmental stewardship and responsible waste management practices.

Green Waste Management and Mulch Vouchers

The City of Joondalup offers green waste management services, collecting organic materials weekly. Residents can dispose of garden waste, which is processed into mulch for community use. Mulch vouchers are available annually, enabling residents to collect free mulch from designated facilities. This initiative promotes sustainability by reducing landfill waste and encouraging garden recycling. Vouchers are distributed digitally via the City’s website, aligning with its paperless goals. Green waste collection helps maintain community gardens and parks while fostering eco-friendly practices. This program is part of Joondalup’s broader efforts to support environmental conservation and resident engagement in sustainable living. It’s a key step toward a greener future.

Downloadable Resources

The City of Joondalup Waste Guide 2022/23, mulch vouchers, and green waste tipping options are available for download on the City’s website, saving paper and enhancing convenience.

Accessing the Digital Waste Guide

The City of Joondalup Waste Guide 2022/23 is now available digitally on the City’s website, offering residents convenient access to essential waste management information. By downloading the guide, residents can reduce paper usage and stay informed about bin collection schedules, recycling tips, and bulk waste disposal options. The digital format ensures easy navigation and quick access to key resources. Additionally, residents can download mulch vouchers and greens tipping options directly from the website, further enhancing convenience. This initiative aligns with the City’s commitment to environmental sustainability and reducing paper waste, making it easier for residents to adopt eco-friendly practices. The digital guide is user-friendly and accessible anytime, promoting a cleaner and greener community.

Mulch Vouchers and Greens Tipping Options

The City of Joondalup offers mulch vouchers and greens tipping options to residents, promoting sustainable garden waste management. These vouchers, available for download on the City’s website, enable residents to dispose of green waste responsibly and obtain mulch for their gardens. The mulch is produced from green waste collected and processed at the Wangara Greens Recycling Facility, helping to retain soil moisture and enrich garden soil. By utilizing these resources, residents support eco-friendly practices and contribute to a greener community. This initiative also aligns with the City’s goal to reduce paper usage by providing digital access to these vouchers.

Community Engagement and Education

The City of Joondalup promotes workshops and awareness campaigns to educate residents on sustainable waste practices, supported by libraries and Customer Care assistance for resource access.

Workshops and Awareness Campaigns

The City of Joondalup conducts regular workshops and campaigns to educate residents on proper waste disposal and sustainability. These initiatives aim to empower the community with knowledge on reducing waste, recycling effectively, and managing hazardous materials safely. By engaging residents through interactive sessions and informative materials, the city fosters a culture of environmental responsibility. These efforts are part of broader strategies to achieve long-term sustainability goals and ensure a cleaner, greener future for all.

Support from City Libraries and Customer Care

The City of Joondalup’s libraries and Customer Care team play a vital role in supporting residents with waste management inquiries. Libraries provide access to digital resources, including the waste guide and mulch vouchers, while the Customer Care team assists with downloading these materials. Residents can visit the administration building or contact the team for guidance on waste disposal, bin schedules, and voucher access. This support ensures everyone can navigate the waste management system efficiently, fostering a community-wide commitment to sustainability and proper waste practices.

The City of Joondalup Waste Guide 2022/23 effectively promotes sustainable waste practices, encouraging a cleaner, greener community through proper waste management and environmental conservation efforts.

Benefits of the 2022/23 Waste Guide

The 2022/23 Waste Guide offers numerous benefits, including convenient access to essential waste management information, promoting sustainability and resource conservation. It provides clear schedules for bin collections, tips for recycling, and guidelines for disposing of bulk and hazardous waste. By going digital, the guide reduces paper usage, saving 1.5 tonnes annually. Residents can easily download mulch vouchers and access green waste management options. The guide also educates the community on proper waste practices, fostering a cleaner and greener environment. These initiatives align with the City’s commitment to environmental sustainability, ensuring efficient and responsible waste management for all residents.

Encouraging a Cleaner and Greener Community

The City of Joondalup Waste Guide 2022/23 plays a vital role in fostering a cleaner and greener community by promoting sustainable practices. By providing detailed information on waste management, including recycling, green waste disposal, and bulk collections, residents are empowered to make environmentally conscious decisions. The guide’s digital accessibility ensures convenience, reducing paper waste and encouraging wider participation. Educational content and initiatives like mulch vouchers and green waste management programs help residents adopt eco-friendly habits. These efforts contribute to a collective goal of reducing the community’s environmental footprint, creating a cleaner, greener, and more sustainable future for all residents of Joondalup.

standard bolt torque chart pdf

1.1 What is a Bolt Torque Chart?

A standard bolt torque chart is a reference guide providing recommended torque values for bolts, ensuring proper tightening and maintaining structural integrity across engineering applications.

1.1 What is a Bolt Torque Chart?

A bolt torque chart is a standardized guide providing maximum torque values for bolts to ensure safe and efficient tightening. It helps prevent over-tightening, which can damage threads or strip bolts. Based on bolt size, grade, and type, these charts offer precise torque specifications, such as 7.0 Nm for M5 bolts or 9 Nm for M16 bolts. They are essential for maintaining structural integrity and preventing failure in engineering applications.

1.2 Importance of Torque Charts in Engineering

Torque charts are critical in engineering for ensuring bolts are tightened to safe and precise levels. They prevent over-tightening, which can cause thread damage or bolt failure, and under-tightening, leading to loose connections. By adhering to these charts, engineers maintain structural integrity, prevent premature wear, and ensure reliability in machinery and structures. Proper torque application also enhances safety and extends the lifespan of mechanical systems.

Factors Influencing Bolt Torque

Bolt torque is influenced by material strength, bolt size, thread type, and surface finish. These factors determine the optimal tightening torque for safe and reliable connections.

2.1 Material Strength and Grade

Material strength and bolt grade significantly impact torque values. Higher-grade bolts, such as Grade 8 or 10.9, require greater torque due to their increased strength. The material’s yield strength determines the maximum safe torque to avoid bolt failure. For example, stainless steel bolts may require less torque than carbon steel bolts of the same size. Proper torque ensures the bolt is tightened to its optimal clamping force without exceeding material limits, preventing damage or loosening. Always consult charts for specific material grades to ensure accuracy and safety in applications.

2.2 Thread Type and Size

Thread type and size play a crucial role in determining bolt torque. Metric and imperial thread standards require different torque values. Coarse-threaded bolts typically need less torque than fine-threaded ones. Bolt size, such as M5 or M16, directly affects torque specifications. For example, a 3/8″ bolt may require 15-24 ft-lbs, while a 7/16″ bolt might need 17-27 ft-lbs. Always refer to charts for specific thread configurations to ensure proper tightening and avoid damage or loosening over time.

2.3 Lubrication and Surface Finish

Lubrication significantly impacts bolt torque values, as it reduces friction between threads. Dry bolts require higher torque to achieve the same clamp load as lubricated ones. Surface finish also plays a role, with rough surfaces requiring more torque. Charts often provide adjustments for lubrication, such as increasing torque by 30% for dry bolts. Proper lubrication ensures consistent tightening and prevents overtightening or under-tightening, enhancing reliability and safety in engineering applications.

How to Calculate Bolt Torque

Bolt torque calculation involves stretching the bolt to create a clamp load. Torque values depend on the bolt’s material, thread size, and lubrication, ensuring optimal tightness and safety.

3.1 Torque Calculation Methods

Bolt torque calculation involves determining the necessary force to achieve the desired clamp load. Methods include using torque coefficient formulas, bolt diameter, and thread engagement. Material strength, lubrication, and friction factors significantly influence calculations. The formula ( T = K imes D imes P ) is commonly applied, where ( T ) is torque, ( K ) is the torque coefficient, ( D ) is bolt diameter, and ( P ) is the desired preload. Lubrication reduces friction, lowering torque requirements.

3.2 Adjustments for Lubrication and Friction

Adjusting bolt torque for lubrication and friction involves understanding the torque coefficient (K), which accounts for friction between threads and the bolt head. Lubrication reduces torque requirements by lowering friction, with typical reductions ranging from 20% to 30% for lubricated bolts compared to dry ones. The type of lubricant and material grade influence the torque coefficient, with higher grade materials potentially having different friction properties. Thread type and size, such as coarse versus fine threads, also affect friction, as larger bolts may have more surface area impacting lubrication efficiency. Additionally, surface finish plays a role, as rougher surfaces increase friction, counteracting lubrication effects. Engineers use these factors to adjust torque values accurately, ensuring bolts are securely fastened without exceeding yield strength, preventing failure or damage.

Standard Bolt Torque Charts

Standard bolt torque charts provide reference guides for recommended torque values, covering metric and imperial specifications. They account for factors like material grade, size, and lubrication to ensure proper tightening.

4.1 Metric Bolt Torque Specifications

Metric bolt torque specifications outline recommended torque values in Newton-meters (Nm) for bolts of various sizes and grades. These values are typically provided in charts, distinguishing between dry and lubricated conditions. For dry bolts, torque values are often increased by approximately 30%. Common examples include M16 bolts with a maximum torque of 9 Nm and M6 bolts with a maximum torque of 2 Nm. These specifications ensure proper tightening and prevent over-tightening, which can lead to bolt failure or damage to the material.

4.2 Imperial Bolt Torque Specifications

Imperial bolt torque specifications provide recommended torque values in pound-feet (lb-ft) or pound-inches (lb-in) for bolts of various sizes and grades. These specifications are crucial for ensuring proper tightening in imperial systems. For example, a 3/8″ bolt might have a torque range of 15-24 lb-ft, while a 7/16″ bolt could range from 17-27 lb-ft. These values help prevent over-tightening and ensure structural safety and reliability in engineering applications.

Tools and Instruments for Measuring Bolt Torque

Essential tools include torque wrenches and digital torque meters, ensuring accurate measurements. These instruments are calibrated to industry standards like ISO9001, providing reliable torque readings for precise bolt tightening.

5.1 Torque Wrenches

Torque wrenches are essential tools for accurately measuring and applying bolt torque. They are widely used in engineering and manufacturing to ensure precise tightening. These wrenches often feature adjustable settings and can operate within specific torque ranges, such as 3-15 Nm. High-quality torque wrenches are calibrated to industry standards like ISO9001, ensuring reliability. They are indispensable for achieving the correct torque values, as specified in standard bolt torque charts, across various applications.

5.2 Digital Torque Meters

Digital torque meters are advanced tools for precise torque measurement, offering high accuracy and reliability. They are often used in industries requiring stringent quality control. These meters can store data and provide real-time monitoring, ensuring compliance with standard bolt torque charts. Many models are calibrated to international standards like NIST and MIL-STD-45662A, making them ideal for applications where exact torque values are critical for safety and performance.

The Importance of Correct Bolt Tightening

Correct bolt tightening ensures structural integrity and prevents bolt failure. Proper torque application, guided by standard charts, is crucial for safety and optimal performance in engineering applications.

6.1 Preventing Bolt Failure

Using standard bolt torque charts ensures bolts are tightened within safe limits, preventing overloading and failure. Proper torque application avoids thread stripping and excessive stress, maximizing reliability. Over-tightening can lead to bolt fracture, while under-tightening risks loosening. charts provide maximum safe torque values, helping maintain structural integrity and prevent catastrophic failures in critical applications.

6.2 Ensuring Structural Integrity

Proper bolt torque application is crucial for ensuring the structural integrity of assemblies. Using standard torque charts helps in applying the right amount of torque, preventing over-tightening, which can lead to material deformation, and under-tightening, which may result in loose connections over time. Accurate torque ensures that all components are securely fastened, maintaining the overall strength and reliability of the structure. This is especially critical in applications where safety is paramount, as failure can lead to catastrophic consequences. By adhering to recommended torque specifications, engineers can ensure that their designs meet safety margins and performance requirements, guaranteeing the longevity and stability of the structure.

Torque-to-Yield Bolts: A Modern Innovation

Torque-to-yield bolts represent a modern advancement in fastening technology, designed to stretch during tightening, creating precise clamp loads and reducing variability in high-performance applications like engines.

7.1 Definition and Application

Torque-to-yield bolts are designed to stretch elastically during tightening, ensuring precise clamp loads. Unlike traditional bolts, they are intentionally yielded, optimizing the connection’s strength and reliability. Widely used in high-performance applications like engines and heavy machinery, these bolts minimize variability in clamping force, enhancing structural integrity. Their unique behavior allows for consistent tension, making them ideal for high-stress environments where precise control over fastening is critical to performance and safety.

7.2 Benefits Over Traditional Bolts

Torque-to-yield bolts offer superior clamping force consistency and reduced weight compared to traditional bolts. They provide optimal performance in high-stress environments, minimizing the risk of failure. By stretching elastically, they ensure even load distribution, enhancing reliability. Their unique design allows for precise control over tightening, reducing variability and improving overall structural integrity. This makes them ideal for critical applications where traditional bolts may fall short in performance and durability.

Torque Wrench Calibration and Maintenance

Regular maintenance of torque wrenches is crucial for optimal performance. This includes periodic recalibration, checking for wear, and ensuring proper lubrication and storage to maintain accuracy and longevity.

8.1 Why Calibration is Essential

Calibration ensures torque wrenches deliver accurate measurements, preventing under or over-tightening, which can compromise safety and structural integrity. Regular calibration maintains tool precision, adheres to industry standards, and prolongs equipment lifespan. Improper calibration can lead to bolt failure or damage. Torque tools should be recalibrated at recommended intervals or after heavy use to ensure reliability and compliance with specifications. This step is critical for maintaining trust in torque measurements and ensuring operational safety.

8.2 Steps for Proper Maintenance

Proper maintenance of torque tools involves regular calibration, storage, and lubrication. Check torque ranges before use, ensure tools are clean, and follow manufacturer guidelines. Lubricate moving parts periodically and store tools in dry environments. Use calibration certificates to verify accuracy and replace worn components. Adhere to industry standards like ISO9001 and NIST for compliance. Regular maintenance ensures tools remain precise and reliable, preventing errors in bolt torque applications. Always refer to the manufacturer’s instructions for specific care routines.

Industry Standards for Bolt Torque

Industry standards like ASME, ASTM, and ISO provide guidelines for bolt torque, ensuring safety, consistency, and compliance across engineering applications globally.

9;1 ASME and ASTM Standards

ASME and ASTM standards provide critical guidelines for bolt torque, ensuring safety and consistency. ASME B18.2.6 covers dimensional standards for heavy hex structural bolts, while ASTM focuses on material testing. These standards help prevent bolt failure by specifying torque limits and material strength, ensuring structural integrity. They also reference torque charts for materials like stainless steel, guiding engineers in selecting appropriate fasteners and tightening procedures.

9.2 International Standards and Compliance

International standards like ISO and DIN provide unified guidelines for bolt torque, ensuring global consistency. These standards define torque specifications, material grades, and lubrication effects. Compliance with these norms ensures product reliability and safety across industries. For instance, ISO standards cover metric bolts, while IFI standards address imperial fasteners, promoting adherence to recommended torque values and material strength requirements for secure and durable connections worldwide.

The Role of Lubrication in Bolt Torque

Lubrication significantly affects bolt torque by reducing friction, lowering required torque values, and preventing overheating. Properly lubricated bolts ensure accurate clamp load and minimize wear during tightening.

10.1 Types of Lubricants Used

Common lubricants include motor oil, grease, and silicone-based sprays, which reduce friction between threads. Dry lubricants like molybdenum disulfide are also used for high-temperature applications. The choice of lubricant impacts torque values, with dry bolts requiring higher torque than lubricated ones. Proper lubrication ensures even stress distribution, prevents corrosion, and extends bolt life, making it a critical factor in bolt torque calculations and maintenance procedures across industrial applications.

10.2 Effect on Torque Values

Lubrication significantly impacts bolt torque values by reducing friction between threads. Dry bolts require up to 30% more torque than lubricated ones to achieve the same clamp load. The type of lubricant and surface finish influence this effect, with smoother surfaces and higher-quality lubricants further reducing friction. Proper lubrication ensures accurate torque application, preventing over-tightening and maintaining structural integrity. Always refer to standard charts for specific lubrication-adjusted torque values to avoid under or over-tightening bolts.

Engineering Principles Behind Bolt Torque

Bolt torque relies on engineering principles like torsional stress, yield strength, and the relationship between bolt stretch and clamp load. Proper torque ensures optimal tension without exceeding material limits, balancing safety and performance in mechanical systems.

11.1 Torsional Stress and Yield Strength

Torsional stress occurs when a bolt is tightened, causing it to twist. Yield strength is the maximum stress a bolt can withstand without permanent deformation. Proper torque application ensures the bolt operates below its yield strength, preventing failure. Exceeding this limit can lead to plastic deformation or rupture. Torsional stress is directly related to torque, as it distributes force across the bolt’s threads. Balancing these factors ensures structural integrity and reliability in mechanical systems.

11.2 Stretch and Clamp Load Relationship

Bolt stretch and clamp load are directly related through torque application. When a bolt is tightened, it stretches, creating a clamp load that holds components together. The relationship ensures even stress distribution, preventing excessive deformation or loosening. Proper torque application balances stretch and clamp load, maintaining joint integrity. Understanding this relationship is critical for ensuring the reliability and safety of bolted connections in engineering applications.

Standard bolt torque charts are essential tools for ensuring accurate and safe bolt tightening in engineering applications. They provide critical data for achieving optimal torque values, preventing bolt failure, and maintaining structural integrity. By adhering to these charts, engineers can ensure reliable connections, minimize risks, and uphold industry standards. Proper use of torque charts is fundamental for successful project execution and long-term durability of assembled structures.

samsung smart door lock manual

Congratulations on purchasing the Samsung Smart Door Lock! This innovative device offers keyless entry, biometric authentication, and seamless smartphone integration for enhanced security and convenience.

Overview of Samsung Smart Door Lock Features

The Samsung Smart Door Lock offers advanced security features like keyless entry via RF cards or passwords, Bluetooth unlocking, and anti-peep password functionality. It also includes auto-lock and manual locking options for flexibility. Biometric authentication ensures secure access, while smartphone integration allows remote monitoring and control. These features enhance convenience and safety, making it a robust solution for modern home security needs.

Importance of Using a Smart Door Lock Manual

A smart door lock manual is essential for understanding installation, setup, and operation. It provides detailed guidance on troubleshooting common issues, ensuring proper maintenance, and optimizing security features. The manual also helps users navigate advanced settings, such as biometric authentication and Bluetooth connectivity, while addressing safety precautions and warranty information. Referencing the manual ensures optimal performance and maximizes the door lock’s security and convenience features effectively.

Installation and Setup Guide

This guide provides step-by-step instructions for installing and setting up your Samsung Smart Door Lock, ensuring compatibility and proper functionality for enhanced security and convenience.

Hardware Requirements and Compatibility

The Samsung Smart Door Lock requires a door thickness of 35mm to 55mm for proper installation. Ensure compatibility with Samsung-approved hardware, such as SHS-G517 or SHN-8610XM models, and verify smartphone compatibility, including Galaxy Fold 4 and S22 Ultra Plus. The lock supports RF cards, passwords, and Bluetooth connectivity. Check the manual for specific device pairings and installation templates to ensure seamless integration with your smart home system.

Step-by-Step Installation Process

Begin by measuring your door thickness (35-55mm) and marking drill points using the provided template. Install the lock body, keypad, and handle, ensuring proper alignment. Secure all components with screws and connect internal wiring. Test the lock’s manual override feature by rotating the handle to the green mark. Finally, configure auto-lock settings and pair your smartphone via the Samsung Smart Doorlock app for remote control and monitoring.

Connecting the Lock to Smart Home Systems

Open the Samsung Smart Doorlock app and enable Bluetooth to begin pairing. Follow in-app instructions to link your lock with compatible systems like Samsung SmartThings or Google Home. Ensure your smartphone supports UWB functionality for enhanced connectivity. Once connected, enjoy remote monitoring, voice commands, and seamless integration with your smart home ecosystem for a secure and convenient experience.

Operating Features and Modes

The Samsung Smart Door Lock offers keyless entry via RF cards, passwords, and biometric authentication. It also features Bluetooth and smartphone integration for remote control and monitoring.

Keyless Entry and Biometric Authentication

The Samsung Smart Door Lock provides advanced keyless entry options, including RF cards and passwords, ensuring convenient access without physical keys. Biometric authentication, such as fingerprint recognition, adds an extra layer of security, allowing only authorized users to unlock the door. This feature enhances home protection while maintaining ease of use for residents.

Bluetooth and Smartphone Integration

The Samsung Smart Door Lock integrates seamlessly with smartphones via Bluetooth, enabling convenient unlocking through compatible devices. Users can utilize the Samsung Smart Doorlock app to manage access remotely. This feature ensures easy setup and operation, allowing homeowners to unlock their doors with their smartphones for added convenience and security.

Manual Locking and Auto-Lock Functions

The Samsung Smart Door Lock offers both manual and auto-lock features for added security. In manual mode, the door locks when the DOUBLE LOCK button is pressed or the keypad is used. Auto-lock activates automatically after closing, ensuring your home stays secure. These features provide flexibility and peace of mind, knowing your door is always protected.

Security and Safety Features

Anti-Peep Password and Unauthorized Access Prevention

The Samsung Smart Door Lock features an anti-peep password system, masking your entry sequence to prevent unauthorized access and ensure maximum security for your home.

The Samsung Smart Door Lock incorporates an advanced anti-peep password system, ensuring your entry sequence remains hidden from prying eyes. This feature prevents unauthorized access by masking your password input, making it difficult for others to guess or replicate your code. Additionally, the lock is equipped with robust security protocols to detect and block unauthorized attempts, providing an extra layer of protection for your home and loved ones.

Encryption and Data Protection Measures

Samsung Smart Door Lock employs robust encryption technology to safeguard user data and ensure secure communication between the lock and paired devices. This includes advanced algorithms that protect against hacking and unauthorized access. Additionally, sensitive information such as passwords and biometric data are encrypted and stored securely, ensuring your personal security and privacy are maintained at all times.

Addressing Known Vulnerabilities and Updates

Samsung regularly releases firmware updates to address known vulnerabilities in their smart door locks. These updates enhance security, fix potential weaknesses, and improve overall performance. Users are advised to enable auto-update features or manually check for updates via the Samsung Smart Door Lock app. Regular updates ensure your lock remains secure and functions optimally, protecting against any identified risks or exploitation attempts.

Troubleshooting Common Issues

Common issues include connectivity problems, locking malfunctions, and firmware glitches. Restarting the device, checking connections, and updating software often resolve these problems effectively.

Diagnosing Connectivity Problems

Connectivity issues with your Samsung Smart Door Lock can often be resolved by checking the Bluetooth or WiFi connection. Ensure the lock is properly paired with your smartphone and that the signal strength is adequate. Restarting the lock and your device can also resolve temporary glitches. If problems persist, verify that the lock’s firmware is updated and consult the user manual for troubleshooting steps. Physical obstructions or outdated software may cause interference, so ensure the environment is clear and all systems are current.

Resolving Locking Mechanism Malfunctions

If the locking mechanism fails to engage, check for proper door alignment and ensure no obstructions block the latch. Clean the lock’s internal components and apply silicone spray if necessary. Verify manual override functionality by using the emergency key or turning the manual handle. If auto-lock fails, reset the lock and ensure all settings are configured correctly. Refer to the manual for detailed instructions to restore smooth operation. Regular maintenance can prevent such issues. Always ensure the lock is properly calibrated for optimal performance. If problems persist, contact Samsung support for further assistance. Peace of mind is ensured with reliable functionality.

Factory Reset and Recovery Options

To restore your Samsung Smart Door Lock to factory settings, press and hold the reset button (located on the back) for 10-15 seconds until the LED flashes red. Release and wait for the lock to reboot. This process will erase all programmed data, including user codes and Bluetooth pairings. Use the emergency key to regain access if needed. After resetting, reinstall the lock using the Samsung Smart Doorlock app. Ensure all settings are reconfigured for optimal performance. Factory reset is ideal for resolving persistent issues or preparing the lock for transfer to a new user. Always back up your data before proceeding. Follow the manual for detailed steps to avoid complications.

Maintenance and Care

Regularly clean the lock surface and keypad to prevent dust buildup. Check and replace batteries as needed to ensure uninterrupted performance. Update software periodically for optimal functionality.

Cleaning and Upkeep Recommendations

Regularly clean the door lock surface using a soft, dry cloth to remove dust and fingerprints. Avoid harsh chemicals or abrasive materials that may damage the finish. Gently wipe the keypad to ensure proper functionality. Check the strike plate alignment and lubricate hinges if necessary. Inspect battery contacts for corrosion and clean them with a cotton swab. Maintain the lock’s exterior to preserve its aesthetic and functional integrity over time;

Battery Management and Replacement

Regularly check the battery level via the Samsung Smart Door Lock app. Replace batteries with high-quality alkaline or lithium ones when the indicator shows low power. Avoid mixing old and new batteries. Clean the battery contacts with a cotton swab to ensure proper connection. Replace batteries every 6-12 months, depending on usage. Properly dispose of old batteries. Refer to the manual for specific battery type recommendations and replacement procedures to maintain optimal performance and security.

Software Updates and Firmware Maintenance

Regular software updates are crucial for optimal performance and security. Enable automatic updates in the Samsung Smart Door Lock app to receive the latest features and patches. Ensure your lock is connected to Wi-Fi during updates. Restart the device after installation. Visit the Samsung support website for manual update instructions if needed. Always use the official app or website to download updates to avoid security risks and ensure compatibility with your smart home system.

Smart Home Integration

Samsung Smart Door Lock seamlessly integrates with Samsung SmartThings and Google Home, enabling voice control and advanced automation. Compatible with UWB-enabled Galaxy devices for enhanced convenience.

Compatibility with Samsung SmartThings

The Samsung Smart Door Lock integrates effortlessly with Samsung SmartThings, allowing users to control and monitor their lock through the SmartThings app. This compatibility enables advanced automation scenarios, such as automatically locking the door when leaving home or unlocking it when a trusted device is nearby. The integration also supports voice commands, enhancing convenience and smart home functionality seamlessly.

Integration with Google Home and Other Systems

The Samsung Smart Door Lock seamlessly integrates with Google Home, enabling voice command functionality through Google Assistant. Users can lock or unlock their doors with simple voice commands, enhancing convenience and smart home automation. Additionally, the lock is compatible with other smart home systems, ensuring a unified and efficient home security experience. This integration allows for advanced automation scenarios and real-time monitoring, providing peace of mind and enhanced control.

Advanced Automation Scenarios

The Samsung Smart Door Lock supports advanced automation scenarios, such as geofencing and time-based locking rules. For example, the lock can automatically engage when you leave home or grant access to guests during specific hours. Voice commands via Google Assistant and custom routines with Samsung SmartThings enable seamless control. These features enhance convenience, security, and efficiency, making your smart home experience more intuitive and personalized.

Frequently Asked Questions

Common queries include troubleshooting lock connectivity, resetting passwords, and updating firmware. Users also ask about compatibility with smart home systems like Samsung SmartThings and Google Home.

Common User Queries and Solutions

Users often inquire about resolving connectivity issues, resetting passwords, and updating firmware. Solutions include restarting the lock, checking Bluetooth settings, and ensuring the app is up-to-date. For forgotten passwords, resetting via the app or manual override is recommended. Firmware updates can be done through the Samsung Smart Door Lock app to maintain optimal performance and security.

  • Connectivity problems: Restart the lock and ensure stable internet connection;
  • Forgot password: Use the app to reset or manually override with the provided pin.
  • Firmware updates: Regularly update via the app for enhanced security features.

Best Practices for Optimal Performance

For optimal performance, regularly update the firmware via the Samsung Smart Door Lock app and ensure the lock is clean and free from debris. Always use genuine Samsung accessories and maintain stable internet connectivity for smart features. Check battery levels periodically and replace them before they drain completely. Avoid using harsh chemicals for cleaning, and ensure proper alignment of the door and lock mechanism for smooth operation.

  • Keep firmware updated for enhanced security and functionality.
  • Use only genuine Samsung parts and accessories.
  • Ensure stable internet connection for remote features.