
The piriformis muscle, located deep in the buttocks, plays a crucial role in hip stabilization and movement. When tight or inflamed, it can compress the sciatic nerve, causing pain. Strengthening and stretching exercises are essential for maintaining its health and preventing discomfort.
1.1. What is the piriformis muscle and its role in the body
The piriformis muscle is a small, deep-seated muscle located in the buttocks, running from the base of the spine to the top of the thighbone. It plays a vital role in hip movement and stabilization, enabling activities like walking, running, and sitting comfortably. The piriformis muscle helps rotate the hip outward and maintains balance during locomotion. When functioning properly, it supports pelvic alignment and reduces pressure on the sciatic nerve, which runs nearby. However, tightness or inflammation in this muscle can lead to discomfort, often associated with piriformis syndrome, where the muscle compresses the sciatic nerve. Understanding its role is crucial for addressing related pain and improving mobility through targeted exercises.
1.2. Importance of piriformis exercises for overall mobility and pain relief
Engaging in piriformis exercises is essential for maintaining optimal hip mobility and preventing pain associated with piriformis syndrome. These exercises help stretch and strengthen the muscle, reducing tightness that can compress the sciatic nerve. Regular stretching improves flexibility, alleviates discomfort, and enhances range of motion, making daily activities more comfortable. Strengthening exercises, on the other hand, build muscle stability, reducing the risk of injury and promoting proper pelvic alignment. By incorporating both stretching and strengthening routines, individuals can effectively manage piriformis-related pain and improve overall lower body functionality. Consistency in these exercises is key to long-term relief and mobility.
Piriformis Stretching Exercises
Piriformis stretching exercises target tightness in the buttocks and hips, relieving pain and improving mobility. Techniques like seated, supine, and figure-4 stretches effectively reduce muscle tension and alleviate discomfort associated with piriformis syndrome.
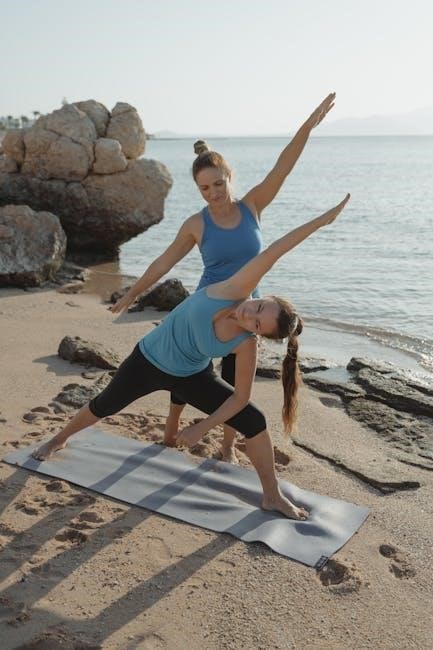
2.1. Seated Piriformis Stretch: Step-by-step instructions
To perform the seated piriformis stretch, sit on a chair with your feet flat on the floor. Place your right ankle on your left knee, allowing your leg to roll outward at the hip. Gently push your right knee toward your chest until you feel a stretch in your buttocks. Hold for 30 seconds, then repeat on the other side. This stretch helps relieve tension in the piriformis muscle and improves hip mobility. Ensure to maintain a straight back and avoid bouncing during the stretch. If discomfort occurs, modify the stretch by reducing the pressure on your knee. Repeat the exercise 2-3 times daily to achieve optimal results and prevent piriformis-related pain.
2.2. Supine Piriformis Stretch: How to perform it effectively
Begin by lying on your back with both knees bent and feet flat on the floor. Cross your right ankle over your left knee, resting it gently. Grasp the thigh of your left leg with both hands and pull it toward your chest until you feel a stretch in your right buttock; Hold the stretch for 30 seconds, breathing deeply to relax the muscle. Avoid bouncing or forcing the stretch, as this could cause discomfort. Repeat the exercise on the left side by crossing your left ankle over your right knee. Perform this stretch 2-3 times daily to effectively relieve piriformis tightness and improve hip flexibility. Regular practice can help reduce sciatic nerve irritation and promote overall lower body mobility.

2.3. Figure-4 Piriformis Stretch: Benefits and proper technique
The Figure-4 Piriformis Stretch is an effective exercise for targeting the piriformis muscle and relieving tension. To perform it, lie on your back and bring one leg into a “Figure-4” position by placing the ankle of the injured leg over the knee of the opposite leg. Gently grasp the thigh of the uninjured leg and pull it toward your chest until a stretch is felt in the buttock of the injured side. Hold the stretch for 30 seconds to allow the muscle to relax fully. This stretch not only helps in reducing piriformis tightness but also promotes sciatic nerve flossing, which can alleviate associated pain. It’s important to avoid bouncing and to focus on deep, controlled breathing to maximize the benefits. For added comfort, astrap or towel can be used to assist in pulling the leg toward the chest. Perform this stretch 2-3 times daily for optimal results.

Strengthening Exercises for the Piriformis Muscle
Strengthening the piriformis muscle is vital for hip stability and preventing pain. Exercises like the clamshell and side-lying abduction target the muscle, improving flexibility and reducing discomfort caused by tightness or weakness.
3.1. Clamshell Exercise: A strengthening technique for the piriformis
The Clamshell Exercise is an effective strengthening technique targeting the piriformis muscle. To perform it, lie on your side with knees bent and legs stacked. Slowly lift the top knee without moving the feet, holding for a few seconds before lowering. This exercise enhances hip stability and strengthens the piriformis, reducing the risk of injury and alleviating pain. Regular practice improves muscle endurance and promotes better posture. It is essential to maintain proper form to avoid strain and maximize benefits. Incorporating this exercise into your routine can significantly contribute to overall lower body strength and mobility.
3.2. Side-Lying Piriformis Abduction: How to do it correctly
The Side-Lying Piriformis Abduction is a targeted strengthening exercise for the piriformis muscle. To perform it correctly, lie on your side with your legs straight and feet touching. Engage your core and slowly lift your top leg away from the bottom leg, keeping your hips aligned. Hold for 2-3 seconds at the top, then lower slowly. Aim for 3 sets of 10-15 repetitions on each side. This exercise strengthens the piriformis and hip abductors, improving hip stability and reducing the risk of injury. Proper form is essential to avoid strain, so focus on smooth, controlled movements. Avoid letting the hips roll forward or backward during the lift. Regular practice can enhance overall hip function and mobility, making it an excellent addition to a lower body strengthening routine.

Nerve Flossing Exercises for Piriformis Syndrome
Nerve flossing is a technique to relieve nerve compression by gently mobilizing the sciatic nerve. It involves slow, controlled movements to improve neural mobility and reduce pain caused by piriformis tightness.
4.1. Sciatic Nerve Flossing: How it helps with piriformis-related pain
Sciatic nerve flossing is a therapeutic technique designed to alleviate piriformis-related pain by addressing nerve compression. This method involves gentle, controlled movements that mobilize the sciatic nerve, improving its mobility and reducing irritation. When the piriformis muscle tightens or becomes inflamed, it can compress the sciatic nerve, leading to pain and discomfort. Nerve flossing works by creating space between the nerve and the surrounding tissues, allowing the nerve to glide freely without restriction. By performing these exercises, individuals can experience relief from symptoms such as shooting pain, numbness, or tingling in the legs. The process typically involves lying on one’s back, bending the knee on the affected side, and gently moving the leg to create a flossing effect on the nerve. Regular practice of nerve flossing, combined with stretching and strengthening exercises, can significantly improve piriformis syndrome symptoms and restore normal nerve function.