char broil big easy oil less fryer manual

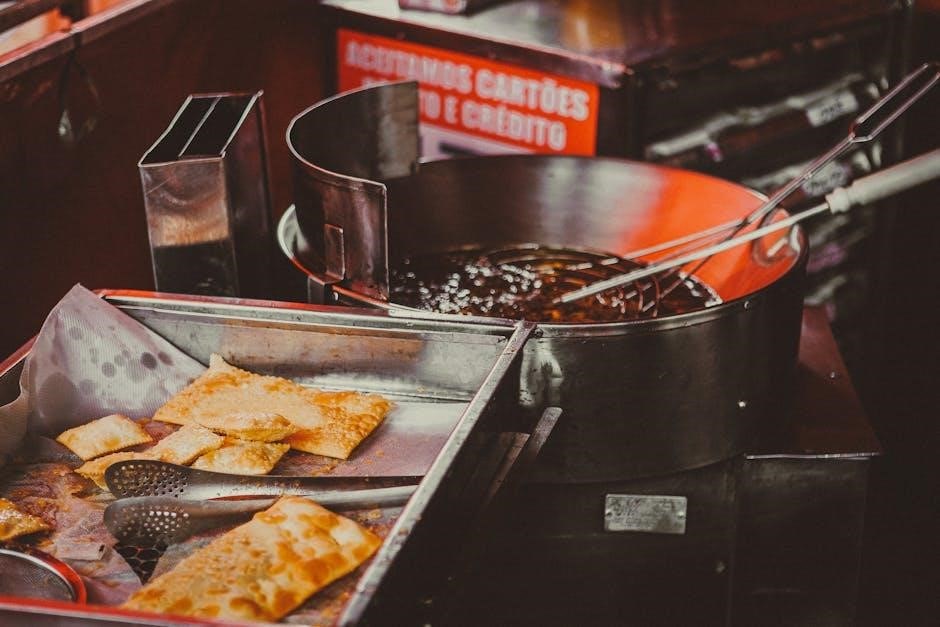
The Char-Broil Big Easy Oil-Less Fryer is a revolutionary outdoor cooking appliance designed for healthier frying without oil․ Using propane and convection heating, it cooks food evenly and faster than traditional methods․ Perfect for turkey, meats, and vegetables, it offers a hassle-free alternative to deep frying, reducing calories and cleanup efforts significantly․

1․1․ What is the Big Easy Fryer?

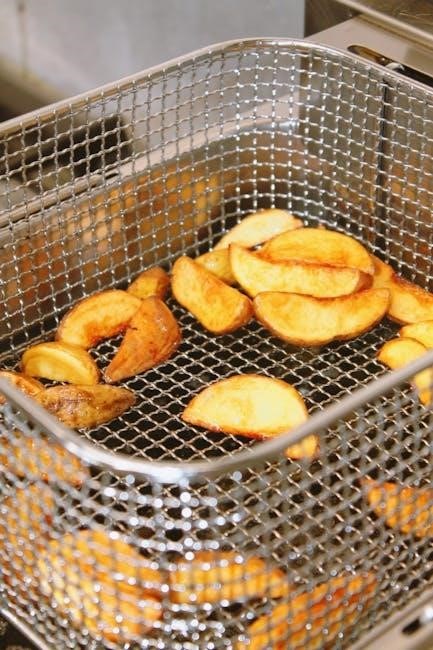
The Char-Broil Big Easy Oil-Less Fryer is a propane-powered cooking appliance designed for outdoor use, offering a healthier alternative to traditional deep frying․ It utilizes convection heating to cook food evenly without the need for oil, making it an ideal choice for those seeking to reduce calories and cleanup efforts․ This innovative cooker is specifically engineered to fry turkeys but is also versatile enough for cooking large cuts of meat, vegetables, and other dishes․ The Big Easy Fryer operates by circulating hot air around the food, ensuring crispy results similar to oil frying but with much less fat․

One of the standout features of the Big Easy Fryer is its simplicity and portability․ It is designed for outdoor cooking, making it perfect for backyard gatherings, picnics, or special events․ The fryer comes with a food thermometer to ensure precise temperature control, and users can upgrade to a digital thermometer for even greater accuracy․ The appliance is also equipped with basic controls that make it easy to monitor and adjust cooking settings․ With its durable construction and user-friendly design, the Big Easy Fryer has become a popular choice among outdoor cooking enthusiasts․

In addition to its cooking capabilities, the Big Easy Fryer is known for its safety features and ease of assembly․ The manual provides detailed instructions for setup and operation, ensuring that users can assemble and use the fryer confidently․ Whether you’re a novice or an experienced cook, the Big Easy Fryer offers a convenient and flavorful way to prepare meals without the hassle of oil․

1․2․ Benefits of Oil-Less Cooking

Cooking with the Char-Broil Big Easy Oil-Less Fryer offers numerous benefits, making it a preferred choice for health-conscious and convenience-focused cooks․ One of the most significant advantages is the drastic reduction in calorie intake, as no oil is required for frying․ This makes it an excellent option for those looking to adopt a healthier diet without sacrificing flavor․

Another key benefit is the ease of cleanup․ Traditional deep frying involves messy oil splatters and lengthy post-cooking cleanups․ The Big Easy Fryer eliminates this hassle, as it uses propane and hot air circulation to cook food evenly․ This not only simplifies the cleaning process but also reduces waste and potential fire hazards associated with hot oil․

Oil-less cooking also promotes safer cooking environments․ Without the risk of hot oil splattering or igniting, the Big Easy Fryer provides a much safer alternative for outdoor cooking․ This makes it ideal for families with children or for use in crowded settings where safety is a top priority․

Additionally, oil-less cooking is more environmentally friendly․ By eliminating the need for large quantities of oil, users reduce their carbon footprint and contribute to a more sustainable cooking practice․ The fryer is also cost-effective in the long run, as the absence of oil reduces expenses over time․

Finally, the Big Easy Fryer delivers consistent and flavorful results․ The convection heating technology ensures that food is crispy on the outside and tender on the inside, rivaling the taste of traditional fried foods․ This versatility makes it perfect for cooking a variety of dishes, from turkeys to vegetables, without compromising on taste or texture․

Overall, the Char-Broil Big Easy Oil-Less Fryer offers a healthier, safer, and more convenient way to enjoy fried foods, making it a valuable addition to any outdoor kitchen or cooking setup․

Safety Precautions

Always follow the manufacturer’s instructions for safe and proper use․ The Char-Broil Big Easy Oil-Less Fryer is designed for outdoor use only․ Be cautious of sharp edges during assembly, and wear protective gloves if needed․ Ensure the appliance is assembled correctly to avoid accidents․ Register your product for future assistance and keep this manual handy for reference․

2․1․ General Safety Tips

Before using the Char-Broil Big Easy Oil-Less Fryer, it is essential to follow general safety tips to ensure a safe and enjoyable cooking experience․ First, always read the entire manual carefully before assembly or operation․ Familiarize yourself with the appliance’s components, warnings, and instructions to avoid accidents․ Wear protective gloves during assembly and when handling hot surfaces, as some parts may have sharp edges or become extremely hot during use․

Ensure the fryer is assembled correctly and completely, as improper assembly can lead to malfunctions or safety hazards․ The appliance is designed for outdoor use only; never operate it indoors or in enclosed spaces, as this can lead to carbon monoxide buildup or fire risks․ Keep the fryer away from flammable materials, such as leaves, branches, or overhanging trees, and maintain a safe distance from buildings or other structures․

Always remain attentive while cooking, especially when propane is involved․ Never leave the fryer unattended, as this can result in unintended fires or burns․ Keep children and pets away from the cooking area to prevent accidental injuries․ Follow all safety warnings and guidelines provided in the manual, and register your product with the manufacturer for future support and updates․ By adhering to these general safety tips, you can ensure a safe and successful cooking experience with the Char-Broil Big Easy Oil-Less Fryer․

2․2․ Handling Hot Surfaces

Handling hot surfaces on the Char-Broil Big Easy Oil-Less Fryer requires extreme caution to prevent burns and injuries․ Always be aware of the fryer’s components, as they can become extremely hot during operation․ The cooking chamber, lid, and surrounding areas may retain heat long after cooking is complete, so avoid touching these surfaces with bare hands․

Use oven mitts, tongs, or other heat-resistant utensils to handle food or adjust the fryer’s parts․ Never wear loose clothing that could come into contact with hot surfaces, and keep long hair tied back to minimize risks․ Children and pets should be kept at a safe distance from the fryer while it is in use or cooling down․

When opening the lid, do so slowly and carefully, as hot steam and air can escape quickly․ Use the provided handles, as they are designed to stay cooler than other parts of the fryer․ Be particularly cautious of the air vents and propane burner area, as they emit intense heat during operation․

After cooking, allow the fryer to cool down completely before cleaning or storing it․ Never attempt to touch or clean hot surfaces immediately, as this can result in severe burns․ Always prioritize caution when handling or approaching the fryer, even after it has been turned off․ By following these guidelines, you can ensure a safer cooking experience with the Char-Broil Big Easy Oil-Less Fryer․

2․3․ Proper Use of Propane

Proper use of propane is essential for safe and efficient operation of the Char-Broil Big Easy Oil-Less Fryer․ Always use LP (liquefied petroleum) gas, as specified in the manual, and ensure the regulator/valve assembly provided with the fryer is correctly connected to the propane tank․ Never modify or tamper with the propane system, as this can lead to hazardous conditions․

Before each use, inspect the propane hose and connections for signs of wear, damage, or leaks․ To check for leaks, apply a soapy water solution to the connections and look for bubbles․ If a leak is detected, turn off the propane supply immediately and do not use the fryer until the issue is resolved by a qualified professional․

Always operate the fryer outdoors in a well-ventilated area, away from flammable materials, overhangs, or enclosed spaces․ Propane-powered appliances produce carbon monoxide, which can be dangerous in confined areas․ Keep the fryer at least 10 feet away from buildings, trees, and other obstructions to ensure proper airflow and heat dissipation․

Turn off the propane supply when the fryer is not in use or during extended periods of inactivity․ Store the propane tank upright in a cool, dry, well-ventilated area, away from direct sunlight or heat sources․ Never leave the fryer unattended while it is in operation, as this could lead to accidents or fires․

Follow the manufacturer’s instructions for lighting the burner and adjusting the flame․ If the burner does not ignite on the first attempt, turn off the propane supply and wait at least 5 minutes before retrying to avoid gas buildup․ Always use the correct tools and procedures to ensure safe ignition and operation;

By adhering to these guidelines, you can ensure safe and efficient use of propane with your Char-Broil Big Easy Oil-Less Fryer, minimizing risks and enjoying a hassle-free cooking experience․

Assembly and Setup

Assembly of the Char-Broil Big Easy Oil-Less Fryer requires careful unpacking and inventory of all components․ Use a screwdriver to secure parts following the step-by-step guide in the manual․ Ensure all connections are tight and proper alignment is maintained for safe operation․ Double-check the propane regulator and burner setup before first use․

3․1․ Unpacking and Inventory

Begin by carefully opening the box and inspecting all components for any signs of damage․ The Char-Broil Big Easy Oil-Less Fryer typically includes the main fryer body, propane burner assembly, cooking basket, thermometer, regulator, and hardware for assembly․ Ensure all items listed in the manual are present before proceeding․

Take a moment to inventory each part, as some components may be packed separately to prevent damage during shipping․ This step is crucial to avoid delays during assembly․ If any parts are missing or damaged, contact customer support immediately to resolve the issue․

Place small hardware items, such as screws or nuts, in a safe, accessible location to prevent loss․ Refer to the manual’s diagrams to familiarize yourself with each part and its purpose․ This will help streamline the assembly process and ensure everything fits together correctly․

Before starting assembly, double-check that all protective packaging materials have been removed from the fryer and its components․ This ensures proper fitment and functionality․ If you notice any sharp edges, as warned in the manual, wear protective gloves to avoid injury․

Once all items are accounted for and prepared, you can proceed to the step-by-step assembly guide with confidence․ Remember, proper preparation now will lead to a smoother and safer assembly process later․

3․2․ Step-by-Step Assembly Guide

Start by attaching the legs to the main fryer body using the provided screws․ Ensure they are securely tightened to maintain stability․ Next, connect the propane burner assembly to the base, following the manual’s alignment instructions to prevent gas leaks․

Mount the cooking basket onto the fryer, making sure it fits snugly into the designated slots․ This will allow for even air circulation during cooking․ Attach the regulator to the propane tank and connect it to the burner, ensuring all connections are tight and leak-free․

Install the thermometer by inserting it into the pre-drilled hole on the lid․ This will help monitor internal temperatures accurately․ Finally, place the lid on top of the fryer, aligning it with the hinges to ensure a proper seal․

Double-check all connections and bolts for tightness before proceeding․ If any step feels unclear, refer back to the manual’s diagrams for guidance․ Proper assembly is essential for safe and effective operation of the fryer․

Once assembled, perform a quick test by lighting the burner to ensure it ignites evenly and the thermometer responds correctly․ This final check will confirm that your Char-Broil Big Easy Oil-Less Fryer is ready for its first use․
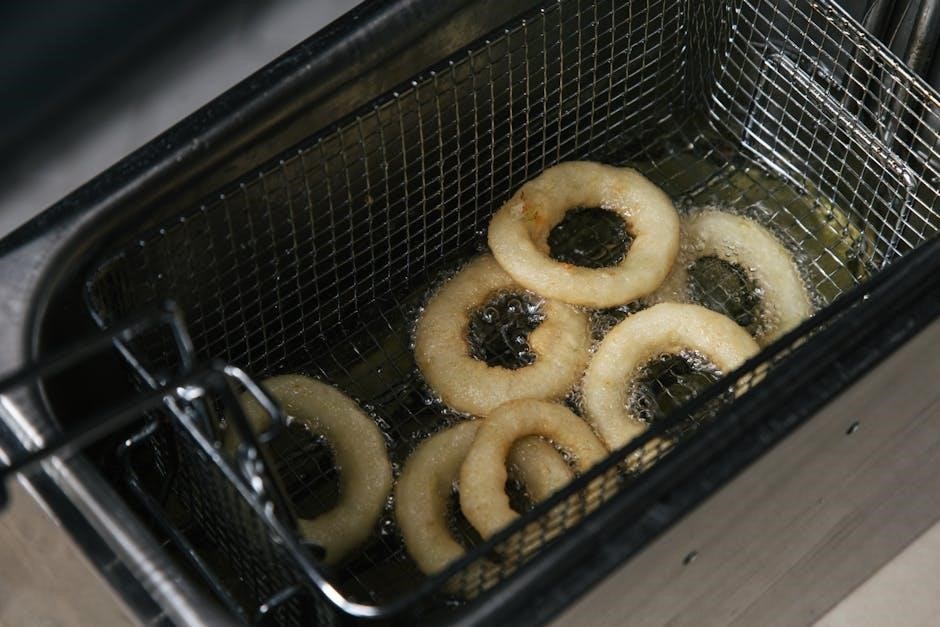
Operating the Fryer

Preheat the fryer by turning the burner knob to the “ignite” position and lighting the propane burner․ Allow it to heat up for 10-15 minutes․ Place food in the cooking basket, ensuring even distribution for consistent cooking․ Monitor the temperature using the built-in thermometer to maintain optimal heat levels․ Food is cooked when it reaches the recommended internal temperature, ensuring a crispy exterior and juicy interior without the need for oil․ This method is faster and healthier than traditional frying, making it ideal for large cuts of meat and vegetables․ Always use protective gloves when handling hot surfaces and follow the manual’s guidelines for safe operation․ Proper temperature control ensures flavorful results every time․ The Char-Broil Big Easy Oil-Less Fryer offers a convenient and efficient way to achieve delicious meals without the hassle of oil․ For best results, refer to the cooking guide for specific temperature settings and cooking times for various foods․ The fryer’s convection technology circulates hot air evenly, ensuring uniform cooking․ Avoid overcrowding the basket to allow air to circulate freely around the food․ Use the included thermometer to check internal temperatures, especially for meats, to ensure they reach a safe minimum internal temperature․ This ensures food safety and optimal flavor․ The fryer’s design allows for quick cooking times, making it ideal for hosting gatherings or preparing meals for large families․ Always turn off the propane supply and allow the fryer to cool down completely before cleaning or storing․ Regular maintenance, such as cleaning the burner and checking for blockages, will extend the life of the fryer and ensure it continues to perform optimally․ By following the operating instructions and guidelines provided in the manual, you can enjoy perfectly cooked meals with the Char-Broil Big Easy Oil-Less Fryer․ The fryer’s intuitive controls and straightforward operation make it easy for both beginners and experienced cooks to achieve professional-quality results․ For additional tips and recipes, refer to the cooking guide included with the manual․ The Char-Broil Big Easy Oil-Less Fryer is a versatile and efficient addition to any outdoor kitchen, offering a healthier alternative to traditional frying methods․ With proper use and care, it will provide years of reliable service and delicious meals․ The fryer’s compact design and portability make it easy to transport and store, perfect for camping trips or outdoor events․ Always follow safety precautions when handling propane and operating the fryer, as outlined in the manual․ The Char-Broil Big Easy Oil-Less Fryer is designed for outdoor use only, ensuring safe and enjoyable cooking experiences․ By adhering to the operating instructions and maintenance recommendations, you can maximize the performance and longevity of your fryer․ The fryer’s innovative oil-less cooking technology not only reduces calories but also eliminates the mess and hazards associated with deep frying․ This makes it a practical and healthier choice for home cooks and outdoor enthusiasts alike․ The Char-Broil Big Easy Oil-Less Fryer is a valuable investment for anyone looking to elevate their outdoor cooking capabilities while maintaining a healthy diet․ With its user-friendly design and efficient operation, it is an excellent choice for preparing a wide variety of dishes, from crispy fried turkeys to tender roasted vegetables․ The fryer’s ability to cook food quickly and evenly ensures that flavors are retained, resulting in mouthwatering dishes that impress family and friends․ For the best cooking results, always preheat the fryer adequately and adjust the temperature as needed based on the type of food being cooked․ The fryer’s temperature range allows for versatile cooking, accommodating everything from delicate fish to hearty meats․ The included cooking guide provides helpful tips and recommended temperature settings to help you achieve the best results․ By experimenting with different recipes and techniques, you can unlock the full potential of the Char-Broil Big Easy Oil-Less Fryer and enjoy a wide range of delicious, oil-free meals․ The fryer’s durability and ease of use make it a worthwhile addition to any outdoor cooking setup, offering convenience and performance for years to come․ Always remember to follow the manufacturer’s instructions for assembly, operation, and maintenance to ensure safe and effective use of the Char-Broil Big Easy Oil-Less Fryer․ The fryer’s innovative design and advanced features make it a standout product in the world of outdoor cooking, providing a healthier and more efficient alternative to traditional frying methods․ With the Char-Broil Big Easy Oil-Less Fryer, you can enjoy the perfect blend of flavor, convenience, and health in every meal you prepare․ The fryer’s compact size and lightweight design make it easy to transport and store, allowing you to take your cooking skills on the go․ Whether you’re cooking for a small gathering or a large event, the Char-Broil Big Easy Oil-Less Fryer is a reliable and efficient cooking solution․ The fryer’s easy-to-use controls and clear temperature monitoring system ensure that you can achieve the perfect doneness for your dishes every time․ For added convenience, the fryer’s design allows for easy cleanup and maintenance, making it a practical choice for busy cooks․ The Char-Broil Big Easy Oil-Less Fryer is a testament to innovative cooking technology, offering a smarter and healthier way to enjoy your favorite fried foods without the need for oil․ By choosing the Char-Broil Big Easy Oil-Less Fryer, you are investing in a high-quality cooking appliance that will enhance your outdoor cooking experiences and provide delicious results for years to come․ The fryer’s durable construction and robust features ensure that it can withstand the rigors of frequent use, making it a valuable addition to any outdoor kitchen․ With the Char-Broil Big Easy Oil-Less Fryer, you can say goodbye to messy oil and hello to a world of flavorful, healthier cooking possibilities․ The fryer’s versatility and ease of use make it an excellent choice for cooks of all skill levels, from beginners to seasoned professionals․ The Char-Broil Big Easy Oil-Less Fryer is a must-have appliance for anyone who loves to cook outdoors and values both convenience and health․ By following the simple operating instructions and maintaining the fryer regularly, you can ensure that it continues to perform at its best and delivers exceptional results every time you use it․ The fryer’s ability to cook food quickly and evenly, combined with its oil-less design, makes it an ideal choice for those looking to reduce their calorie intake without sacrificing flavor․ The Char-Broil Big Easy Oil-Less Fryer is a game-changer in the world of outdoor cooking, offering a unique combination of performance, convenience, and health benefits that make it a standout product in its category․ With its advanced features and user-friendly design, the Char-Broil Big Easy Oil-Less Fryer is poised to become your go-to appliance for all your outdoor cooking needs․ The fryer’s innovative technology and durable construction ensure that it will remain a reliable and efficient cooking solution for many years to come․ The Char-Broil Big Easy Oil-Less Fryer is a wise investment for anyone who values quality, performance, and health in their cooking appliance․ By choosing this fryer, you are not only enhancing your outdoor cooking experience but also contributing to a healthier lifestyle for yourself and your loved ones․ The fryer’s ease of use and versatility make it a valuable asset for any home cook or outdoor enthusiast, providing endless opportunities to create delicious, oil-free meals․ The Char-Broil Big Easy Oil-Less Fryer is a shining example of how innovative design can transform the way we cook, offering a smarter, healthier, and more efficient alternative to traditional frying methods․ With its impressive features and reliable performance, the Char-Broil Big Easy Oil-Less Fryer is a must-have appliance for anyone looking to elevate their outdoor cooking to new heights․ The fryer’s ability to deliver crispy, flavorful results without the need for oil makes it a favorite among health-conscious cooks who refuse to compromise on taste․ The Char-Broil Big Easy Oil-Less Fryer is a testament to the power of innovation in cooking technology, offering a practical and delicious solution for modern cooks․ By incorporating the Char-Broil Big Easy Oil-Less Fryer into your cooking routine, you can enjoy the perfect balance of flavor,

4․1․ Basic Controls and Functions

The Char-Broil Big Easy Oil-Less Fryer features intuitive controls designed for easy operation․ The primary burner knob allows you to ignite the propane burner and adjust the flame level․ A temperature gauge is located on the front panel, enabling precise monitoring of internal heat․ The regulator ensures a consistent propane supply, while the cooking basket and lifting hook provide safe food handling; To operate, turn the burner knob to the “ignite” position and press the igniter button․ Once lit, adjust the knob to achieve the desired temperature, typically between 350°F to 400°F․ Preheating takes about 10-15 minutes, after which you can place food in the basket; The fryer uses convection heat to cook evenly, eliminating the need for oil․ Always ensure the lid is closed during cooking to maintain consistent temperatures․ The included food thermometer helps verify internal food temperatures for safety․ For optimal results, avoid overcrowding the basket and use the lifting hook to safely remove cooked food․ Regularly clean the burner and venturi to maintain proper airflow and performance․ Follow the manual’s guidelines for adjusting heat and monitoring cooking times to achieve perfect results․ Mastering these basic controls ensures safe and efficient operation, delivering crispy, flavorful food without the hassle of oil․

4․2․ Temperature Monitoring and Control

Temperature monitoring and control are crucial for achieving perfectly cooked food with the Char-Broil Big Easy Oil-Less Fryer․ The fryer is equipped with a temperature gauge on the front panel, allowing you to monitor internal heat levels accurately․ The ideal cooking temperature typically ranges between 350°F and 400°F, depending on the type of food being cooked․ Always preheat the fryer for about 10-15 minutes before adding food to ensure even heat distribution․

The fryer’s propane burner can be adjusted using the control knob to maintain the desired temperature․ It’s essential to keep the lid closed during cooking to retain heat and promote consistent cooking․ For added precision, use the included food thermometer or upgrade to a digital thermometer, such as the Char-Broil Smart Thermometer, to monitor internal food temperatures․ This ensures your food reaches a safe minimum internal temperature, preventing undercooking or overcooking․

Regularly check the temperature gauge during cooking, especially when cooking large or dense foods․ Adjust the burner as needed to maintain steady heat․ Avoid overcrowding the basket, as this can disrupt airflow and temperature uniformity․ By carefully monitoring and controlling the temperature, you can achieve crispy, flavorful results without the need for oil, making the Char-Broil Big Easy Oil-Less Fryer a versatile and efficient cooking solution․

4․3․ Cooking Techniques and Best Practices

Cooking with the Char-Broil Big Easy Oil-Less Fryer requires some specific techniques to ensure optimal results․ Always start by preheating the fryer to the recommended temperature for your recipe, typically between 350°F and 400°F, for at least 10-15 minutes․ This step ensures even heat distribution and prevents food from sticking to the basket․

Pat dry the food thoroughly before cooking to remove excess moisture․ This helps create a crispy texture and prevents steam from interfering with the cooking process․ For meats like turkey or chicken, season generously before placing them in the basket․ For vegetables, toss them in oil-free seasonings or marinades to enhance flavor without adding extra calories․

Do not overcrowd the cooking basket, as this can hinder airflow and lead to uneven cooking․ Cook in batches if necessary, to ensure each piece of food has enough space․ Use the included thermometer to check internal temperatures, especially for meats, to ensure they reach a safe minimum internal temperature (e․g․, 165°F for poultry)․

For crispy results, keep the lid closed during cooking to retain heat and promote even browning․ However, check on the food periodically to avoid overcooking․ Adjust the propane burner as needed to maintain a consistent temperature, especially when cooking larger or thicker cuts of meat․

After cooking, allow the food to rest for a few minutes before serving․ This allows juices to redistribute, ensuring tender and flavorful results․ By following these techniques and best practices, you can achieve delicious, oil-free meals with the Char-Broil Big Easy Oil-Less Fryer․

Maintenance and Cleaning

Regular maintenance and cleaning are essential to ensure the longevity and optimal performance of your Char-Broil Big Easy Oil-Less Fryer․ After each use, allow the fryer to cool completely before cleaning to avoid burns and damage to components․

Start by removing any food residue from the cooking basket and tray․ Use a soft brush or paper towels to wipe away loose particles․ For tougher stains, mix a solution of mild soap and warm water, and gently scrub the surfaces with a non-abrasive sponge․ Rinse thoroughly and dry to prevent rust formation․

The propane burner and surrounding areas should be inspected regularly for grease buildup․ Use a wire brush to clean the burner ports, ensuring proper gas flow․ The grease tray, located beneath the cooking chamber, should be emptied and washed with soap and water after each use to prevent grease from hardening․

Check the fryer’s exterior for any food splatters or debris․ Wipe it down with a damp cloth to maintain its appearance and prevent corrosion․ For tougher stains, a mild detergent can be used, but avoid harsh chemicals that may damage the finish․

Deep clean the fryer every few months by removing all removable parts and soaking them in warm soapy water․ For the cooking chamber, use a long-handled brush to scrub away any stubborn residue․ Always refer to the manual for specific cleaning instructions to ensure you do not damage any components․

By following these maintenance and cleaning practices, you can keep your Char-Broil Big Easy Oil-Less Fryer in excellent condition, ensuring it continues to perform efficiently and safely for years to come․

369 book free pdf free download

The 369 Book is a popular manifestation journal guiding users to focus on their desires through written affirmations‚ helping to align thoughts and emotions for effective manifestation.

1.1 What is the 369 Method?

The 369 Method is a manifestation technique that involves writing down specific affirmations multiple times a day to align your thoughts and emotions with your desires. It is based on the idea that repetition reinforces intentions‚ making them clearer to the subconscious mind. The method requires writing your affirmation three times in the morning‚ six times during the day‚ and nine times at night. This structured approach is believed to enhance focus and consistency‚ key elements for effective manifestation. The technique is often used in conjunction with a journal‚ such as the 369 Manifestation Journal‚ which provides a guided framework for practicing this method. By leveraging the power of written affirmations‚ the 369 Method aims to help individuals manifest their goals and desires more effectively. It has gained popularity for its simplicity and potential to transform mindset and reality.

1.2 Origin and Background of the 369 Technique

The 369 Technique originates from the belief that numbers carry spiritual significance‚ with 3‚ 6‚ and 9 symbolizing creation‚ balance‚ and completion. This method‚ popularized by manifestation practitioners‚ involves writing affirmations in a specific sequence: three times in the morning‚ six during the day‚ and nine at night. The technique is rooted in the idea that repetition amplifies intentions‚ aligning them with the universe’s energy. It gained traction through books like “Project 369: The Key to the Universe” by David Kasneci‚ which shares a personal journey of achieving life goals and overcoming losses. The method is now widely used in manifestation journals‚ offering a structured approach to focus thoughts and emotions‚ helping individuals align with their desires and attract abundance into their lives. Its simplicity and effectiveness have made it a favorite among those exploring the law of attraction and mindfulness practices.

1.3 Importance of the 369 Manifestation Journal

The 369 Manifestation Journal is a cornerstone of the 369 Technique‚ serving as a structured tool for focusing intentions and tracking progress. By writing affirmations three times in the morning‚ six during the day‚ and nine at night‚ users clarify their desires‚ reinforcing them in their subconscious mind. This consistent practice helps align thoughts and emotions‚ amplifying manifestation potential. The journal acts as a visible record of commitment‚ fostering accountability and mindfulness. Many users report heightened self-awareness and positive mindset shifts‚ attributing their successes to the journal’s disciplined approach. Its accessibility and simplicity make it a powerful resource for anyone seeking to harness the law of attraction‚ offering a practical yet profound method to transform aspirations into reality. Regular use of the journal is often cited as a key factor in achieving desired outcomes‚ making it an indispensable companion on the manifestation journey.

Benefits of the 369 Manifestation Method

The 369 Manifestation Method enhances focus‚ fosters emotional clarity‚ and reduces stress‚ leading to a more disciplined and positive approach to achieving personal goals and desires effectively.

2.1 Emotional and Mental Benefits

The 369 Manifestation Method offers profound emotional and mental benefits‚ including enhanced focus‚ reduced stress‚ and improved self-awareness. By consistently writing affirmations‚ users experience a clearer mindset‚ fostering positivity and emotional resilience. This practice helps individuals stay grounded and aligned with their goals‚ promoting mental clarity and emotional balance. Over time‚ the method cultivates gratitude and self-belief‚ empowering users to approach life challenges with confidence and optimism; The structured approach of writing affirmations three‚ six‚ and nine times a day creates a routine that reinforces mental discipline and emotional stability‚ leading to a more fulfilling and purpose-driven life. This mental clarity and emotional strength are key to effectively manifesting desires and achieving personal growth.

2.2 Practical Benefits for Daily Life

The 369 Manifestation Method offers practical benefits that enhance daily life by fostering focus‚ organization‚ and productivity. The structured practice of writing affirmations three‚ six‚ and nine times a day helps users stay disciplined and aligned with their goals. This routine encourages consistent action‚ making it easier to break down larger objectives into manageable tasks. By prioritizing desires and tracking progress‚ individuals gain clarity in decision-making and resource allocation. The method also promotes accountability‚ as the daily practice reinforces commitment to personal growth. Over time‚ users develop better time management skills and a clearer sense of purpose‚ leading to improved efficiency in achieving their aspirations. This practical approach to manifestation empowers individuals to integrate their desires seamlessly into their daily routines‚ creating a balanced and goal-oriented lifestyle. The method’s simplicity makes it accessible for anyone seeking to enhance their daily life through focused intention and action.

2.3 Success Stories and Testimonials

Many individuals have reported transformative results from using the 369 Manifestation Method. Users share stories of achieving financial stability‚ improving relationships‚ and manifesting career opportunities. One testimonial highlights how the method helped someone overcome financial struggles by focusing on abundance affirmations‚ leading to unexpected income sources. Another user credited the technique for improving their mental clarity and confidence‚ enabling them to secure a promotion. The structured practice of writing affirmations has also been praised for reducing anxiety and fostering a positive mindset. These success stories demonstrate how the 369 method can empower individuals to align their thoughts and actions with their desires‚ creating meaningful changes in their lives. The method’s simplicity and effectiveness have made it a trusted tool for those seeking to manifest their goals and enhance their overall well-being.

How to Use the 369 Method Effectively

Write your affirmation three times in the morning‚ six times during the day‚ and nine times at night. Consistency and belief are key to harnessing its power effectively.

3.1 Step-by-Step Guide to the 369 Technique

The 369 technique involves writing your affirmation three times in the morning‚ six times during the day‚ and nine times at night. Start by clearly defining your desire and phrasing it in the present tense. Use positive‚ emotionally charged language to evoke feelings of gratitude and belief. Each writing session should be done with focus and intention‚ avoiding distractions. Consistency is crucial; commit to the practice daily for at least 93 days. Combine this with visualization and mindfulness to amplify its effectiveness. Over time‚ this method helps reprogram your subconscious mind‚ aligning your thoughts and emotions with your goals. Patience and faith in the process are essential for achieving desired results.

3.2 Tips for Effective Practice

To maximize the effectiveness of the 369 technique‚ consistency and intention are key. Start by writing your affirmations in the present tense‚ as if your desire has already manifested. Use emotionally charged language to evoke strong feelings of gratitude and belief. Focus on one specific goal at a time to maintain clarity and avoid diluting your energy. Practice the technique daily‚ preferably at the same times each day‚ to build a strong routine. Visualize your desire vividly during each writing session to reinforce your intention. Stay positive and patient‚ as manifestation is a process that requires time. Avoid negative thoughts or doubts‚ as they can hinder progress. Finally‚ keep your journal private and sacred‚ ensuring it remains a powerful tool for your personal growth and manifestation journey.

3.3 Common Mistakes to Avoid

When practicing the 369 method‚ there are several common mistakes to avoid for optimal results. One of the most frequent errors is inconsistency in the practice‚ as skipping days can disrupt the momentum of manifestation. Another mistake is focusing on multiple desires at once‚ which can dilute the energy and clarity of your intentions. Writing affirmations without emotional connection or in a negative tone can also hinder progress. Additionally‚ practicing the technique at irregular times or without a structured routine can reduce its effectiveness. It’s important to avoid doubting the process or becoming impatient‚ as this can block the manifestation from occurring. Lastly‚ neglecting to visualize or feel the emotions of already having what you desire can weaken the impact of the affirmations. By being mindful of these pitfalls‚ you can refine your practice and enhance your manifestation journey.

The 369 Manifestation Journal

The 369 Manifestation Journal is a structured guide for focusing on desires through daily affirmations‚ helping users align their thoughts and emotions to attract positive outcomes effectively.

4.1 What is Included in the 369 Journal?

The 369 Manifestation Journal typically includes structured sections for daily affirmations‚ following the 3-6-9 method‚ where users write their desires three times in the morning‚ six times during the day‚ and nine times at night. It often provides guided prompts to help focus on specific goals‚ such as abundance‚ relationships‚ or personal growth. Many versions include space for reflections‚ gratitude practices‚ and tracking progress over time. Some journals also offer tips on crafting effective affirmations and maintaining a positive mindset. The journal may include introductory pages explaining the science behind the 369 technique and how it aligns with the law of attraction. Overall‚ it serves as a comprehensive tool for those seeking to manifest their desires through consistent‚ structured practice.

4.2 How to Structure Your Daily Entries

Structuring daily entries in the 369 Manifestation Journal involves a consistent and intentional approach. Begin by dedicating the first section of each day to writing your primary affirmation three times‚ focusing on your main goal or desire. Use the present tense and include emotions to make it vivid. Next‚ allocate space for six additional affirmations throughout the day‚ reinforcing related or secondary goals. Finally‚ conclude with nine affirmations in the evening‚ revisiting your main goal to solidify it in your subconscious. Include a gratitude section to acknowledge positive experiences and reflect on progress. Many journals provide templates or prompts to guide this process‚ ensuring clarity and consistency. The structure helps users maintain focus and align their thoughts with their desires‚ making the manifestation process more effective and disciplined.

4.3 Why the Journal is Essential for Manifestation

The 369 Manifestation Journal is a cornerstone of the method‚ offering a structured way to align thoughts‚ emotions‚ and desires. By consistently writing affirmations‚ users gain clarity on their goals‚ focusing their intentions and amplifying their manifestation power. The journal’s daily practice helps rewire the subconscious mind‚ fostering a positive mindset and emotional connection to desires. It also serves as a tool for accountability‚ ensuring commitment to the process. Over time‚ the journal becomes a record of progress‚ providing motivation and insights into what works best. Many users find the physical act of writing more impactful than digital methods‚ as it engages multiple senses and deepens intention. Ultimately‚ the journal is not just a tool but a sacred space for transformation‚ making it indispensable for those serious about manifestation.

Free PDF Download Options

The 369 Book is available as a free PDF download from various online sources. Authors like David Kasneci and Abraham Shaheen offer guided workbooks for manifestation. Access these resources effortlessly now‚ making it easy to start your manifestation journey.

5.1 Where to Find the 369 Book for Free

Several platforms offer the 369 Book as a free PDF download. Websites like gopdfliblg.firebaseapp.com provide direct links to download the guide. Additionally‚ authors such as David Kasneci and Abraham Shaheen have made their versions available on various online libraries. Some platforms require simple sign-ups‚ while others offer immediate access. Popular choices include Project 369: The Key to the Inner Universe and 369 Manifesting Journal by Abraham Shaheen. These resources are easily accessible‚ allowing users to begin their manifestation journey without cost. Always ensure to download from reputable sites to avoid security risks.

5.2 How to Download the PDF Safely

To safely download the 369 Book PDF‚ choose reputable websites such as gopdfliblg.firebaseapp.com or trusted online libraries. Verify the download link to ensure it leads directly to the PDF without redirects. Avoid sites with excessive ads or unrelated content‚ as they may pose security risks. Always look for “https” in the URL and a padlock icon‚ indicating a secure connection. Steer clear of torrent sites or untrusted sources‚ as they may contain malware. After downloading‚ consider scanning the file with antivirus software for added protection. By following these steps‚ you can access the 369 Book safely and begin your manifestation journey with confidence.

5.3 Comparing Free vs. Paid Versions

While free PDF versions of the 369 Book are widely available online‚ they may lack the comprehensive content of the paid version. The free downloads typically include basic guidance on the 369 manifestation technique‚ such as writing affirmations three times in the morning‚ six times during the day‚ and nine times at night. However‚ paid versions‚ like the one by David Kasneci‚ offer additional resources‚ including detailed step-by-step guides‚ success stories‚ and structured journal templates. The paid version also provides in-depth insights into the law of attraction and practical tips for consistent practice. For those seeking a more immersive experience‚ the paid version is recommended‚ as it includes supplementary materials that enhance the manifestation process. Free versions are a great starting point‚ but the paid version offers a more holistic approach to achieving your goals.

Legal and Ethical Considerations

Downloading copyrighted material without permission is illegal and disrespects intellectual property. Always purchase books from authorized sources to support authors and comply with copyright laws.

6.1 Importance of Intellectual Property

Intellectual property (IP) protections are crucial for authors and creators‚ ensuring their work is not used without permission. Downloading free PDFs of books like the 369 Method without proper licensing violates these rights‚ potentially harming creators financially and undermining their ability to produce future content. IP laws exist to safeguard original ideas‚ fostering innovation and creativity. By respecting these rights‚ we support the development of new resources and encourage authors to continue sharing valuable knowledge. It is essential to prioritize legal and ethical downloading practices to maintain a fair system that benefits both creators and consumers.

6.2 Supporting Authors and Creators

Supporting authors and creators is essential for fostering innovation and high-quality content. By purchasing or downloading the 369 Book through official channels‚ you directly contribute to the sustainability of their work. Authors invest significant time and effort into developing valuable resources like the 369 Method‚ and your support enables them to continue creating. Free PDF downloads from unauthorized sources bypass this support‚ potentially harming their ability to produce future content. Ethical practices encourage a fair exchange of value‚ ensuring creators are recognized and compensated for their contributions. When you choose to support authors‚ you not only gain access to authentic and well-crafted materials but also promote a culture of respect for intellectual labor and creativity.

6.3 Understanding Copyright Laws

Copyright laws protect original works‚ including books like the 369 Book‚ ensuring authors retain exclusive rights over their content. Downloading or distributing copyrighted material without permission is illegal and violates these laws. The 369 Book‚ as an intellectual property‚ is protected under copyright‚ meaning unauthorized free PDF downloads or sharing are against the law. Respect for copyright fosters creativity and supports authors in producing quality content. Legal consequences for infringement can include fines or legal action. Always obtain books through authorized platforms to ensure compliance with copyright laws and ethical standards. This respect for intellectual property promotes a fair system for creators and consumers alike‚ safeguarding the value of original work.

Additional Resources and Guides

Explore supplementary materials‚ online courses‚ and communities to deepen your understanding of the 369 method and enhance your manifestation journey.

7.1 Recommended Books on Manifestation

For those exploring the 369 method‚ several books complement its principles. “Project 369: The Key to the Universe” by David Kasneci offers insights into manifesting success. Another popular choice is “369 Manifesting Journal” by Abraham Shaheen‚ providing a structured approach to daily affirmations. Both books align with the 369 technique‚ focusing on written affirmations to clarify desires and align emotions. These resources are widely available‚ including free PDF downloads‚ making them accessible for deeper exploration of manifestation practices. They serve as valuable companions to enhance understanding and application of the 369 method.

7.2 Online Courses and Tutorials

Online courses and tutorials are excellent resources for mastering the 369 manifestation method. Platforms like Udemy and Teachable offer courses that delve into the specifics of written affirmations‚ emotional alignment‚ and daily practices. These tutorials often include video lessons‚ downloadable worksheets‚ and interactive exercises to enhance learning. Many courses are designed to complement the 369 book and journal‚ providing deeper insights into the technique. Some courses are free‚ while others require a small fee for premium content. They are ideal for those seeking structured guidance to apply the 369 method effectively and consistently. By enrolling in these courses‚ users can gain a clearer understanding of manifestation principles and how to integrate them into their daily lives for optimal results.

7.3 Communities and Forums for Support

Joining online communities and forums can provide valuable support and guidance for those practicing the 369 manifestation method. Platforms like Facebook groups‚ Reddit forums‚ and specialized manifestation communities offer spaces to share experiences‚ ask questions‚ and connect with others on a similar journey. Many of these groups are free to join and provide access to resources such as free PDF downloads‚ affirmations‚ and success stories. Members often share tips on staying consistent with the 369 technique and overcoming common challenges. These communities foster a sense of belonging and motivation‚ helping users stay committed to their manifestation practice. Engaging with others who are using the 369 method can also provide inspiration and encouragement‚ making the journey more enjoyable and rewarding.

The 369 method offers a simple yet powerful way to manifest desires through structured journaling‚ making it accessible to everyone. Consistency is key to achieving lasting results.

8.1 Summarizing the Key Points

The 369 manifestation method is a structured journaling technique that involves writing desires three times in the morning‚ six times during the day‚ and nine times at night. This practice helps align thoughts and emotions‚ making manifestations more effective. The method emphasizes clarity‚ consistency‚ and emotional connection to desires. It also highlights the importance of gratitude and present-tense affirmations to reprogram the subconscious mind. Many users report positive experiences‚ with some achieving significant life changes. The availability of free PDF downloads has made this method accessible to a wide audience. Overall‚ the 369 technique offers a practical and empowering tool for those seeking to manifest their goals and improve their lives.

8.2 Encouragement for Consistent Practice

Consistency is key to unlocking the full potential of the 369 method. By dedicating a few minutes daily to this practice‚ you can train your mind to focus on your desires and align your energy with your goals; Many users have reported transformative results‚ from improved mental clarity to the manifestation of specific outcomes. The availability of free PDF downloads makes it easier to start and maintain this practice without financial barriers. Embrace the process with patience and persistence‚ as consistent effort is essential for lasting change. Celebrate small victories along the way and stay committed to your vision. With time‚ this simple yet powerful technique can become a life-changing habit‚ helping you achieve your dreams and live a more fulfilling life.

8.3 Final Words on the 369 Method

The 369 method offers a simple yet profound approach to manifestation‚ empowering individuals to shape their reality through focused affirmations. By leveraging the structure of writing desires three‚ six‚ and nine times daily‚ users can align their thoughts and emotions with their goals. The availability of free PDF downloads makes this powerful tool accessible to everyone‚ encouraging widespread adoption. The method’s effectiveness lies in its ability to reprogram the subconscious mind‚ fostering clarity and belief. Many have found success through this practice‚ transforming their lives in meaningful ways. As you embark on this journey‚ remember that consistency and patience are key. The 369 method is not just a technique—it’s a mindset. Embrace it fully‚ and you may discover the profound impact it can have on your life.

r410a pressure chart high and low side pdf

R410A pressure charts are essential tools for understanding the relationship between temperature and pressure in HVAC systems. They provide critical data for both high and low side pressures, helping technicians diagnose issues, ensure system efficiency, and maintain safety standards. These charts are invaluable for installation, maintenance, and troubleshooting, offering a quick reference for pressure-temperature relationships in various operating conditions.

Overview of R410A Refrigerant

R410A is a widely used HFC refrigerant, primarily composed of R32 and R125. It is known for its zero ozone depletion potential and higher efficiency compared to R22. R410A operates at higher pressures and is commonly used in air conditioning and refrigeration systems. Its thermodynamic properties make it suitable for various applications, including residential and commercial HVAC systems. R410A’s critical temperature is 158.3°F, with a critical pressure of 691.8 psia. It is a popular replacement for R22 due to environmental regulations and its improved performance characteristics.

Importance of Pressure-Temperature Charts

Pressure-temperature charts are vital for understanding the thermodynamic properties of R410A refrigerant. These charts provide essential data for determining saturation pressures at specific temperatures, which is crucial for system design and troubleshooting. By referencing these charts, technicians can identify whether the system is operating within safe and efficient parameters. They also help in diagnosing issues such as overcharging or undercharging, and identifying potential leaks or blockages. Additionally, the charts are indispensable for converting pressure units and understanding the relationship between pressure and temperature at different system operating conditions, ensuring optimal performance and safety in HVAC applications.

Understanding the R410A Pressure-Temperature Chart

The R410A pressure-temperature chart illustrates the relationship between pressure and temperature for both high and low side systems, essential for efficient HVAC operations and safety.

How to Read the Chart

To read the R410A pressure-temperature chart, identify the temperature on the x-axis and pressure on the y-axis. Locate the desired temperature and trace vertically to find the corresponding pressure. For high side pressures, focus on higher temperature ranges, while low side pressures are at lower temperatures. The chart provides pressure values in PSIG, barA, and barg, allowing conversion between units. For example, at 0°F, the pressure is approximately 48.4 PSIG. Use this data to diagnose system performance, ensuring pressures align with recommended operating ranges for efficiency and safety.

Key Data Points on the Chart

The R410A pressure chart highlights critical data points such as saturation pressures at various temperatures, boiling and condensing points, and critical pressure values. For instance, at 0°F, the pressure is 48.4 PSIG, while at 12 PSIG, the temperature is -37.7°F. The chart also shows high side pressures reaching up to 522 PSIG at 137.6°F and low side pressures as low as 12 PSIG at -37.7°F. These data points are essential for diagnosing system performance, ensuring safe operating conditions, and facilitating accurate repairs. They also help in identifying refrigerant leaks or overcharging issues by comparing actual pressures with chart values.

Conversion Between Pressure Units (PSIG, barA, barg)

The R410A pressure chart provides data in multiple units, including PSIG (pounds per square inch gauge), barA (bar absolute), and barg (bar gauge). To convert PSIG to psia (pounds per square inch absolute), add 14.5 psi (1 bar) to the gauge pressure. For example, 12 PSIG equals 26.5 psia. Similarly, barA includes atmospheric pressure, while barg does not. These conversions are crucial for system design, troubleshooting, and ensuring compatibility with equipment specifications. Accurate unit conversion helps technicians interpret data correctly and maintain system performance across different operating conditions and regions.

High Side Pressures in R410A Systems

High side pressures in R410A systems typically range from 100 to 400 PSIG, depending on ambient temperature and system load. Proper management ensures efficiency and safety.

Typical High Side Pressure Ranges

High side pressures for R410A systems generally range between 100 and 400 PSIG, depending on outdoor temperatures and system load; At moderate outdoor temperatures, pressures typically fall between 150-250 PSIG. Elevated pressures, above 300 PSIG, may indicate high ambient temperatures or system overloading. Conversely, pressures below 100 PSIG could signal low refrigerant levels or compressor issues. These ranges are critical for ensuring proper condenser operation and system efficiency. Maintaining pressures within recommended levels is essential for performance and longevity. Examples from charts show pressures like 114 PSIG at 37.8°F and 216 PSIG at 74.3°F, highlighting typical operating conditions.

Factors Influencing High Side Pressure

Outdoor temperature significantly influences R410A high side pressure, with higher temperatures leading to increased pressure and lower temperatures resulting in decreased pressure. System load also affects pressure levels, as higher cooling demands require more refrigerant flow, elevating pressure. Condenser efficiency plays a crucial role; if the condenser isn’t functioning properly, it can cause a rise in pressure. Additionally, elevation impacts pressure readings, necessitating adjustments at higher altitudes to ensure accurate measurements. The refrigerant charge level is another factor, where overcharging can lead to higher-than-normal pressures, and undercharging may result in lower pressures. Understanding these factors is vital for maintaining optimal system performance and effectively diagnosing issues.

Safe Operating Ranges for High Side Pressure

The safe operating range for R410A high side pressure typically falls between 150 and 300 PSIG under normal conditions. However, this range can vary depending on outdoor temperatures and system design. At higher outdoor temperatures, pressures may exceed 300 PSIG, while lower temperatures can reduce pressure levels. Critical pressure for R410A is 691.8 PSIG, but operational pressures should remain well below this threshold to ensure system safety. Maintaining pressure within recommended ranges is crucial to prevent overpressure situations and potential system damage. Always consult the R410A pressure chart for specific operating limits based on ambient temperature and elevation.

Low Side Pressures in R410A Systems

R410A low side pressures are critical for proper refrigeration and cooling. They typically range from 60 to 120 PSIG, varying with temperature and system load. Maintaining these pressures ensures efficient operation and prevents issues like refrigerant underflow or overcharging. Proper monitoring is essential to uphold system performance and safety. Always refer to the R410A pressure chart for accurate low side pressure values in various conditions. This ensures optimal system functionality and longevity.

Typical Low Side Pressure Ranges

In R410A systems, low side pressures typically range between 60 to 120 PSIG, depending on the operating conditions and temperature. At lower temperatures, such as 40°F, the low side pressure might be around 70 PSIG, while at higher temperatures, like 80°F, it could rise to approximately 100 PSIG. These pressures are critical for maintaining proper refrigerant flow and system efficiency. Factors such as evaporator temperature, system load, and ambient conditions influence these pressure ranges. Referencing the R410A pressure chart ensures accurate pressure values for specific operating temperatures, helping technicians maintain optimal system performance and safety.

Factors Influencing Low Side Pressure

Low side pressure in R410A systems is influenced by several key factors, including ambient temperature, evaporator load, and refrigerant flow. Higher ambient temperatures increase the pressure due to greater heat transfer demands, while lower temperatures reduce it. The evaporator’s performance and load also play a role, as higher loads increase pressure. Additionally, system restrictions, such as clogged air filters or blocked refrigerant lines, can elevate low side pressure. Proper system sizing and maintenance are crucial to ensure pressures remain within optimal ranges, as outlined in the R410A pressure chart, to prevent inefficiency or potential system damage.

Safe Operating Ranges for Low Side Pressure

The safe operating range for R410A low side pressure typically falls between 60 to 120 PSIG, depending on the evaporator temperature and system design. Referencing the R410A pressure chart, pressures below 60 PSIG may indicate insufficient refrigerant or system restrictions, while exceeding 120 PSIG could signal overcharging or high ambient temperatures. For example, at 35°F evaporator temperature, the low side pressure should be around 60 PSIG, rising to approximately 120 PSIG at 50°F. Always consult the chart for precise limits and ensure system conditions align with the application to avoid inefficiency or potential damage.

Pressure-Temperature Relationship

The pressure-temperature relationship for R410A is defined by saturation properties, where pressure increases with temperature. Charts plot this relationship for both liquid and vapor states, essential for system design and troubleshooting. At lower temperatures, pressures are negative, indicating vacuum conditions, while higher temperatures result in significantly higher pressures. For example, at 35°F, the saturation pressure is approximately 60 PSIG, rising to 150 PSIG at 90°F. This relationship is critical for determining system performance, refrigerant flow, and ensuring safe operating conditions across various applications.

Saturation Pressures at Different Temperatures

Saturation pressure for R410A varies significantly with temperature. At -60°F, saturation pressure is approximately 0.3 PSIG, increasing to 60 PSIG at 35°F. By 90°F, it reaches 150 PSIG. Charts detail these relationships, showing how pressure rises steadily with temperature. For example, at 12 PSIG, the saturation temperature is -37.7°F, while at 114 PSIG, it rises to 37.8°F. These data points are crucial for system design, ensuring proper refrigerant flow and pressure management. Understanding saturation pressures helps technicians diagnose issues like overcharging or undercharging, ensuring efficient and safe system operation across varying conditions.

Boiling and Condensing Points

The boiling and condensing points of R410A are critical for understanding its phase changes. At standard atmospheric pressure, R410A boils at -61°F and condenses at 158.3°F. Pressure-temperature charts show that at 12 PSIG, the refrigerant boils at -37.7°F, while at 114 PSIG, it condenses at 37.8°F. These points are essential for system design, as they determine the operating conditions for evaporators and condensers. Technicians use these values to ensure proper refrigerant flow and system performance, avoiding issues like inadequate cooling or system overpressure. Accurate knowledge of these points is vital for maintaining efficiency and safety in HVAC systems.

Critical Pressure and Temperature Values

R410A has a critical pressure of 691.8 psia and a critical temperature of 158.3°F, beyond which the refrigerant cannot be liquefied, regardless of pressure. These values are crucial for system design, as they define the upper limits of operation. Exceeding these points can lead to unsafe conditions and system failure. The critical density is 34.5 lb/ft³, indicating the refrigerant’s state at these extreme conditions. Understanding these values is essential for ensuring systems operate within safe and efficient parameters, as referenced in R410A pressure-temperature charts for high and low side pressures.

Applications of R410A Pressure Charts

R410A pressure charts are vital for air conditioning, refrigeration, and high-temperature systems, ensuring efficient operation, troubleshooting, and safe pressure management in various HVAC applications.

Air Conditioning Systems

R410A pressure charts are indispensable for air conditioning systems, enabling precise temperature-pressure correlations. Technicians use these charts to diagnose issues like overcharging or undercharging refrigerant, ensuring optimal performance. By referencing high and low side pressures, they can identify system leaks or blockages, ensuring efficient cooling. The charts also guide safe operating ranges, preventing overpressure and ensuring reliability. With data spanning from freezing to high temperatures, R410A charts are crucial for maintaining peak performance in residential and commercial air conditioning units, aligning with safety and efficiency standards.

Refrigeration Systems

R410A pressure charts are vital for refrigeration systems, providing precise temperature-pressure data for both high and low sides. This allows technicians to monitor system performance accurately, ensuring efficient cooling and preventing overpressure. The charts help identify issues like blockages or refrigerant leaks, enabling timely repairs. By referencing saturation pressures at various temperatures, operators can optimize system operation, especially in high-temperature applications. These charts are essential for maintaining reliability, safety, and energy efficiency in commercial and industrial refrigeration, ensuring compliance with operational standards and extending equipment lifespan.

High-Temperature Refrigeration

R410A pressure charts are indispensable for high-temperature refrigeration systems, where precise pressure-temperature management is critical. These charts provide detailed data for operating at elevated temperatures, ensuring system efficiency and safety. By referencing the chart, technicians can identify optimal operating pressures for high-temperature applications, preventing overpressure and maintaining performance. The charts also aid in diagnosing issues like blockages or overcharging, which are common in high-temperature environments. This ensures reliable operation in demanding conditions, making R410A a preferred choice for high-temperature refrigeration systems in both industrial and commercial settings.

Safety Considerations

Safety is paramount when handling R410A systems. Pressure charts help identify safe operating ranges, preventing overpressure risks. Always use protective gear and follow emergency protocols to ensure technician and system safety.

Handling R410A Safely

Handling R410A requires adherence to strict safety protocols. Always wear protective gear, including gloves, goggles, and a mask, to prevent exposure. Ensure proper ventilation in work areas to avoid inhalation risks. Use pressure charts to identify safe operating pressures, avoiding overpressure situations. Familiarize yourself with emergency procedures, such as evacuating the area and using fire extinguishers if needed. Regularly inspect equipment for leaks or damage to prevent accidental releases. Follow manufacturer guidelines and industry standards for safe handling practices.

Pressure Safety Limits

Pressure safety limits for R410A systems are critical to ensure safe operation. High side pressures typically range between 100-400 PSIG, while low side pressures generally operate below 150 PSIG. Exceeding these limits can lead to system damage or safety hazards. Always refer to the pressure chart to identify maximum allowable pressures at specific temperatures. The critical pressure of R410A is approximately 691.8 PSIA, which should never be exceeded. Staying within these limits ensures system reliability, efficiency, and safety, while also preventing potential overpressure incidents that could compromise equipment integrity or pose risks to personnel. Adhering to these guidelines is essential for proper system management.

Emergency Procedures for Overpressure

In case of overpressure in an R410A system, immediate action is necessary to prevent equipment damage or safety risks. First, shut down the system and isolate it from power sources. Next, vent the excess pressure safely, ensuring the area is well-ventilated to prevent refrigerant buildup. Check for leaks or blockages that may have caused the overpressure. Document the pressure levels using the R410A pressure chart to identify the root cause. Contact a certified technician for repairs, especially if the pressure exceeds critical limits. Always follow safety protocols to avoid injuries and environmental contamination during the procedure. Timely intervention is crucial to restore system stability and prevent further complications.

High Elevation Adjustments

High elevation requires adjustments to R410A system pressures due to lower atmospheric pressure. At 5,000 feet, pressure corrections are necessary to maintain optimal performance and safety standards.

Pressure Corrections at High Elevations

At high elevations, atmospheric pressure decreases, requiring adjustments to R410A system pressures to ensure proper operation. For example, at 5,000 feet, the atmospheric pressure is lower, so system pressures must be corrected to avoid overpressure or reduced efficiency. Gauge pressure (psig) is relative to atmospheric pressure, so absolute pressure (psia) is calculated by adding 14.5 psi to gauge pressure. This adjustment is critical for maintaining performance and safety. Technicians should consult R410A pressure charts for specific corrections at various elevations to ensure systems operate within safe and efficient parameters.

Example Adjustments for 5,000 Feet

At 5,000 feet, atmospheric pressure is lower, requiring specific adjustments to R410A system pressures. For example, to convert gauge pressure (psig) to absolute pressure (psia), add 14.5 psi. At this elevation, a system operating at 12 PSIG would have an absolute pressure of 26.5 psia. Similarly, at 114 PSIG, the temperature adjustment ensures proper operation. These corrections prevent overpressure and maintain efficiency. Always consult R410A pressure charts for precise adjustments at high elevations to ensure system performance and safety. Proper elevation corrections are critical for optimal refrigeration and air conditioning system operation.

Impact of Elevation on System Performance

Higher elevations significantly impact R410A system performance due to lower atmospheric pressure. At 5,000 feet, atmospheric pressure decreases, affecting the refrigerant’s pressure-temperature relationship. This leads to lower saturation pressures, influencing both high and low side operations. The system’s efficiency may decrease if not adjusted properly. The boiling and condensing points of R410A are altered at higher elevations, which can strain the system and potentially cause it to operate outside safe limits. Proper elevation adjustments are crucial to maintain performance and safety, ensuring the system functions optimally under varying elevation conditions and prevents potential hazards.

Troubleshooting Using the Chart

The R410A pressure chart aids in diagnosing system issues by comparing actual pressures with chart data to identify anomalies. It helps detect leaks, overcharging, and blockages by analyzing deviations in pressure-temperature relationships, ensuring accurate troubleshooting and repairs.

Identifying System Leaks

Leak detection in R410A systems can be facilitated by analyzing deviations in pressure-temperature readings from the chart. Low-side pressures below the chart’s baseline may indicate refrigerant leaks, while high-side pressures exceeding normal ranges could signal blockages or overcharging. By comparing actual system pressures with the chart’s data, technicians can pinpoint potential leaks or restrictions. For example, if the low-side pressure is significantly lower than expected for a given temperature, it may suggest refrigerant loss. Similarly, unusual pressure drops or rises can help locate faulty components or connections, enabling targeted repairs and maintaining system efficiency.

Diagnosing Overcharging or Undercharging

Diagnosing overcharging or undercharging in R410A systems relies on comparing system pressures with the chart’s data. Overcharging often causes high-side pressures to exceed chart values, leading to reduced efficiency or system damage. Conversely, undercharging results in low-side pressures below the chart’s baseline, indicating insufficient refrigerant. By cross-referencing pressure-temperature readings, technicians can identify charging issues. For instance, if the high-side pressure is higher than the chart’s value at a given temperature, it suggests overcharging. Similarly, lower-than-expected low-side pressures indicate undercharging, guiding precise adjustments to restore optimal system performance and prevent further complications. This ensures accurate diagnosis and effective system tuning.

Recognizing Blockages or Restrictions

Blockages or restrictions in R410A systems can be identified by analyzing pressure deviations from the chart’s expected values. If high-side pressures exceed chart limits while low-side pressures drop significantly, it may indicate a restriction in the refrigerant flow. For example, a clogged filter or faulty valve can cause such imbalances. By comparing actual system pressures to the chart’s data at specific temperatures, technicians can pinpoint potential blockages. Elevated high-side pressures paired with lower-than-normal low-side pressures often signal restrictions. Regularly referencing the chart ensures timely detection and resolution of these issues, preventing further system damage or efficiency losses. This diagnostic approach is crucial for maintaining optimal system performance.

Environmental and Physical Properties

R410A has a molecular weight of 72.59 g/mol, a boiling point of -61°F, and a critical density of 34.5 lb/ft³, with a GWP of 2,344.

Molecular Weight and Boiling Point

R410A has a molecular weight of 72.59 g/mol, with a boiling point of -61°F at atmospheric pressure. Its critical pressure is 691.8 psia, and the critical temperature is 158.3°F. These properties are essential for understanding its behavior in refrigeration systems. The boiling point indicates the temperature at which the refrigerant changes state from liquid to vapor at standard pressure. This data is crucial for system design and operation, ensuring proper refrigeration and safety. Additionally, R410A’s molecular weight influences its performance in heat transfer processes, making it a key factor in HVAC system efficiency and environmental impact.

Critical Pressure and Density

R410A has a critical pressure of 691.8 psia and a critical temperature of 158.3°F. Its critical density is 34.5 lb/ft³, indicating the refrigerant’s state at extreme conditions. Critical pressure is the maximum pressure the refrigerant can withstand at its critical temperature without causing system instability. This data is vital for designing and operating HVAC systems safely. Exceeding critical pressure can lead to system malfunction or safety hazards. The critical density reflects the refrigerant’s compressibility at these limits, ensuring proper sizing of components like compressors and heat exchangers for efficient operation.

Global Warming Potential (GWP)

R410A has a Global Warming Potential (GWP) of approximately 2,300–2,400 over a 100-year time horizon, significantly higher than CO2. This metric quantifies the refrigerant’s contribution to climate change relative to carbon dioxide. Despite its efficiency, R410A’s high GWP has led to increased regulatory scrutiny and a shift toward lower-GWP alternatives. The industry is moving to phase down HFCs like R410A under international agreements, emphasizing the need for eco-friendly refrigerants with lower climate impact. Understanding GWP is crucial for sustainable HVAC practices and complying with environmental regulations.

R410A pressure charts are critical for understanding system performance and safety. They provide essential data for technicians to ensure efficient operation under various conditions.

R410A pressure charts provide essential data for understanding high and low side pressures in HVAC systems. They detail saturation pressures, boiling points, and critical values, aiding in system diagnosis and efficiency. Technicians use these charts for installation, maintenance, and troubleshooting, ensuring safe and optimal performance. The charts cover a wide temperature range, from freezing to high temperatures, and include conversions between pressure units like PSIG, barA, and barg. They are indispensable for maintaining system functionality and safety, offering a quick reference for pressure-temperature relationships in various operating conditions. Regular use ensures compliance with safety standards and optimal system performance.

Best Practices for Using R410A Charts

Always reference the R410A pressure chart for accurate pressure-temperature relationships during system setup and troubleshooting. Ensure understanding of high and low side pressures to maintain optimal performance. Regularly check for updates or revisions to the chart. Use appropriate unit conversions (PSIG, barA, barg) for precise calculations. Pay attention to high elevation adjustments, as pressure readings may vary. Cross-reference the chart with system specifications to avoid overcharging or undercharging. Keep the chart accessible for quick consultations during maintenance or repairs. Regular training on chart interpretation ensures safe and efficient system operation. Adhere to safety guidelines when handling refrigerants and pressures.

Additional Resources

Access downloadable R410A pressure chart PDFs for high and low side pressures. Utilize tools like pressure-temperature calculators and explore further reading materials for in-depth understanding.

Downloadable R410A Pressure Chart PDF

A downloadable R410A pressure chart PDF provides a comprehensive guide for understanding high and low side pressures in HVAC systems. These charts detail pressure-temperature relationships in units such as PSIG, barA, and barg, making them essential for technicians. They include saturation pressures at various temperatures, boiling points, and critical values. PDF charts often feature detailed tables and graphs for quick reference. For example, at 12 PSIG, R410A operates at -37.7°F, while at 114 PSIG, it reaches 37.8°F. Downloadable resources are available on HVAC websites or manufacturer portals for easy access.

Recommended Tools for Pressure-Temperature Analysis

For accurate pressure-temperature analysis of R410A systems, essential tools include digital pressure gauges, manifold sets, and precision thermometers. Digital pressure gauges provide readings in units like PSIG or bar, ensuring precise measurements. Manifold sets allow for efficient testing of both high and low side pressures. Thermometers, especially digital models, offer accurate temperature readings, crucial for determining saturation pressures. Additionally, chart plotting software can visualize data, aiding in system diagnostics. These tools are indispensable for technicians to ensure system performance, safety, and compliance with R410A operating standards. Regular calibration of these tools is vital for reliable results.

Further Reading on R410A Refrigerant

For deeper understanding, explore resources like ASHRAE standards, manufacturer guides, and technical papers. These cover R410A’s thermodynamic properties, environmental impact, and system design. Research its global warming potential (GWP) and comparisons with other refrigerants. Additionally, review case studies on high-efficiency systems and retrofitting R22 systems to R410A. High-elevation adjustments and safety protocols are also critical areas for further study. These resources provide theoretical and practical insights, ensuring comprehensive knowledge of R410A’s application and management in various climates and system configurations.

whole 30 food list pdf

The Whole30 Food List PDF is a comprehensive guide to navigating the program, outlining approved foods, prohibited items, and tips for a successful 30-day reset. Perfect for meal planning and grocery shopping, it helps you stay compliant and focused on whole, nutrient-dense foods. Downloadable and printable, this resource simplifies your journey, ensuring clarity and convenience as you commit to healthier eating habits.

What is the Whole30 Program?

The Whole30 program is a 30-day dietary reset focused on eliminating inflammatory foods and embracing whole, nutrient-dense ingredients. It emphasizes removing grains, dairy, legumes, added sugars, and alcohol to promote healing and improved health. Designed to reset your metabolism and mindset, the program encourages a focus on meats, seafood, eggs, vegetables, fruits, and healthy fats. By cutting out processed and harmful foods, participants aim to reduce inflammation, improve energy, and develop a healthier relationship with food. The program is not about weight loss but about nourishing your body with real food for 30 days, leading to long-term benefits and a clearer understanding of how food affects your health.

Why Use a Whole30 Food List PDF?

A Whole30 Food List PDF is an essential tool for anyone starting or following the program. It provides a clear, concise guide to approved and prohibited foods, eliminating confusion and guesswork. With a printable format, you can easily take it grocery shopping or keep it in your kitchen for quick reference; The PDF helps ensure compliance by highlighting hidden ingredients to avoid and offering a quick checklist for meal planning. It also serves as a handy resource for understanding the program’s rules and staying on track throughout your 30-day journey. By having all the necessary information in one place, you can focus on nourishing your body with whole, healthy foods without the stress of constant decision-making.

Benefits of a Printable Whole30 Food List

A printable Whole30 food list offers numerous benefits, making your journey smoother and more organized. It serves as a quick reference guide, helping you identify compliant foods at a glance. The portability of a printed list allows you to take it shopping, ensuring you only purchase Whole30-approved items. It also aids in meal planning by providing a clear outline of what you can eat, reducing the time spent deciding on recipes. Additionally, having a physical copy can be motivating, serving as a daily reminder of your commitment to the program. This tool is especially helpful for beginners, as it eliminates confusion and keeps you focused on your health goals throughout the 30-day reset.

Core Principles of the Whole30 Program

The Whole30 program focuses on eliminating grains, dairy, legumes, added sugars, and alcohol for 30 days, emphasizing whole, unprocessed foods to promote a dietary reset and improved health.

Foods to Eliminate During the Program

The Whole30 program requires eliminating specific food groups to promote a dietary reset. These include grains (wheat, oats, rice), dairy (milk, cheese, yogurt), and legumes (beans, lentils). Added sugars, even in natural forms like honey, and alcohol are also prohibited. Processed foods, junk snacks, and treats containing compliant ingredients are off-limits. Certain additives like carrageenan and sulfites should be avoided. The focus is on eliminating inflammatory foods that can disrupt digestion and energy levels. By removing these, the program aims to support your body’s natural healing processes and improve overall health. This strict elimination phase helps identify food sensitivities and promotes a cleaner, more balanced diet. Staying compliant ensures the best results during your 30-day journey.

Foods to Include in Your Diet

During the Whole30 program, focus on incorporating whole, unprocessed foods that nourish your body. This includes a variety of meats, poultry, and seafood, such as grass-fed beef, pasture-raised chicken, and wild-caught fish. Vegetables and fruits form the foundation of your diet, with dark leafy greens, broccoli, and colorful fruits like berries and citrus being excellent choices. Healthy fats like avocado, olive oil, and coconut oil are also essential for satiety and energy; Eggs and compliant dairy alternatives, such as almond milk, can be included. Herbs, spices, and natural seasonings add flavor without compromising compliance. By prioritizing these foods, you create a balanced and nutrient-dense diet that supports your health goals.

Understanding the 30-Day Reset

The 30-Day Reset is the cornerstone of the Whole30 program, designed to rejuvenate your relationship with food and your body. It’s a structured period where you eliminate potentially inflammatory foods like grains, dairy, legumes, added sugars, and alcohol. This reset allows your body to heal and recalibrate, often leading to improvements in digestion, energy levels, and overall health. The 30-day duration is chosen because it provides sufficient time for noticeable changes, helping you break free from food cravings and habits that may hinder your well-being. By focusing on whole, nutrient-dense foods, you empower your body to function optimally. The reset is not just a diet but a transformative experience aimed at fostering long-term health benefits and awareness of how your body responds to different foods.

Whole30 Food List Categories

Organizes foods into categories like meat, poultry, seafood, vegetables, fruits, healthy fats, oils, eggs, and dairy alternatives for clarity and easy reference during shopping and meal planning.

Meat, Poultry, and Seafood

Focus on unprocessed, nutrient-dense options like grass-fed beef, pasture-raised poultry, and wild-caught seafood. Avoid added sugars, grains, and processed additives. Opt for fresh or frozen varieties, ensuring no harmful ingredients. When shopping, choose organic or wild-caught for better quality. Always check labels for compliance, as some packaged meats may contain non-Whole30 ingredients. Incorporate a variety of proteins to keep meals diverse and satisfying. Grilling, baking, or sautéing are great ways to prepare these foods. Pair with vegetables for balanced meals. This category forms the foundation of your Whole30 diet, providing essential protein and nutrients for energy and health.

Vegetables and Fruits

Vegetables and fruits are cornerstone components of the Whole30 diet, providing essential vitamins, minerals, and fiber. Focus on a wide variety of colorful vegetables, such as leafy greens, broccoli, and bell peppers, to maximize nutrient intake. Fresh, frozen, or canned options without added sugars or preservatives are ideal. Include a mix of berries, citrus fruits, and apples for natural sweetness. Avoid juices and dried fruits, as they can be high in sugar. These foods help keep meals balanced and satisfying, ensuring you stay on track with the Whole30 guidelines. Pair vegetables with healthy fats and proteins for a well-rounded plate. Emphasize whole, unprocessed forms to reap the most benefits and maintain compliance.

Healthy Fats and Oils

Healthy fats and oils are essential for a balanced Whole30 diet, providing energy and supporting nutrient absorption. Avocados, nuts, and seeds are excellent sources of healthy fats. Olive oil, coconut oil, and avocado oil are recommended for cooking and dressings. Always choose unrefined, cold-pressed options to avoid harmful additives. These fats enhance the flavor of meals and keep you satiated. Be mindful of portion sizes, as they are calorie-dense. Avoid processed oils like canola or soybean oil, which are not Whole30 compliant. Incorporating these fats into your meals ensures you stay nourished and satisfied throughout your 30-day reset. They also play a key role in maintaining healthy cholesterol levels and overall well-being.

Eggs and Dairy Alternatives

Eggs are a versatile and protein-rich staple in the Whole30 diet, perfect for breakfast, snacks, or meals. While dairy is eliminated, non-dairy alternatives like almond milk, coconut milk, and cashew milk are allowed. Look for unsweetened and unflavored options to avoid added sugars. Vegan yogurt and mayonnaise made from compliant ingredients are also great alternatives. These substitutes help maintain variety in your diet without compromising the program’s rules. Always check labels for hidden additives like carrageenan or sulfites, which are prohibited. Eggs and these alternatives provide essential nutrients and keep meals satisfying and diverse throughout your Whole30 journey. They are key to maintaining energy levels and supporting overall health during the reset period.

Grocery Shopping with the Whole30 Food List PDF

The Whole30 Food List PDF simplifies grocery shopping by providing a clear guide to compliant foods, ensuring organized and efficient trips while avoiding non-compliant items.

How to Read Labels for Compliance

Reading labels is crucial for ensuring compliance with the Whole30 program. Start by scanning the ingredient list for prohibited items like added sugars, alcohol, grains, dairy, and legumes. Look for hidden ingredients such as carrageenan, sulfites, and MSG, which are commonly found in processed foods. Pay attention to certifications like “Whole30 Approved” or “Paleo-Friendly” to streamline your shopping. Avoid products with artificial flavors, colors, or preservatives. Use the Whole30 Food List PDF as a reference guide to identify compliant ingredients; Always double-check the labels, even for seemingly harmless items, to ensure they align with the program’s rules. This diligence will help you stay on track and avoid accidental violations of the Whole30 guidelines.

Navigating the Grocery Store Aisles

Navigating the grocery store aisles during Whole30 requires strategic planning to avoid non-compliant foods. Start by shopping the perimeter of the store, where fresh produce, meats, and seafood are typically located. Avoid the center aisles, which are filled with processed and packaged items. Use your Whole30 Food List PDF to quickly identify compliant foods and avoid impulse purchases. Focus on seasonal fruits and vegetables for freshness and affordability. When shopping for meats, opt for wild-caught seafood and grass-fed options. Don’t forget to check the freezer section for organic, flash-frozen vegetables and wild-caught fish. By sticking to whole, unprocessed foods and using your printable list as a guide, you’ll efficiently navigate the store and stay on track with your Whole30 goals.

Hidden Ingredients to Avoid

While following the Whole30 program, it’s crucial to be vigilant about hidden ingredients that can sneak into your diet. Many packaged foods, even those labeled as “healthy,” contain additives like added sugars, sulfites, and gums such as carrageenan, which are not Whole30 compliant. Always read nutrition labels carefully to identify these sneaky ingredients. For example, canned goods, sauces, and even some meats may contain hidden sugars or preservatives. Use your Whole30 Food List PDF as a reference to ensure the foods you’re purchasing align with program guidelines. By staying informed and double-checking labels, you can avoid unintentional slip-ups and maintain the integrity of your 30-day reset.

Meal Planning and Prep

Meal planning and prep are essential for Whole30 success. Create a weekly meal plan, organize grocery shopping, and prep meals in advance using the Whole30 Food List PDF as your guide.

Creating a Weekly Meal Plan

Creating a weekly meal plan is crucial for Whole30 success. Start by listing meals for each day, ensuring variety and balance. Use the Whole30 Food List PDF to select compliant ingredients. Plan breakfast, lunch, dinner, and snacks, avoiding repetitive meals. Consider batch cooking and prepping to save time. Include leftovers in your plan to minimize waste. Refer to the PDF for ideas on combining proteins, vegetables, and healthy fats. A structured plan helps prevent decision fatigue and ensures adherence to Whole30 guidelines. Adjust the plan as needed based on preferences and dietary needs. Staying organized with a clear plan enhances the likelihood of completing the program successfully.

Meal Prep Tips for Success

Meal prep is essential for Whole30 success, helping you stay on track and avoid last-minute decisions. Dedicate one day a week to prepare meals, portioning them into containers for easy grab-and-go options. Chop vegetables, marinate proteins, and cook bulk items like cauliflower rice or sweet potatoes. Use the Whole30 Food List PDF to ensure all ingredients are compliant. Store prepped meals in airtight containers to maintain freshness. Label and date everything for clarity. Keep snacks like fruit, nuts, and veggies readily available. Avoid monotony by varying your meals and flavors. Prep time saves time during the week and reduces the temptation to deviate from the program. Stay consistent and enjoy the convenience of prepared meals!

Snacks and Quick Meals

Snacks and quick meals are crucial for maintaining energy and adherence to the Whole30 program. Opt for fresh fruits, raw or roasted vegetables, and nuts like almonds or walnuts. Hard-boiled eggs, avocado slices, and homemade trail mix are convenient options. For quick meals, prepare lettuce wraps with grilled chicken or tuna salad. Keep a stash of compliant deli meats and pre-washed greens for easy assembly. Soups, stir-fries, and omelets can be whipped up in minutes using Whole30-approved ingredients. Always refer to the Whole30 Food List PDF to ensure your choices are compliant. Planning ahead with prepped snacks and meals saves time and prevents cravings from leading to non-compliant choices. Stay prepared and enjoy nourishing, quick options that keep you on track!

Reintroduction Phase

The Reintroduction Phase follows the 30-day reset, allowing you to gradually reintroduce eliminated foods to identify sensitivities. Monitor symptoms and adjust your diet accordingly for long-term health.

Understanding the Reintroduction Process

The Reintroduction Process is a crucial step after completing the Whole30 program, helping you identify how specific foods affect your body. It involves gradually reintroducing eliminated foods like grains, dairy, or legumes one at a time. This method allows you to observe any adverse reactions, such as digestive issues or energy crashes. By carefully tracking symptoms, you can determine which foods are tolerated and which should be avoided long-term. The process emphasizes mindfulness and self-awareness, enabling you to create a personalized diet that supports optimal health and wellness. This phase is key to understanding your unique nutritional needs and preferences. It ensures a smooth transition to a sustainable eating plan.

Identifying Food Sensitivities

Identifying food sensitivities is a key benefit of the Whole30 program, as it helps you understand how specific foods affect your body. After the 30-day reset, the reintroduction phase allows you to slowly reintroduce eliminated foods, such as grains, dairy, or legumes, one at a time. By carefully monitoring your body’s reactions, you can identify foods that cause inflammation, digestive discomfort, or energy fluctuations. Common signs of sensitivity include bloating, skin issues, or joint pain. Tracking these reactions in a food diary can provide clarity. By pinpointing problematic foods, you can create a personalized diet that avoids triggers, promoting long-term health and well-being. This process empowers you to make informed choices about what you eat. It ensures a healthier relationship with food.

Transitioning After Whole30

Transitioning after Whole30 involves gradually reintroducing eliminated foods while maintaining healthy habits. The program’s focus is on building sustainable eating practices, not restriction. After completing the 30-day reset, you can slowly incorporate foods like grains, dairy, or legumes, observing how your body responds. This transition phase helps you identify which foods best support your long-term health. It’s important to continue prioritizing whole, nutrient-dense foods while allowing occasional treats in moderation. By staying mindful of portion sizes and avoiding unhealthy patterns, you can maintain the benefits of Whole30, such as improved energy and reduced inflammation. The goal is to create a balanced diet that works for your lifestyle, ensuring you feel nourished and empowered beyond the program.

Whole30 Tools and Resources

The Whole30 Food List PDF is a vital resource for success, offering a clear guide to approved foods, hidden ingredients to avoid, and compliant additives. Additional tools include meal templates, shopping lists, and community support to help you stay on track. These resources simplify your journey, ensuring you have everything needed to plan and prepare Whole30 meals confidently.

Where to Find the Whole30 Food List PDF

The Whole30 Food List PDF can be easily found on various health and wellness websites, such as Unbound Wellness and 40 Aprons, which offer free downloadable resources. Many bloggers and Whole30 enthusiasts provide printable PDFs specifically designed to simplify meal planning and grocery shopping. Additionally, the official Whole30 website and affiliated resources often include comprehensive food lists and guides. These PDFs are typically free and accessible, making it easy to stay compliant with the program. They often include categorized lists of approved foods, hidden ingredients to avoid, and tips for reading labels. Downloading these resources ensures you have a handy reference for your 30-day journey.

Additional Resources for Whole30 Success

Beyond the Whole30 Food List PDF, numerous resources are available to support your journey. Websites like Unbound Wellness and 40 Aprons offer free meal plans, recipes, and printable guides. The official Whole30 website provides detailed program rules, success stories, and expert tips. Social media groups and forums connect you with a vibrant community for encouragement and advice. Blogs and cookbooks, such as those by Melissa Hartwig, offer creative meal ideas and insights into the program; Additionally, online courses and webinars delve deeper into topics like reintroduction and maintaining healthy habits post-Whole30. These resources collectively empower you to stay motivated, informed, and successful throughout your 30-day reset and beyond.

Community Support and Guidance

The Whole30 community is a powerful tool for success, offering motivation, tips, and accountability. Join forums, Facebook groups, and Instagram communities to connect with others sharing your journey. Local Whole30 meetups and online challenges provide additional support. Blogs and websites like Unbound Wellness and 40 Aprons share recipes, advice, and encouragement. Many participants find inspiration in success stories and testimonials from those who’ve completed the program. Coaches and mentors are also available to guide you through challenges. Engaging with the community helps you stay committed, troubleshoot obstacles, and celebrate milestones. The collective energy of the Whole30 community is invaluable, ensuring you feel supported every step of the way. Embrace it to enhance your experience and achieve lasting results! Community support is key to your Whole30 success, fostering connection and accountability throughout your journey.