self build garden room guide pdf

Welcome to the ultimate guide on self-build garden rooms! Discover how to create your own bespoke garden room with detailed plans‚ DIY kits‚ and expert tips. Perfect for homeowners seeking extra space‚ this comprehensive resource offers step-by-step instructions‚ material lists‚ and design inspiration to help you build a stunning‚ functional garden room effortlessly.

What is a Self-Build Garden Room?

A self-build garden room is a DIY project where homeowners construct an additional functional space using pre-designed plans and materials. These structures‚ often resembling small offices or studios‚ can be customized to suit individual needs. With detailed guides and insulation options‚ they offer a cost-effective way to enhance your property. Ideal for those seeking extra space‚ self-build garden rooms provide a manageable building experience‚ making them accessible to people of all skill levels.

Benefits of Building Your Own Garden Room

Constructing your own garden room offers numerous advantages. It allows for personalized design‚ cost savings‚ and the ability to add value to your property. With detailed guides and DIY kits‚ the process is more accessible than ever. Additionally‚ self-build projects provide a sense of accomplishment and flexibility in tailoring the space to your specific needs. This approach also enables you to work within your budget‚ making it a practical and rewarding endeavor for homeowners seeking extra functional space.

Overview of the Self-Build Process

Building your own garden room is a manageable project with the right guidance. The process typically involves planning‚ preparing the site‚ constructing walls and roof‚ and installing finishes. Detailed guides and DIY kits provide step-by-step instructions‚ making it achievable for those with basic DIY skills. From foundation work to final touches‚ the self-build approach offers flexibility and cost savings. With comprehensive plans and material lists‚ you can efficiently progress through each stage‚ ensuring a well-crafted and functional garden room tailored to your needs and preferences.

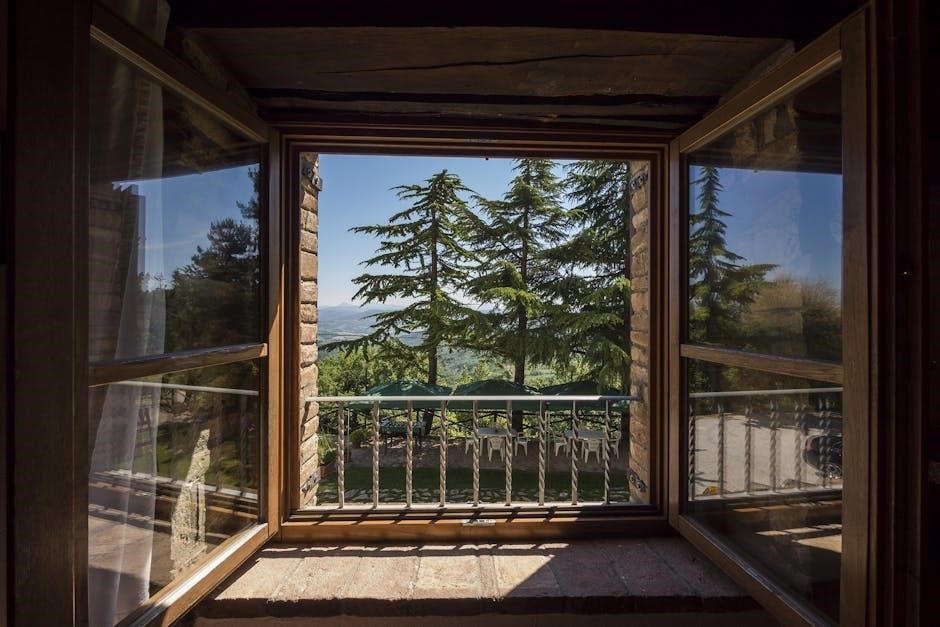
Planning and Designing Your Garden Room

Plan your garden room by considering space‚ purpose‚ and design. Use detailed guides to create a layout that suits your needs and outdoor setting perfectly.

Setting a Budget and Timeline

Setting a realistic budget and timeline is crucial for your garden room project. Use detailed guides to estimate costs and plan construction schedules. Start by assessing your budget‚ considering materials‚ labor‚ and permits. Break down expenses into manageable parts‚ such as foundation‚ walls‚ roof‚ and finishes. Create a timeline that aligns with your goals‚ ensuring each phase is completed on time. Utilize cost estimates and construction schedules from expert guides to avoid overspending and delays‚ ensuring your project stays on track and within budget.

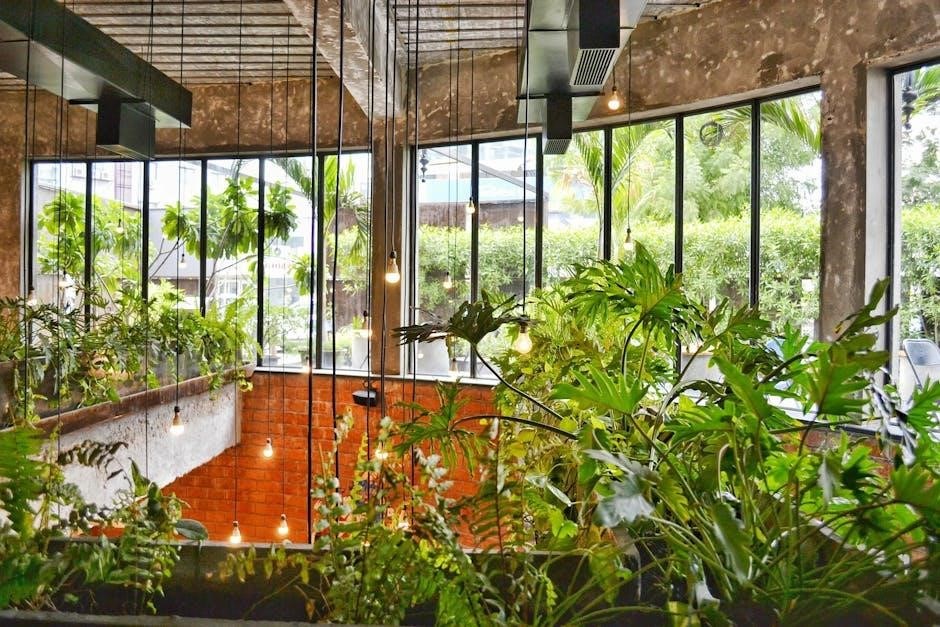
Designing the Layout and Features

Designing the layout and features of your garden room involves balancing functionality and aesthetics. Start by defining the room’s purpose‚ whether it’s a home office‚ lounge‚ or studio. Consider the space’s flow‚ ensuring easy movement and practical use. Use detailed blueprints and 3D models to visualize your design; Incorporate features like large windows for natural light‚ insulation for comfort‚ and electrical systems for functionality. Prioritize elements that enhance usability and personal style‚ ensuring your garden room meets your needs and complements your outdoor space.

Choosing the Right Materials and Suppliers

Selecting the right materials and suppliers is crucial for your garden room project. Look for durable‚ weather-resistant materials like timber‚ insulation‚ and roofing supplies. Use detailed PDF plans and price lists to source materials efficiently. Consider suppliers offering high-quality components‚ such as pre-made kits or luxury finishes. Ensure materials align with your design and budget‚ and opt for reputable suppliers to guarantee long-lasting results. This step ensures your garden room is both functional and visually appealing‚ tailored to your unique needs.

Preparing the Site and Foundations

Assess the site‚ clear debris‚ and level the ground. Use materials like ground screws or concrete for a stable base‚ ensuring proper drainage and structural integrity.

Assessing the Site for Construction

Evaluate your site’s conditions‚ ensuring it is level and well-drained. Check for any obstructions or uneven ground that may require leveling. Consider the surrounding landscape and sunlight direction to optimize placement. Verify that the area is clear of debris and vegetation. Assess the soil type to determine the most suitable foundation method‚ such as ground screws or concrete bases; Proper site assessment ensures a stable and even base for your garden room‚ preventing future structural issues.

Types of Foundations for Garden Rooms

Choosing the right foundation is crucial for stability. Options include slab foundations‚ ideal for flat sites‚ and strip foundations‚ suited for larger structures. Screw pile foundations are perfect for uneven terrain‚ offering a quick‚ minimal-dig solution. Each type ensures a durable base‚ preventing structural issues and aligning with your garden room’s needs. Proper foundation selection guarantees long-term stability and safety‚ adapting to various site conditions effectively.

Preparing the Ground for Construction

Before construction begins‚ the ground must be properly prepared to ensure a stable base. Clear the site of debris‚ vegetation‚ and obstructions. Level the ground using tools like shovels or diggers‚ ensuring even terrain. Compact the soil to prevent settling and improve stability. Lay a layer of sand or gravel for drainage and a smooth surface. Check for any underground utilities and mark their locations. Proper ground preparation ensures a solid foundation and prevents future structural issues‚ making the construction process smoother and more efficient.

Constructing the Walls and Roof

Construct the wall frames‚ install windows‚ and build the roof structure. Add roofing materials‚ ensuring waterproofing for durability. Follow detailed guides for precise assembly and alignment.

Building the Wall Frames and Installing Windows

Construct wall frames using high-quality materials‚ ensuring precise measurements for stability. Assemble frames on-site or pre-fabricate for efficiency. Install windows according to detailed plans‚ ensuring proper alignment and sealing. Use weatherproof materials to prevent leaks. Follow step-by-step guides for accurate assembly. Ensure frames are level and secure before proceeding. Properly fit windows to enhance natural light and ventilation. Detailed instructions in PDF guides provide clear methods for frame construction and window installation‚ ensuring a professional finish. This step is crucial for the structural integrity of your garden room.

Constructing the Roof Structure

Building the roof structure is a critical step in your garden room project. Use durable materials like timber frames or prefabricated trusses for a sturdy base. Ensure accurate measurements and secure the structure to the wall frames. Install rafters and support beams for added stability. Consider roofing materials like tiles or metal‚ following detailed guides for precise installation. Proper alignment and sealing are essential for a weather-tight finish. Consult professional plans or guides if unsure‚ as a well-constructed roof ensures longevity and protection.

Installing Roofing Materials and Waterproofing

Once the roof structure is in place‚ install high-quality roofing materials such as tiles‚ metal‚ or EPDM rubber. Ensure precise fitting and sealing to prevent leaks. Apply waterproofing membranes or coatings for added protection; Follow detailed guides for layering and securing materials. Proper installation ensures a weather-tight seal. Use manufacturer-recommended adhesives and fasteners for durability. Inspect and test the roof for any gaps or weaknesses before finalizing. A well-installed roof guarantees longevity and protection from the elements.

Insulation and Interior Finishing

Insulate walls‚ floor‚ and roof for energy efficiency; Install electrical systems safely. Add interior finishes and decor to create a functional‚ comfortable‚ and stylish space.

Insulating Walls‚ Floor‚ and Roof

Insulating your garden room is crucial for energy efficiency and comfort. Use high-quality materials like PIR‚ mineral wool‚ or foam board for walls and floor. Ensure the roof is well-insulated to retain heat and reduce noise. Properly install insulation according to manufacturer guidelines. Consider adding a vapor barrier to prevent moisture issues. Follow detailed step-by-step instructions from your guide to achieve optimal results. This step ensures your garden room remains warm in winter and cool in summer‚ making it a functional year-round space.

Installing Electrical Systems

Installing electrical systems in your garden room requires careful planning and adherence to safety standards. Start by mapping out your power needs‚ including lighting‚ sockets‚ and any appliances. Use detailed guides to run cables safely‚ ensuring proper insulation and protection. Consider hiring a professional for complex wiring to avoid hazards. Follow your guide’s step-by-step instructions for correct installations. Always comply with local building regulations and safety codes to ensure your garden room is functional and secure. Proper electrical setup enhances usability and safety.

Adding Interior Finishes and Decor

Personalize your garden room with interior finishes and decor to create a welcoming space. Install flooring‚ such as laminate or carpet‚ and add wall finishes like paint or paneling. Incorporate storage solutions and shelving for functionality. Use the guide’s tips to select lighting fixtures and furniture that suit your style. Add decorative elements like artwork or plants to enhance the ambiance. Refer to your PDF plans for specific material recommendations and step-by-step instructions to achieve a professional-looking interior. This final touch brings your garden room to life‚ making it a cozy retreat or productive workspace.

Final Touches and Maintenance

Complete your garden room with doors‚ lighting‚ and furniture. Regular maintenance ensures longevity‚ protecting your investment and preserving its functionality and aesthetic appeal over time.

Installing Doors and Exterior Finishes

Install doors securely‚ ensuring proper alignment and weatherproofing. Add exterior finishes like cladding or trim for a polished look. Paint or stain to match your home’s style. Finish with hardware installation. Ensure all elements are level and securely fastened for durability and safety;

Adding Lighting and Furniture

Add lighting to create ambiance and functionality‚ choosing options like ceiling fixtures‚ wall sconces‚ or solar-powered lights. Select furniture that suits your garden room’s purpose‚ such as a desk for a home office or a sofa for relaxation. Ensure pieces are proportional to the space and made from durable‚ weather-resistant materials. Personalize the area with decorative accents‚ rugs‚ and plants to make it inviting. Measure carefully to avoid overcrowding‚ ensuring a comfortable and stylish finish to your garden room.

Maintenance Tips for Longevity

Regular maintenance ensures your garden room remains durable and functional. Inspect the roof and walls for damage‚ clean gutters‚ and trim nearby plants. Check for any gaps or cracks in windows and doors‚ sealing them to prevent water ingress. Apply weatherproof coatings to exterior surfaces annually. Keep the interior dry by using a dehumidifier if necessary. Clean lighting fixtures and furniture regularly to maintain their appearance. Address any issues promptly to protect your investment and extend the lifespan of your garden room.

Legal and Safety Considerations

Ensure compliance with local building regulations and safety standards. Always follow construction guidelines‚ obtain necessary permits‚ and adhere to safety protocols to avoid legal issues and ensure a safe build.

Understanding Building Regulations

Building regulations ensure your garden room meets safety and structural standards. Research local requirements for permits and compliance. The self-build guide provides detailed insights into navigating regulations‚ ensuring your project adheres to legal standards. Understanding these rules is crucial for avoiding fines and ensuring safety. Always consult local authorities and refer to the guide for specific instructions tailored to your project’s needs.

Ensuring Safety During Construction

Safety is paramount during garden room construction. Conduct a thorough risk assessment and ensure proper protective gear is worn. Follow tool manufacturer guidelines and maintain a clean site to prevent accidents. Use sturdy scaffolding and ensure all electrical work is carried out by professionals. Regularly inspect equipment and materials for damage. Keep emergency contact information accessible and educate everyone involved on site safety protocols. Adhering to these practices minimizes risks and ensures a secure building environment for all involved.

Obtaining Necessary Permits

Before starting your garden room project‚ ensure you obtain all required permits. Check with your local planning department to determine if your project meets zoning regulations. Submit detailed plans and specifications for approval. Depending on the size and complexity‚ you may need building‚ electrical‚ or plumbing permits. Failure to secure permits can lead to legal issues or fines. Ensure compliance with local building codes and regulations to avoid delays. Proper documentation and approval are essential for a smooth construction process and long-term compliance.

orea rental application form 410 pdf

The OREA Rental Application Form 410 is a standardized document developed by the Ontario Real Estate Association (OREA) for residential rental applications in Ontario. It helps landlords assess potential tenants by collecting personal, rental history, and financial information. This form is widely used across Ontario to streamline the rental process and ensure compliance with provincial tenancy laws. Available as a downloadable PDF, it simplifies tenant screening and provides a clear framework for both landlords and tenants. Form 410 was revised in 2009 to better meet the needs of Ontario’s rental market. Its use is recommended but not mandatory under the Residential Tenancies Act (RTA).

1.1 Purpose of the Form

The OREA Rental Application Form 410 is designed to assist landlords in evaluating potential tenants for residential properties in Ontario. Its primary purpose is to collect essential information about applicants, including personal details, rental history, and financial status. This helps landlords make informed decisions about tenant suitability. The form streamlines the application process by providing a standardized format for gathering necessary data. It ensures that landlords can assess applicants fairly and efficiently while complying with Ontario’s tenancy laws. Form 410 serves as a vital tool for maintaining a smooth and lawful rental process.

1.2 Importance of the Form in Ontario Rentals

The OREA Rental Application Form 410 plays a crucial role in Ontario’s rental market by providing a standardized tool for landlords to evaluate tenants. It ensures transparency and fairness in the tenant selection process while protecting the interests of both parties. The form’s structured format helps landlords assess applicants consistently, reducing the risk of discrimination or bias. Additionally, it aids landlords in verifying financial stability and rental history, which are critical for maintaining a successful tenancy. Form 410 is widely recognized as a reliable resource in Ontario, making it a cornerstone of the rental application process.

Structure and Content of Form 410

Form 410 is a comprehensive document divided into sections for personal information, rental history, employment details, and financial data. It includes fields for applicant details, such as name, date of birth, and contact information, as well as spaces for references and credit checks. The form is designed to be clear and organized, ensuring landlords can efficiently assess applicants. Its structured format makes it easy to gather all necessary information in one place. This standardized approach simplifies the rental application process for both tenants and landlords in Ontario.

2.1 Personal Information Section

The Personal Information Section of Form 410 collects essential details about applicants, including their full name, date of birth, and contact information. This section also requests identification details, such as driver’s license numbers, to verify identity. Applicants are required to provide their current and previous addresses, along with emergency contact information. The section is designed to be straightforward and organized, ensuring landlords can quickly assess applicant credibility. By gathering foundational data, this part of the form lays the groundwork for further evaluation of rental suitability. Accurate completion of this section is crucial for a smooth rental application process.

2.2 Rental History and Employment Details

The Rental History and Employment Details section of Form 410 is crucial for assessing an applicant’s reliability and financial stability; Applicants must provide information about their previous landlords, including names, addresses, and tenancy dates, to verify rental history. Employment details, such as job title, employer, and duration, are also required. Self-employed individuals must disclose their business details. Additionally, the section asks about income sources and monthly earnings, helping landlords evaluate the applicant’s ability to pay rent consistently. Accurate and complete information in this section is vital for landlords to make informed decisions.

2.3 Financial and Credit Information

The Financial and Credit Information section of Form 410 requires applicants to disclose their financial standing. This includes bank account details, savings, investments, and other assets. Applicants must also provide credit card and loan information, including balances and monthly payments. Additionally, the form asks for bankruptcy or consumer proposal details and whether they have any outstanding debts. This section helps landlords assess the applicant’s financial stability and creditworthiness. Accurate disclosure is essential for landlords to evaluate the risk of non-payment. This information is critical in the tenant screening process.

How to Obtain and Fill Out Form 410

Form 410 can be downloaded from the OREA website or obtained through Ontario real estate offices. Carefully complete all sections, ensuring accuracy and legibility. Sign and date the application.

3.1 Downloading the Form

The OREA Rental Application Form 410 can be downloaded directly from the Ontario Real Estate Association (OREA) website in PDF format. It is readily available for members and non-members alike, ensuring easy access for both landlords and tenants. The form is designed to be fillable online, allowing applicants to type in their information before printing. Once downloaded, users can save it for future use or share it electronically. Instructions for completing the form are often included to guide applicants through the process. Ensure the form is downloaded from official sources to avoid outdated versions. Always verify the revision date (e.g., 2009) to ensure compliance with current standards.

3.2 Step-by-Step Guide to Completing the Form

Start by downloading the latest version of Form 410 from the OREA website. Begin with the personal information section, providing your full name, date of birth, and contact details. Next, fill in your current address and employment details, including your employer’s name, position, and income. Include rental history, listing previous landlords and their contact information. Disclose financial information, such as bank account details and credit history. Attach required documents, like proof of employment and ID. Review the form for accuracy, sign, and date it before submission. Ensure all sections are complete to avoid delays in processing.

Submission and Processing of the Application

After completing Form 410, submit it to the landlord along with required documentation. The landlord reviews the application, verifies references, and may conduct a credit check. Approval leads to a lease agreement.

4.1 Required Documentation

When submitting Form 410, applicants must provide supporting documents to validate the information given. These typically include government-issued photo ID, recent pay stubs, bank statements, and employment letters. Tenants may also need to supply proof of rental history, such as references from previous landlords or rental agreements. Additionally, self-employed individuals should provide financial statements or tax returns. Ensuring all required documentation is included accelerates the processing of the application. Landlords may request additional paperwork to assess suitability. Proper documentation helps verify the accuracy of the information provided in Form 410.

4.2 Landlord’s Review Process

After receiving a completed Form 410, landlords review the application to assess the applicant’s suitability. They verify personal details, rental history, and financial stability. Credit checks and references may be requested. Landlords evaluate employment status, income consistency, and debt levels to determine reliability. The form provides a structured basis for fair evaluation, ensuring transparency. While the form aids in screening, it is not legally binding. Landlords may approve, deny, or request additional information. The review process helps landlords make informed decisions, balancing tenant qualifications with property management needs. This step is crucial for fostering a positive landlord-tenant relationship.

Legal Considerations and Requirements

The OREA Form 410 complies with Ontario tenancy laws, ensuring a fair and transparent rental process. It is not a legally binding contract but helps landlords and tenants understand their rights and responsibilities. The form must be used in accordance with the Residential Tenancies Act (RTA), and landlords are not liable for its use. Compliance with provincial regulations is essential to maintain legal validity and avoid disputes. Proper use of the form protects both parties and promotes a balanced rental relationship.

5.1 Compliance with Ontario Tenancy Laws

The OREA Rental Application Form 410 is designed to comply with Ontario’s Residential Tenancies Act (RTA), ensuring a fair and lawful rental process. It prohibits questions that could lead to discrimination, such as inquiries about family status or disabilities. The form respects tenant rights while allowing landlords to assess applicants responsibly. Transparency is key, as it avoids illegal clauses and ensures both parties understand their obligations. By adhering to the RTA, Form 410 helps prevent disputes and fosters a balanced rental relationship. Proper use of the form aligns with legal standards, protecting both tenants and landlords under Ontario law.

5.2 Landlord-Tenant Rights and Responsibilities

The OREA Rental Application Form 410 helps clarify the rights and responsibilities of both landlords and tenants under Ontario law. Landlords have the right to screen applicants and maintain their property, while tenants are entitled to a safe, habitable living space and protection from unlawful eviction. The form ensures transparency, outlining expectations for rent payments, property maintenance, and lease terms. It also highlights the importance of mutual respect and legal compliance, fostering a balanced relationship between both parties. By using Form 410, landlords and tenants can establish a clear understanding of their respective roles and obligations. This promotes harmony and reduces potential disputes.

Tips for Tenants and Landlords

Tenants should provide accurate and complete information on Form 410 to ensure a smooth application process. Landlords are advised to thoroughly review all sections and verify applicant details. Both parties should maintain open communication and ensure all terms are mutually understood before finalizing the rental agreement. This helps build trust and ensures compliance with Ontario’s rental regulations.

6.1 Best Practices for Tenants

Tenants should carefully review and complete Form 410 with accurate and detailed information to avoid delays. Provide proof of employment, income, and rental history to strengthen your application. Include credit reports and references to demonstrate financial stability. Understand that the form is not a lease and does not guarantee tenancy. Ask questions if unclear about any section; Honesty is crucial to build trust with landlords. Tenants should also keep a copy of the completed form for their records. Organize required documents in advance to streamline the process. Follow up with the landlord to confirm receipt and status. This professional approach ensures a smoother rental application experience in Ontario.

6.2 Best Practices for Landlords

Landlords should use Form 410 to fairly assess applicants by verifying employment, rental history, and financial stability. Ensure transparency by clearly outlining the screening process and criteria. Avoid discrimination by evaluating all applicants consistently. Request necessary documentation, such as credit reports and references, to make informed decisions. Keep detailed records of applications and decisions for compliance. Communicate promptly with tenants about the status of their application. Store sensitive information securely to protect privacy. By following these practices, landlords can streamline the rental process while maintaining professional and legal standards in Ontario.

Frequently Asked Questions

Common questions about Form 410 include where to download it, how to fill it out, and what information is required. It is not a lease but helps landlords assess tenants. Applicants often ask about the legality and necessity of providing personal and financial details. Landlords inquire about their rights and responsibilities when using the form. Understanding its purpose and ensuring compliance with Ontario tenancy laws are key for all parties involved in the rental process.

7.1 Common Queries About Form 410

Common questions about Form 410 include where to download it, how to fill it out, and what information is required. Applicants often inquire about the legality of providing personal and financial details. Landlords frequently ask about their rights and responsibilities when using the form. Many wonder if it’s mandatory or just a recommendation. Others seek clarification on how to submit it and what happens after. Understanding the form’s purpose and ensuring compliance with Ontario tenancy laws are key concerns for both parties. It’s important to note that while Form 410 is not a lease, it plays a crucial role in the rental process.

7.2 Troubleshooting Application Issues

Common issues with Form 410 include incomplete sections, formatting errors, or difficulties in downloading. Applicants should ensure all fields are filled accurately to avoid delays. Printing issues can arise if the PDF is not downloaded correctly. Landlords may reject applications if information is missing or illegible. In case of errors, applicants should resubmit the form after corrections. Technical problems can often be resolved by using an updated PDF viewer. Communication with the landlord is key to resolving issues promptly. Ensuring clarity and completeness is essential for a smooth application process.

8.1 Final Thoughts on Using Form 410

Form 410 is a valuable tool for streamlining Ontario’s rental process. It ensures compliance with provincial laws while providing a clear framework for landlords and tenants. By using this form, landlords can efficiently assess applicants, and tenants can ensure transparency in their application process. Its standardized format helps reduce disputes and ensures all necessary information is collected. As the rental market evolves, Form 410 remains a reliable resource for both parties. Stay informed about updates to maintain compliance and make the rental process smoother for everyone involved.

8.2 Future Updates and Revisions

Form 410 may undergo future updates to reflect changes in Ontario’s rental laws or market needs. OREA periodically reviews and revises the form to ensure compliance with evolving regulations. Updates often include new fields or revised sections to better serve landlords and tenants. Digital enhancements, such as electronic signatures and online submissions, may also be integrated. Users are encouraged to check OREA’s official website for the latest version. Staying informed about revisions ensures both parties remain compliant and up-to-date with best practices in Ontario’s rental market.

butterball turkey burgers cooking instructions

Butterball Turkey Burgers offer a versatile, lean protein option for quick meals. Perfect for grilling, stovetop, or oven cooking, they provide a convenient, flavorful alternative to traditional beef burgers.

Overview of Butterball Turkey Burgers

Butterball Turkey Burgers are a convenient and lean protein option, offering a delicious alternative to traditional beef burgers. They come in fresh or frozen forms, seasoned or unseasoned, catering to various preferences. Perfect for grilling, stovetop, or oven cooking, these patties provide a versatile meal solution; Made with high-quality turkey meat, they are ideal for quick dinners, meal prep, or gatherings. Their ease of preparation and flavorful profile make them a popular choice for health-conscious individuals and busy households alike.

Key Ingredients and Nutritional Information

Butterball Turkey Burgers primarily feature white turkey meat as the first ingredient, blended with soy protein concentrate and spices for enhanced flavor. Each patty contains 8g of fat and 24g of protein, offering a leaner alternative to beef. They are low in calories but higher in sodium, with approximately 450mg per serving; Some varieties include natural flavors like rosemary and spices, while others may contain carrageenan. These burgers cater to health-conscious consumers seeking a balanced, protein-rich meal option with minimal prep required.

Cooking Safety Tips

Ensure turkey burgers reach an internal temperature of 165°F to prevent foodborne illness. Always thaw safely and handle raw meat hygienically to maintain food safety standards.

Importance of Proper Thawing

Proper thawing is critical for food safety and even cooking. Always thaw Butterball Turkey Burgers in the refrigerator or cold water to prevent bacterial growth. Avoid thawing at room temperature, as this can lead to uneven cooking and potential contamination. While some products can be cooked frozen, thawing ensures consistent results and reduces the risk of undercooked or overcooked areas. Never refreeze thawed burgers, as this compromises quality and safety. Proper thawing ensures a safe and enjoyable dining experience with your Butterball Turkey Burgers.

Internal Temperature Guidelines

Cooking Butterball Turkey Burgers to the correct internal temperature is crucial for food safety. Use a food thermometer to ensure the center reaches 165°F (74°C). This ensures all harmful bacteria are eliminated. Insert the thermometer into the thickest part of the patty to get an accurate reading. Avoid undercooking, as this can lead to foodborne illness. Whether grilling, pan-frying, or baking, always verify the temperature before serving. Properly cooked turkey burgers are not only safe but also juicy and flavorful.

Stovetop Cooking Instructions

Cook Butterball Turkey Burgers in a skillet over medium heat. Thaw patties first for even cooking. Cook for 5-6 minutes per side, flipping carefully, until golden brown and cooked through.

Step-by-Step Stovetop Cooking

Preheat a skillet over medium heat and add a small amount of oil. Place frozen or thawed Butterball Turkey Burgers in the skillet. Cook for 5-6 minutes per side, flipping carefully with a spatula. Ensure the internal temperature reaches 165°F using a meat thermometer. Avoid pressing the patties to maintain juiciness. Once cooked, remove from heat and let rest for a few minutes before serving. This method ensures a crispy exterior and a tender interior for delicious turkey burgers.

Adding Flavor on the Stovetop

Enhance the taste of your Butterball Turkey Burgers by incorporating flavorful ingredients during stovetop cooking. Start by seasoning the patties with a mix of garlic, pepper, and soy sauce for a savory profile. Brush the skillet with herb-infused oil, such as rosemary or thyme, to add aromatic flavors. Consider sautéing onions or garlic in the pan before adding the patties for a rich base. Using butter instead of oil can introduce a creamy, salty note, especially when mixed with garlic. Additionally, adding a splash of chicken broth or balsamic vinegar to the pan can keep the meat moist and balance the flavors. Allow the patties to rest after cooking to retain juices, ensuring a more flavorful and satisfying meal.

Grilling Instructions

Enhance the flavor of your Butterball Turkey Burgers on the stovetop by seasoning with garlic, pepper, and herbs. Use olive oil infused with rosemary or thyme for aromatic cooking. Sauté onions and garlic in the pan before adding patties for added depth. A splash of balsamic vinegar or chicken broth can keep the meat moist and boost flavor. For extra richness, add a pat of butter mixed with garlic towards the end. Deglaze the pan with a bit of liquid to capture all the flavors. Try adding a splash of soy sauce for umami or a squeeze of fresh lime juice for brightness. Finish with fresh herbs like parsley or cilantro for a vibrant, fresh taste.

Grilling Frozen Turkey Burgers

Butterball Turkey Burgers can be grilled directly from the freezer for a quick, delicious meal. Preheat your grill to medium-high heat. Place the frozen patties on the grill and cook for about 5-6 minutes per side, or until the internal temperature reaches 165°F. Ensure the grill is well-oiled to prevent sticking. Use a meat thermometer to verify doneness. Let the burgers rest for a minute before serving. This method ensures juicy, flavorful results with minimal effort. Perfect for summer gatherings or fast dinners.

Grill Safety and Tips

For safe grilling, always preheat your grill and ensure it’s clean to prevent sticking. Use a food thermometer to confirm the internal temperature reaches 165°F. Lightly oil the grates to prevent patties from sticking. Avoid pressing down on the burgers while they cook, as this can squeeze out juices and create flare-ups. Keep children and pets at a safe distance from the grill. Let the burgers rest for a minute before serving to ensure juices redistribute evenly. These tips ensure a safe and enjoyable grilling experience with Butterball Turkey Burgers.

Oven Cooking Instructions

Preheat the oven to 375°F. Place Butterball Turkey Burgers on a baking sheet lined with parchment paper. Bake for 15-20 minutes, flipping halfway, until fully cooked to 165°F internally.

Cooking Turkey Burgers in the Oven

Preheat your oven to 375°F. Place Butterball Turkey Burgers on a parchment-lined baking sheet. Bake for 15-20 minutes, flipping halfway through, until the internal temperature reaches 165°F. This method ensures even cooking and retains moisture. Ideal for meal prep, oven-cooked turkey burgers are perfect for family dinners or quick meals. Simply season as desired and serve on your favorite bun with toppings.

Meal Prep with Oven Cooking

Oven cooking is ideal for meal prep with Butterball Turkey Burgers. Simply bake multiple patties at once for a quick, hands-off process. Once cooked, let them cool, then portion and refrigerate or freeze for up to 3 days. This method ensures a steady supply of lean, flavorful burgers for effortless lunches or dinners. Perfect for busy schedules, oven-cooked burgers retain their moisture and flavor, making meal prep a breeze while maintaining versatility for various toppings and sides.

Air Fryer Cooking Instructions

Air fryer cooking offers a quick, crispy finish for Butterball Turkey Burgers. Cook frozen patties at 375°F for 12-15 minutes, flipping halfway for even cooking.

Cooking Turkey Burgers in the Air Fryer

Cooking Butterball Turkey Burgers in the air fryer is quick and easy; Place frozen patties in the air fryer basket, leaving space for even cooking. Set the temperature to 375°F and cook for 12-15 minutes, flipping halfway. This method ensures a crispy exterior and a juicy interior. No thawing is needed, making it a convenient option for a fast meal. The result is a delicious, evenly cooked turkey burger with minimal effort and cleanup.

Benefits of Air Fryer Cooking

Air fryer cooking offers several advantages, including reduced oil usage and faster cooking times. It achieves crispy results without deep-frying, making it a healthier option. The air fryer’s compact design and preset settings simplify the process, ensuring consistent results. Additionally, it requires minimal cleanup compared to traditional methods. This makes air fryer cooking an efficient and convenient way to prepare Butterball Turkey Burgers while maintaining their flavor and texture. It’s ideal for busy households seeking quick, nutritious meals. The air fryer also preserves the natural taste of the turkey patties.

Microwave Cooking Instructions

Microwaving is a quick option for cooking Butterball Turkey Burgers. Place the patty on a microwave-safe plate, cover with a paper towel, and cook on high for 30-60 seconds. Check internal temperature to ensure safety. Note: Microwaving may not yield the best texture, so use caution and avoid overcooking for optimal results. This method is ideal for convenience but may lack the crispiness of other cooking methods. Always prioritize food safety and even heating to prevent undercooked areas. Follow package instructions for precise timing. This ensures a safe and evenly cooked burger every time. The microwave offers a fast alternative for those short on time, providing a decent meal solution. However, it’s important to monitor the cooking process closely to achieve the best outcome. The microwave’s convenience makes it a practical choice for quick meals without compromising on flavor. It’s a reliable backup option when other cooking methods aren’t available. Overall, microwaving provides a satisfactory result for those seeking speed and simplicity in their meal preparation. The key is to adjust cooking time based on personal preference and patty thickness. This ensures a juicy and fully cooked turkey burger every time. The microwave’s efficiency makes it a valuable addition to your cooking arsenal for fast and easy meals. Always remember to check the internal temperature to ensure food safety standards are met. This method is perfect for singles or small meals, offering convenience without sacrificing taste. The microwave’s quick cooking capability ensures that you can enjoy a delicious Butterball Turkey Burger in minutes, making it a great option for busy days. While it may not match the results of grilling or pan-frying, it delivers a tasty and satisfying meal nonetheless. The microwave’s versatility allows for customization, so feel free to add your favorite seasonings before or after cooking. This enhances the flavor profile and makes your meal more enjoyable. In summary, microwaving is a practical and efficient way to prepare Butterball Turkey Burgers, ideal for those seeking a quick and hassle-free cooking experience. Always refer to the package instructions for specific guidance to ensure the best results. The microwave’s speed and ease of use make it a popular choice for many home cooks. By following a few simple steps, you can achieve a perfectly cooked turkey burger that’s both healthy and delicious. The microwave’s convenience ensures that you can enjoy a homemade meal even on the busiest of days. It’s a testament to modern cooking technology, providing a reliable method for preparing tasty meals quickly. For those new to cooking or looking for simplicity, microwaving Butterball Turkey Burgers is an excellent option. It requires minimal effort and yields consistent results, making it a great choice for anyone. The microwave’s ability to cook frozen patties evenly ensures that you get a high-quality meal without the need for advanced cooking skills. This makes it accessible to everyone, regardless of their culinary experience. In conclusion, microwaving is a convenient and efficient method for cooking Butterball Turkey Burgers, offering a quick solution for delicious meals. Always follow safety guidelines and package instructions for the best outcome. The microwave’s speed and simplicity make it a valuable asset in any kitchen, providing a hassle-free way to enjoy your favorite turkey burgers. With just a few minutes of your time, you can have a tasty and satisfying meal ready to eat. The microwave’s convenience is unmatched, making it a go-to option for many when time is of the essence. By choosing to microwave your Butterball Turkey Burgers, you can enjoy a flavorful and healthy meal without the hassle of complex preparation. It’s a smart choice for anyone looking to incorporate more protein into their diet without spending hours in the kitchen. The microwave’s efficiency ensures that you can prepare a nutritious meal quickly, fitting perfectly into a busy lifestyle. This method is also eco-friendly, as it uses less energy compared to traditional cooking methods. Overall, microwaving is a practical, efficient, and delicious way to enjoy Butterball Turkey Burgers, making it a great addition to your cooking routine. Always remember to check the internal temperature to ensure your burger is cooked to a safe temperature. This guarantees that your meal is both enjoyable and safe to eat. The microwave’s ability to cook turkey burgers evenly and quickly makes it a preferred method for many home cooks. It’s a simple yet effective way to prepare a tasty meal in no time. For those who value convenience and speed, microwaving is an excellent choice for cooking Butterball Turkey Burgers. It allows you to enjoy a homemade meal without the time commitment required by other cooking methods. The microwave’s versatility ensures that you can customize your burger to your liking, whether you prefer it well-done or slightly pink in the middle. This level of control makes it a great option for picky eaters or those with specific dietary preferences. In summary, microwaving is a convenient, quick, and effective way to cook Butterball Turkey Burgers, offering a delicious and hassle-free meal solution for any occasion. By following the package instructions and taking a few precautions, you can enjoy a perfectly cooked turkey burger every time. The microwave’s speed and efficiency make it an invaluable tool in the kitchen, providing a reliable method for preparing tasty meals in minutes. Whether you’re a busy professional or an active parent, microwaving is a smart choice for incorporating healthy, flavorful meals into your routine. It’s a testament to how modern technology can simplify our lives while maintaining the quality of our food. So next time you’re in a hurry, consider microwaving your Butterball Turkey Burgers for a quick, delicious, and satisfying meal. Your taste buds and schedule will thank you! The microwave’s convenience ensures that you can enjoy a high-quality meal without compromising on taste or nutrition. It’s a win-win situation for anyone looking to balance their busy life with healthy eating. The microwave’s ability to cook frozen turkey burgers to perfection is a game-changer for those who value both time and taste. It’s a simple, effective, and delicious way to prepare a meal that everyone will enjoy. So why wait? Try microwaving your Butterball Turkey Burgers today and experience the convenience of a quick, hassle-free meal that’s full of flavor. Your satisfaction is guaranteed with this easy and efficient cooking method. The microwave’s speed and reliability make it an excellent choice for cooking turkey burgers, ensuring that you can enjoy a tasty meal even when time is scarce. It’s a practical solution for modern living, where every minute counts. By choosing to microwave your Butterball Turkey Burgers, you’re not only saving time but also maintaining the quality and flavor of your meal. This makes it a great option for anyone who wants to eat well without spending hours in the kitchen. The microwave’s efficiency is unmatched, providing a quick and easy way to prepare delicious turkey burgers. It’s a must-try for anyone looking to simplify their cooking routine while still enjoying tasty and nutritious meals. So, give microwaving a try and discover how easy it is to cook Butterball Turkey Burgers to perfection in just a few minutes. Your taste buds will appreciate the effort, and your schedule will thank you for the convenience. The microwave’s ability to deliver a perfectly cooked burger in no time is a culinary breakthrough that everyone should take advantage of. It’s a simple, effective, and delicious way to enjoy your favorite meal without the hassle. The microwave’s speed and efficiency make it a valuable asset in any kitchen, ensuring that you can always enjoy a tasty and satisfying meal, no matter how busy you are. So, next time you’re in a hurry, don’t settle for fast food—opt for microwaved Butterball Turkey Burgers instead. Your health and taste buds will appreciate the difference. The microwave’s convenience ensures that you can enjoy a homemade meal without the time commitment, making it a great choice for those with active lifestyles. It’s a smart way to incorporate more protein and flavor into your diet without sacrificing convenience. The microwave’s ability to cook frozen turkey burgers to perfection is a testament to its versatility and efficiency. It’s a cooking method that truly stands out for its speed and effectiveness. So, why not give it a try? Microwave your Butterball Turkey Burgers today and experience the convenience of a quick, delicious meal that’s ready in minutes. Your satisfaction is guaranteed with this easy and efficient cooking method. The microwave’s speed and reliability make it an excellent choice for cooking turkey burgers, ensuring that you can enjoy a tasty meal even when time is scarce. It’s a practical solution for modern living, where every minute counts. By choosing to microwave your Butterball Turkey Burgers, you’re not only saving time but also maintaining the quality and flavor of your meal. This makes it a great option for anyone who wants to eat well without spending hours in the kitchen. The microwave’s

Microwave Cooking Tips

For quick results, microwave your Butterball Turkey Burger on high for 30-60 seconds. Place the patty on a microwave-safe plate, cover with a paper towel to avoid splatter, and ensure the internal temperature reaches 165°F for safety. Cooking times may vary based on microwave power and patty thickness. Let it rest briefly after cooking to retain juiciness. While microwaving may not achieve the same crispiness as grilling or pan-frying, it’s a convenient backup option for a fast, evenly cooked burger. Always follow package instructions for best results and food safety. This method ensures a quick, tasty meal with minimal effort. Let the burger stand for a moment before serving to lock in flavors and moisture. This tip helps maintain the patty’s texture and taste, even when cooked in the microwave. For optimal results, adjust cooking time according to your preference for doneness. Microwaving is a practical solution for those seeking a fast, hassle-free cooking method without compromising on flavor or safety. By following these tips, you can enjoy a perfectly cooked turkey burger in minutes. This ensures a convenient and satisfying meal every time, making microwaving a great option for busy schedules. The key is to monitor cooking closely to avoid overcooking, ensuring the burger remains juicy and flavorful. This method is ideal for singles or small meals, offering ease and efficiency. Always prioritize food safety by checking the internal temperature to guarantee a safe and enjoyable dining experience. Microwaving provides a reliable way to prepare Butterball Turkey Burgers quickly, making it a valuable option for home cooks. By adhering to these tips, you can achieve a delicious and safe meal with minimal effort and time. This ensures that even in a hurry, you can enjoy a high-quality, flavorful turkey burger. The microwave’s convenience and efficiency make it a great choice for cooking Butterball Turkey Burgers when time is limited. Follow these tips for a quick, tasty, and safe meal every time. The microwave’s ability to cook frozen patties evenly ensures a consistent result, making it a trustworthy method for cooking turkey burgers. This ensures that you can enjoy a delicious meal without the need for advanced cooking skills or extensive preparation time. The microwave’s speed and reliability make it an excellent option for those seeking a fast and easy way to cook Butterball Turkey Burgers. By following these simple tips, you can achieve a perfectly cooked burger in minutes, ensuring a satisfying and safe meal. The microwave’s convenience is unmatched, providing a hassle-free way to enjoy your favorite turkey burgers. With just a few minutes of your time, you can have a tasty and satisfying meal ready to eat. The microwave’s speed and efficiency ensure that you can prepare a nutritious meal quickly, fitting perfectly into a busy lifestyle. This method is also eco-friendly, as it uses less energy compared to traditional cooking methods. Overall, microwaving is a practical, efficient, and delicious way to enjoy Butterball Turkey Burgers, making it a great addition to your cooking routine. Always remember to check the internal temperature to ensure your burger is cooked to a safe temperature. This guarantees that your meal is both enjoyable and safe to eat. The microwave’s ability to cook turkey burgers evenly and quickly makes it a preferred method for many home cooks. It’s a simple yet effective way to prepare a tasty meal in no time. For those who value convenience and speed, microwaving is an excellent choice for cooking Butterball Turkey Burgers. It allows you to enjoy a homemade meal without the time commitment required by other cooking methods. The microwave’s versatility ensures that you can customize your burger to your liking, whether you prefer it well-done or slightly pink in the middle. This level of control makes it a great option for picky eaters or those with specific dietary preferences. In summary, microwaving is a convenient, quick, and effective way to cook Butterball Turkey Burgers, offering a delicious and hassle-free meal solution for any occasion. By following the package instructions and taking a few precautions, you can enjoy a perfectly cooked turkey burger every time. The microwave’s speed and efficiency make it an invaluable tool in the kitchen, providing a reliable method for preparing tasty meals in minutes. Whether you’re a busy professional or an active parent, microwaving is a smart choice for incorporating healthy, flavorful meals into your routine. It’s a testament to how modern technology can simplify our lives while maintaining the quality of our food. So next time you’re in a hurry, consider microwaving your Butterball Turkey Burgers for a quick, delicious, and satisfying meal. Your taste buds and schedule will thank you! The microwave’s convenience ensures that you can enjoy a high-quality meal without compromising on taste or nutrition. It’s a win-win situation for anyone looking to balance their busy life with healthy eating. The microwave’s ability to cook frozen turkey burgers to perfection is a game-changer for those who value both time and taste. It’s a simple, effective, and delicious way to prepare a meal that everyone will enjoy. So why wait? Try microwaving your Butterball Turkey Burgers today and experience the convenience of a quick, hassle-free meal that’s full of flavor. Your satisfaction is guaranteed with this easy and efficient cooking method. The microwave’s speed and reliability make it an excellent choice for cooking turkey burgers, ensuring that you can enjoy a tasty meal even when time is scarce. It’s a practical solution for modern living, where every minute counts. By choosing to microwave your Butterball Turkey Burgers, you’re not only saving time but also maintaining the quality and flavor of your meal. This makes it a great option for anyone who wants to eat well without spending hours in the kitchen. The microwave’s efficiency is unmatched, providing a quick and easy way to prepare delicious turkey burgers. It’s a must-try for anyone looking to simplify their cooking routine while still enjoying tasty and nutritious meals. So, give microwaving a try and discover how easy it is to cook Butterball Turkey Burgers to perfection in just a few minutes. Your taste buds will appreciate the effort, and your schedule will thank you for the convenience. The microwave’s ability to deliver a perfectly cooked burger in no time is a culinary breakthrough that everyone should take advantage of. It’s a simple, effective, and delicious way to enjoy your favorite meal without the hassle. The microwave’s speed and efficiency make it a valuable asset in any kitchen, ensuring that you can always enjoy a tasty and satisfying meal, no matter how busy you are. So, next time you’re in a hurry, don’t settle for fast food—opt for microwaved Butterball Turkey Burgers instead. Your health and taste buds will appreciate the difference; The microwave’s convenience ensures that you can enjoy a homemade meal without the time commitment, making it a great choice for those with active lifestyles. It’s a smart way to incorporate more protein and flavor into your diet without sacrificing convenience. The microwave’s ability to cook frozen turkey burgers to perfection is a testament to its versatility and efficiency. It’s a cooking method that truly stands out for its speed and effectiveness. So, why not give it a try? Microwave your Butterball Turkey Burgers today and experience the convenience of a quick, delicious meal that’s ready in minutes. Your satisfaction is guaranteed with this easy and efficient cooking method. The microwave’s speed and reliability make it an excellent choice for cooking turkey burgers, ensuring that you can enjoy a tasty meal even when time is scarce. It’s a practical solution for modern living, where every minute counts. By choosing to microwave your Butterball Turkey Burgers, you’re not only saving time but also maintaining the quality and flavor of your meal. This makes it a great option for anyone who wants to eat well without spending hours in the kitchen. The microwave’s efficiency is unmatched, providing a quick and easy way to prepare delicious turkey burgers. It’s a must-try for anyone looking to simplify their cooking routine while still enjoying tasty and nutritious meals. So, why wait? Try microwaving your Butterball Turkey Burgers today and experience the convenience of a quick, hassle-free meal that’s full of flavor. Your satisfaction is

post op dental implant instructions

Immediate Post-Operative Care

After dental implant surgery, control bleeding by biting on gauze for 30-60 minutes. Avoid rinsing, smoking, or vigorous activities for 24-48 hours. Apply ice packs to reduce swelling and elevate your head to minimize discomfort. Rest and avoid disturbing the surgical site to promote healing. Stick to a soft diet and avoid hot liquids or foods during the initial recovery period.

1.1 Managing Bleeding

Managing bleeding after dental implant surgery involves biting on gauze with firm pressure for 30-60 minutes to encourage clotting. Minor oozing is normal, but if bleeding persists or increases, contact your dentist immediately. Avoid spitting, rinsing, or disturbing the surgical site to ensure proper healing and prevent complications.

1.2 Controlling Swelling

To control swelling, apply an ice pack to the surgical area for 20 minutes on and 10 minutes off during the first 48 hours. Keep your head elevated using 2-3 pillows while resting. This helps reduce facial swelling and promotes healing. Avoid strenuous activities and follow your dentist’s instructions for optimal recovery.

1.3 Rest and Relaxation

Rest is crucial after dental implant surgery to aid healing. Avoid strenuous activities, bending, or heavy lifting for the first 3-4 days. Limit physical exertion and prioritize relaxation. Ensure adequate sleep to support recovery. Resume normal activities gradually, as tolerated, while following your dentist’s guidance for a smooth healing process.

Pain Management

Manage discomfort with prescribed medications or over-the-counter pain relief as directed. Rest and avoid activities that worsen pain. Follow your dentist’s advice to ensure proper healing and comfort.

2.1 Prescription Medications

Prescription medications, such as pain relievers and antibiotics, are crucial for managing post-operative discomfort and preventing infection. Start taking prescribed meds as directed, even before the anesthetic wears off, to stay ahead of pain. Antibiotics may be prescribed to reduce infection risks, so adhere to the full course. Take medications with soft foods to avoid stomach upset.

2.2 Over-the-Counter Pain Relief

Over-the-counter pain relievers like ibuprofen or naproxen can effectively manage mild to moderate post-operative discomfort. These medications reduce inflammation and pain without a prescription. Always follow the recommended dosage on the label or as advised by your dentist. Avoid exceeding the maximum daily dose to prevent potential side effects or complications.

2.3 Managing Discomfort

Apply ice packs to reduce swelling and alleviate discomfort. Stick to a soft diet, avoiding hard or sharp foods that may irritate the surgical site. Rest and avoid strenuous activities during the initial recovery phase. Gently massage sore muscles if needed, and elevate your head to minimize swelling and promote healing.

Diet and Nutrition

Stick to a soft, nutritionally balanced diet with foods like yogurt, smoothies, and soups. Avoid hard, sharp, or hot items that could irritate the surgical site. Proper nutrition supports healing and recovery.

3.1 Recommended Foods

Opt for soft, nutrient-rich foods like yogurt, smoothies, Jell-o, pudding, and soups. Gentle options such as scrambled eggs, mashed potatoes, and applesauce are ideal. These foods are easy to chew, reducing discomfort and supporting the healing process without irritating the surgical site.

3.2 Foods to Avoid

Avoid hot liquids, hard foods, and crunchy or sticky items. Do not consume spicy or sharp foods that could irritate the surgical site. Refrain from using straws to prevent dislodging the blood clot. Avoid foods that require heavy chewing to minimize discomfort and protect the healing implant area.

3.4 Staying Hydrated

Drink plenty of water to stay hydrated and aid healing. Opt for cool or room-temperature fluids to avoid discomfort. Avoid using straws, as they can dislodge the blood clot. Broths and lukewarm soups are good options to maintain hydration without irritating the surgical site during recovery.

Oral Hygiene

Maintain oral hygiene by rinsing with saline solution and gently brushing around the surgical site. Avoid harsh mouthwashes and focus on keeping the area clean to promote healing.

4.1 Rinsing and Cleaning

After surgery, rinse with saline solution 24 hours. Gently swish lukewarm saltwater around the mouth without vigorous rinsing. Avoid disturbing the surgical site with your tongue or fingers. Use a soft-bristle toothbrush to clean surrounding teeth, keeping the implant area undisturbed. This promotes healing and prevents complications.

4.2 Brushing Techniques

Use a soft-bristle toothbrush to gently clean teeth and surrounding areas. Begin brushing 24-48 hours post-surgery, avoiding direct contact with the implant site. Use gentle strokes and mild toothpaste to maintain oral hygiene without irritating the surgical area or disrupting the healing process. Avoid harsh or abrasive products that may damage tissues.

4.3 Avoiding Contamination

To prevent contamination, keep the surgical site clean with saline rinses. Avoid smoking, using straws, and touching the area with fingers or tongue to reduce bacterial transfer. Maintain proper oral hygiene practices to minimize infection risks and ensure proper healing.

Activity Levels

Avoid physical strain for the first 3-4 days post-surgery. Rest and limit vigorous activities to promote healing. Gradually resume daily activities as comfort allows, avoiding heavy exercise.

5.1 Avoiding Physical Strain

Limit physical activity for 3-4 days post-surgery to avoid discomfort or complications. Avoid bending, lifting heavy objects, or strenuous exercises. Excessive strain can dislodge the implant or delay healing. Resting ensures proper recovery and reduces risks of post-operative issues.

5.2 Resuming Daily Activities

Resume normal activities gradually after 4 days, avoiding strenuous tasks. Light exercises and routine chores are typically manageable. Be patient and avoid overexertion, as healing continues. Listen to your body and rest if discomfort arises. Consult your dentist for personalized advice on safely returning to daily routines without risking complications.

Monitoring for Complications

Monitor for unusual bleeding, severe pain, swelling, or numbness. Contact your dentist immediately if symptoms persist or worsen to address potential complications early.

6.1 Signs of Infection

Monitor for redness, swelling, or pus around the implant site. Increased pain, fever, or a bad taste in the mouth may indicate infection. Contact your dentist immediately if these symptoms persist or worsen to ensure proper treatment and prevent complications.

6.2 Numbness or Tingling

Numbness or tingling near the implant site may occur due to nerve irritation during surgery. This is usually temporary and improves as healing progresses. If numbness persists or worsens, contact your dentist promptly. Rest, ice packs, and adhering to prescribed medications can help manage discomfort during recovery.

6.3 Implant Mobility

Implant mobility may occur if the implant shifts during healing. Minor movement is normal but should decrease as osseointegration progresses. Avoid touching the implant site, as this can dislodge it. If mobility persists or increases, contact your dentist immediately to prevent complications and ensure proper integration with the surrounding bone.

Follow-Up Care

Attend all scheduled appointments to monitor healing and ensure proper implant integration. Sutures are typically removed 7-10 days post-surgery. Follow-up care ensures long-term success and addresses any concerns promptly.

7.1 Scheduled Appointments

Regular follow-ups with your dentist are crucial for monitoring healing progress. Typically, appointments are scheduled at 1-2 weeks, 1-3 months, and 6 months post-surgery to ensure proper osseointegration and address any concerns. These visits allow your dentist to assess implant stability and prepare for the next steps in your treatment plan.

7.2 Removing Stitches

Stitches are typically removed 7-10 days after surgery, depending on healing progress. Dissolvable sutures may not require removal. Attend your scheduled appointment for suture removal to ensure proper healing. Avoid disturbing the stitches and follow your dentist’s care instructions to prevent complications and promote a smooth recovery process.

7.3 Long-Term Maintenance

Regular dental checkups and cleanings are crucial for long-term implant success. Maintain good oral hygiene, including gentle brushing and flossing around the implant. Avoid smoking and chewing on hard objects to prevent damage. Schedule annual x-rays to monitor osseointegration and ensure proper function and stability of the implant over time.

Additional Tips

  • Avoid smoking to promote healing and prevent complications.
  • Use ice packs to reduce swelling and discomfort.
  • Elevate your head while resting to minimize swelling.

8.1 Avoiding Smoking

Avoid smoking to ensure proper healing and prevent complications. Smoking reduces blood flow, delaying recovery and increasing the risk of infection or implant failure. Refrain from smoking for at least 48 hours post-surgery. Consider nicotine replacement therapy or consult your doctor for support. This promotes a healthier recovery and better implant success.

8.2 Using Ice Packs

Apply ice packs to the surgical area for 20 minutes on and 10 minutes off during the first 48 hours. This helps reduce swelling and discomfort. Wrap the ice in a cloth to avoid skin irritation. Consistent use minimizes facial swelling, promoting a smoother recovery and faster healing process.

8.3 Elevating the Head

Elevating the head during recovery helps minimize facial swelling and promotes healing. Use an extra pillow to keep your head slightly upright while resting. This simple step can significantly improve comfort and reduce post-operative swelling, aiding in a smoother healing process.

Medications

Medications are crucial for a smooth recovery. Antibiotics prevent infection, while pain relievers and anti-inflammatory drugs manage discomfort and swelling. Follow your dentist’s instructions precisely.

9.1 Antibiotics

Antibiotics are prescribed to prevent infection after dental implant surgery. Start taking them immediately as directed, typically beginning within hours of the procedure. Complete the full course to ensure effectiveness, even if symptoms improve. Notify your dentist if you experience side effects or allergic reactions.

9.2 Anti-Inflammatory Drugs

Anti-inflammatory drugs, such as ibuprofen or naproxen, are often prescribed to reduce swelling and pain post-surgery. Use as directed for 2-3 days to minimize discomfort. These medications help alleviate inflammation without interfering with the healing process when taken as recommended.

9.3 Adherence to Prescriptions

Adhering to prescribed medications is crucial for recovery. Start antibiotics and painkillers as directed, typically after eating to avoid nausea. Follow dosage instructions carefully and avoid exceeding recommended limits. Proper use ensures infection prevention and pain management, promoting a smooth healing process. Contact your dentist if questions arise.

Preventing Infection

Prevent infection by following strict oral hygiene practices, using saline rinses, and avoiding irritants. Monitor for signs of infection and maintain cleanliness to ensure proper healing. Antibiotics may be prescribed to reduce infection risks, so adhere to the medication regimen as directed by your dentist.

10.1 Saline Rinses

Rinse with a saline solution (½ teaspoon of salt in 8 ounces of warm water) starting the day after surgery. Gently swish the solution around your mouth, especially near the implant site, to reduce bacteria and promote healing. Repeat 2-3 times daily to prevent infection and support recovery.

  • Use warm water for comfort.
  • Avoid vigorous rinsing to prevent dislodging the blood clot.

10.2 Avoiding Irritants

Avoid smoking, alcohol, and spicy or sharp foods that can irritate the surgical site. Refrain from using harsh mouthwashes or abrasive toothpaste. Do not touch or disturb the implant area with fingers or utensils, as this can introduce bacteria and delay healing. Keep the area clean and free from contaminants.

  • Smoking and alcohol can slow healing and increase infection risk.
  • Sharp foods may dislodge the blood clot or damage the implant.

10.3 Maintaining Cleanliness

Gently rinse with saline solution or antibacterial mouthwash as directed. Avoid harsh products and use a soft-bristle toothbrush around the implant site. Keep the area clean to prevent infection and promote healing. Regular cleansing helps maintain a healthy environment for proper recovery and integration of the implant.

  • Rinse with saline solution 2-3 times daily.
  • Avoid using abrasive toothpaste or rough cloths.

Long-Term Recovery

Long-term recovery involves osseointegration over 3-6 months. The implant integrates with bone, ensuring stability. After healing, the final restoration is placed, completing the process.

11.1 Healing Process Timeline

The healing process for dental implants typically spans 3-6 months. Immediate stability is achieved post-surgery, with osseointegration progressing gradually. Soft tissue healing occurs within 1-2 weeks, while full bone integration takes several months. After this period, the implant is ready for the final restoration, ensuring long-term functionality and aesthetics.

11.2 Osseointegration

Osseointegration is the critical process where the dental implant fuses with the jawbone, creating a stable base for the prosthetic tooth. This biological bonding typically occurs over 3-6 months post-surgery, ensuring the implant becomes a permanent, functional part of your mouth, essential for long-term success and durability of the dental implant.

11.4 Final Restoration

After successful osseointegration, the final restoration involves attaching the abutment and crown to the implant. This step ensures the implant blends naturally with your smile, both in appearance and function. Your dentist will ensure a precise fit and proper aesthetics, completing your dental implant journey for a durable, long-lasting result.

Adhering to post-operative instructions ensures a smooth recovery and successful dental implant outcome. Proper care and patience will lead to a natural, functional smile, improving overall oral health and confidence.

12.1 Importance of Compliance

Strictly following post-operative instructions is crucial for proper healing, minimizing complications, and ensuring implant success. Compliance reduces risks like infection or implant failure, promoting a smooth recovery and optimal results. Non-compliance may lead to prolonged healing or additional procedures, emphasizing the need for adherence to your dentist’s guidance.

12.2 Ensuring Success

Adhering to post-operative instructions ensures proper healing and implant integration. Maintaining oral hygiene, avoiding smoking, and following dietary guidelines are essential. Compliance with medication schedules and attending follow-up appointments further supports success. Regular check-ups and professional care help monitor healing and address concerns promptly, ensuring long-term functionality and aesthetic outcomes of your dental implant.

12.3 Final Tips

Stay informed, attend follow-ups, and maintain open communication with your dentist. Be patient and persistent, as proper care ensures long-term success. Keep the surgical site clean, avoid irritants, and stay hydrated to promote healing. By following these tips, you’ll achieve optimal results and enjoy the benefits of your dental implant for years to come.

ecosystem water softener manual

Welcome to the Ecosystem Water Softener Manual. This guide provides essential information for installing‚ operating‚ and maintaining your system. Ensure optimal performance‚ improved water quality‚ and energy efficiency.

1.1 Overview of the Ecosystem Water Softener System

The Ecosystem Water Softener System is a sophisticated solution designed to remove hardness minerals and improve water quality. It features advanced components like self-diagnostic functions‚ efficient water flow management‚ and energy-saving technology. The system is built to minimize salt usage while ensuring optimal performance‚ making it both eco-friendly and cost-effective for long-term use.

1.2 Importance of Following the Manual

Following the manual ensures proper installation‚ operation‚ and maintenance of your Ecosystem Water Softener. It prevents voiding the warranty‚ enhances safety‚ and guarantees optimal performance. Adhering to guidelines helps avoid water damage‚ system malfunctions‚ and ensures energy efficiency‚ leading to long-term cost savings and improved water quality for your home.

Installation Guide

Welcome to the installation guide for your Ecosystem Water Softener. This section provides step-by-step instructions‚ pre-installation checks‚ and tips to avoid common mistakes‚ ensuring a safe and successful setup;

2.1 Pre-Installation Checks

Before installation‚ ensure water temperature does not exceed 120°F to avoid damage. Check maximum inlet pressure (125 psi) and ensure minimum flow rate of 3 gallons per minute. Avoid direct sunlight exposure to prevent distortion. Install indoors to protect from freezing. Verify compliance with local plumbing codes and ensure all materials are ready for a smooth setup.

2.2 Step-by-Step Installation Instructions

Mount the water softener near the main water supply inlet. Connect inlet and outlet pipes securely. Install the drain line according to local plumbing codes. Plug in the power source and ensure all connections are tight. Follow the control panel setup guide to program the system. Perform a final check for leaks and proper function before use.

2.3 Common Installation Mistakes to Avoid

Avoid installing in direct sunlight or freezing areas‚ as this can damage components. Ensure the system is not treating water over 120°F. Do not exceed the maximum inlet water pressure of 125 psi. Verify the minimum water flow rate of 3 gallons per minute is met. Properly secure all connections to prevent leaks and maintain warranty validity.

Operating Instructions

This section provides a comprehensive guide to operating your Ecosystem Water Softener. Learn how to use the control panel‚ monitor performance‚ and program settings for optimal results.

3.1 Understanding the Control Panel

The control panel is the central interface for managing your water softener. It features buttons for adjusting settings and a display showing system status. Use it to monitor water usage‚ adjust hardness levels‚ and access diagnostic modes. Refer to the manual for detailed guidance on navigating and customizing your control panel effectively.

3.2 Setting Up the Water Softener

Setting up your water softener involves connecting it to your water supply and configuring the control panel. Ensure the system is installed upstream of all plumbing fixtures. Set the hardness level and regeneration cycle based on your water usage. Refer to the manual for specific instructions to ensure proper setup and functionality.

3.3 Regular Operation and Monitoring

Monitor the control panel regularly to ensure proper function. Check salt levels and water hardness settings to maintain optimal performance. Note any error messages and address them promptly. Regularly inspect the system for leaks or unusual noise. Ensure the water softener operates within recommended pressure and temperature limits for efficient and reliable service.

Maintenance and Troubleshooting

Regularly check salt levels and monitor for leaks. Address error messages promptly to ensure optimal performance. Maintain recommended water pressure and temperature to prevent system damage.

4.1 Daily Maintenance Tips

Check salt levels regularly to ensure optimal softening performance. Monitor for leaks around connections and valves. Clean the brine tank periodically to prevent salt bridges. Ensure proper water flow rates and pressure to maintain system efficiency. Regularly inspect and replace worn-out seals or gaskets to prevent water damage. These simple checks help extend the system’s lifespan and effectiveness.

4.2 Seasonal Maintenance Requirements

Perform seasonal checks to ensure optimal performance. Winterize the system to prevent freezing damage. Clean the brine tank and replenish salt levels before peak usage seasons. Inspect for scale buildup during summer months when water usage is higher. Ensure the softener is prepared for varying water temperatures and demands throughout the year.

4.3 Troubleshooting Common Issues

Identify and resolve common issues promptly to maintain efficiency. Check for error messages on the control panel and refer to the manual for solutions. Low salt levels or improper regeneration can cause soft water issues. Ensure proper water flow and pressure‚ as deviations may affect performance. Addressing issues early prevents system damage or downtime.

Advanced Features of the Ecosystem Water Softener

Discover advanced features enhancing performance and efficiency. The self-diagnostic function monitors system health‚ adaptive flow management optimizes water pressure‚ and smart energy modes reduce consumption.

5.1 Self-Diagnostic Function

The Ecosystem Water Softener features a self-diagnostic function that monitors electrical components‚ ensuring optimal performance. It detects issues promptly‚ preventing malfunctions and enabling efficient troubleshooting. This advanced feature enhances system reliability and longevity by providing real-time insights and alerts for maintenance needs‚ ensuring uninterrupted water treatment.

5.2 Water Flow and Pressure Management

The Ecosystem Water Softener requires a minimum water flow of 3 gallons per minute at the inlet and a maximum pressure of 125 psi. Ensure water temperature does not exceed 120°F to avoid damage. Proper flow and pressure management are crucial for optimal performance‚ efficiency‚ and longevity of the system‚ preventing potential malfunctions.

5.3 Energy Efficiency Features

The Ecosystem Water Softener is designed with advanced energy-saving technology. It operates on low power consumption and features smart diagnostic systems to reduce energy waste. The system optimizes water usage while maintaining high performance‚ ensuring eco-friendly operation without compromising on effectiveness or water quality.

Benefits of Using an Ecosystem Water Softener

Enjoy improved water quality‚ reduced energy bills‚ and extended appliance lifespan. The system minimizes salt usage‚ lowers maintenance costs‚ and supports eco-friendly water treatment for a sustainable home.

6.1 Improved Water Quality

The Ecosystem Water Softener effectively removes hardness minerals like calcium and magnesium‚ reducing scaling and improving water texture. This results in softer skin‚ shinier hair‚ and cleaner dishes. The system also minimizes impurities‚ enhancing taste and odor‚ while retaining beneficial minerals. Enjoy healthier drinking water and reduced buildup in pipes and appliances for long-term protection and efficiency.

6.2 Cost Savings Over Time

By reducing scaling and extending appliance lifespan‚ the Ecosystem Water Softener lowers maintenance and replacement costs. Energy-efficient operation minimizes electricity bills‚ while reduced salt usage decreases annual expenses. Long-term savings are enhanced through fewer repairs and prolonged system durability‚ making it a cost-effective solution for homeowners seeking to minimize water treatment expenditures over time.

6.3 Environmental Impact

The Ecosystem Water Softener promotes sustainability by reducing salt usage and minimizing wastewater. Its energy-efficient design lowers electricity consumption‚ while recyclable components contribute to eco-friendliness. By conserving resources and reducing environmental footprint‚ this system supports greener living and aligns with efforts to protect the planet for future generations.

Safety Guidelines

Follow safety guidelines to ensure proper operation and warranty validity. Avoid treating water over 120°F‚ as extreme temperatures and direct sunlight can damage components. Maintain minimum water flow of 3 gallons per minute and avoid exceeding 125 psi inlet pressure to prevent system damage.

7.1 General Safety Precautions

Always follow safety guidelines to ensure safe operation. Avoid treating water over 120°F‚ as excessive heat can damage components. Keep the system away from direct sunlight to prevent distortion. Maintain a minimum water flow of 3 gallons per minute and avoid exceeding 125 psi inlet pressure. Ensure proper installation to prevent electrical or water damage.

7.2 Warranty and Liability Information

Your EcoWater softener is backed by a comprehensive warranty covering parts and labor for a specified period. Systems are certified by the Water Quality Association‚ ensuring compliance with industry standards. Misuse or improper installation voids the warranty. Manufacturer is not liable for damages resulting from negligence or failure to follow guidelines. Adhere to manual instructions to maintain warranty coverage.

7.3 Emergency Procedures

In case of an emergency‚ such as a system leak or overflow‚ turn off the water supply immediately. For extreme temperatures‚ avoid exposure to freezing or heat above 120F. If the system malfunctions‚ switch off the power and contact a certified technician. Regular maintenance can help prevent such emergencies by ensuring all components function properly.

Optimal Usage and Performance

For optimal performance‚ ensure water temperature does not exceed 120F and inlet pressure remains below 125 psi. Maintain a minimum flow rate of 3 gallons per minute.

8.1 Water Temperature and Pressure Limits

Ensure water temperature does not exceed 120°F to prevent damage. Maximum allowable inlet pressure is 125 psi. Maintain a minimum water flow rate of 3 gallons per minute for optimal performance. Exceeding these limits can cause system damage and void the warranty. Always follow recommended guidelines for temperature and pressure settings.

8.2 Avoiding Damaging Conditions

Protect your water softener from direct sunlight‚ freezing temperatures‚ and water exceeding 120°F. Avoid installing in areas with high humidity or extreme heat. Excessive sun exposure can distort non-metallic parts‚ while freezing or hot water may cause irreparable damage. Ensure the system is placed in a stable‚ climate-controlled environment to maintain optimal performance and warranty validity.

8.4 Maximizing System Efficiency

Ensure optimal water flow rates and inlet pressure within the recommended range (3-125 psi) to maintain efficiency. Monitor water temperature below 120°F to prevent damage. Regularly clean the resin and check salt levels to ensure proper regeneration. Program the control panel according to water usage patterns for energy savings and consistent performance.

Comparing Different Ecosystem Water Softener Models

Explore various EcoWater models‚ each offering unique capacities‚ features‚ and efficiency levels. Compare ECR3700‚ ESD2750‚ EEC1502‚ and ESD2800 to find the best fit for your water treatment needs.

9.1 Key Differences Between Models

EcoWater models vary in capacity‚ flow rate‚ and features. The ECR3700 offers high-efficiency ion exchange‚ while ESD2750 focuses on salt-saving technology. EEC1502 includes advanced diagnostics‚ and ESD2800 excels in water conservation. Each model caters to different household needs‚ ensuring optimal performance based on water usage and treatment requirements.

9.2 Choosing the Right Model for Your Needs

Assess your household water usage and treatment needs. Models like ESD2750 are ideal for small homes‚ while ESD2800 suits larger families. Consider features like salt efficiency‚ flow rate‚ and advanced diagnostics. Compare capacities to ensure optimal performance. Selecting the right model ensures tailored water treatment‚ enhancing efficiency and long-term satisfaction.

9.3 Upgrading Your Current System

Consider upgrading to newer models like ESD2800 for improved performance. Ensure compatibility with existing plumbing and electrical systems. Newer systems offer enhanced features such as advanced diagnostics and energy efficiency. Consult EcoWater support to confirm upgrade compatibility and benefits. Upgrading ensures access to the latest technology‚ improving water treatment efficiency and system longevity.

Eco-Friendly Aspects of the System

The Ecosystem Water Softener promotes sustainability with advanced water conservation features‚ reduced salt usage‚ and recyclable components‚ minimizing environmental impact while providing clean‚ softened water efficiently.

10.1 Water Conservation Features

The Ecosystem Water Softener incorporates innovative water conservation features‚ minimizing waste through efficient regeneration cycles and advanced sensors that monitor usage. Its eco-friendly design ensures reduced water consumption while maintaining optimal performance‚ aligning with environmental sustainability goals and promoting responsible resource management.

10.2 Reduced Salt Usage

The Ecosystem Water Softener is designed to minimize salt consumption through high-efficiency technology. Smart sensors detect water usage patterns‚ optimizing regeneration cycles and reducing excess salt waste. This eco-friendly feature not only lowers operating costs but also aligns with environmental goals by promoting responsible resource use.

10.3 Recyclable Components

The Ecosystem Water Softener features recyclable components‚ including high-quality plastics and metals. Designed with sustainability in mind‚ these parts can be responsibly reused or recycled at the end of their lifecycle. This eco-conscious approach reduces environmental impact and supports a circular economy‚ aligning with global efforts to minimize waste and promote resource efficiency.

11.1 Summary of Key Points

This manual has covered the installation‚ operation‚ and maintenance of the Ecosystem Water Softener. Proper installation ensures optimal performance‚ while regular maintenance prolongs system life. The system offers improved water quality‚ energy efficiency‚ and cost savings. Always follow safety guidelines and refer to specific sections for detailed instructions on troubleshooting and advanced features.

11.2 Final Tips for Long-Term Use

Regularly monitor water hardness levels to ensure optimal system performance. Schedule annual professional maintenance to maintain efficiency. Avoid exposing the system to extreme temperatures or direct sunlight. Keep the control panel clean and update settings as needed. Always use recommended replacement parts to preserve warranty coverage and system longevity for reliable‚ softened water.

miller mobile home furnace manual

The manual provides essential guidance for the safe installation‚ operation‚ and maintenance of Miller Mobile Home Furnaces‚ ensuring optimal performance and compliance with safety standards.

Overview of the Miller Mobile Home Furnace

The Miller Mobile Home Furnace is a high-efficiency heating solution designed specifically for manufactured and modular homes. Known for reliability and low maintenance‚ these furnaces offer advanced features like ECM motors for precise temperature control. They are available in various models‚ including gas and oil options‚ to suit different home sizes and energy needs. The E7 Series‚ for instance‚ is a popular choice‚ combining durability with energy efficiency. These furnaces are built with insulated cabinets to minimize heat loss and reduce operational noise. Designed for safety and performance‚ Miller furnaces are a trusted option for homeowners seeking dependable heating systems tailored to their unique needs.

Importance of the Manual for Safe and Efficient Operation

The manual is crucial for ensuring the safe and efficient operation of the Miller Mobile Home Furnace. It provides detailed instructions for installation‚ operation‚ and maintenance‚ helping users avoid potential hazards. By following the guidelines‚ homeowners can ensure compliance with safety standards and local building codes. The manual also highlights critical safety precautions‚ such as proper venting and gas line connections‚ to prevent risks like carbon monoxide leaks or fires. Additionally‚ it offers troubleshooting tips to address common issues‚ minimizing downtime and extending the furnace’s lifespan. Adhering to the manual’s instructions ensures optimal performance‚ energy efficiency‚ and reliability‚ making it an indispensable resource for both installers and homeowners.

Key Features of the Miller Mobile Home Furnace

The Miller Mobile Home Furnace is designed with high-efficiency features to provide reliable heating for manufactured homes. It incorporates advanced technologies such as an ECM motor for quieter operation and variable speed airflow‚ ensuring consistent temperature control. The furnace is compact and lightweight‚ making it ideal for installation in mobile homes with space constraints. It also features a direct vent or non-direct vent option‚ offering flexibility in installation. With a robust insulated cabinet‚ the furnace minimizes heat loss and operates quietly. Its high Annual Fuel Utilization Efficiency (AFUE) rating ensures energy savings and eco-friendly performance. These features make the Miller furnace a durable and efficient choice for manufactured housing‚ providing comfort and reliability during the heating season.

Safety Considerations and Precautions

Ensure proper installation‚ venting‚ and gas line connections to prevent hazards. Always follow safety codes and manufacturer guidelines to avoid risks associated with gas furnaces;

Installation Warnings and Guidelines

Always follow the manufacturer’s instructions and local building codes for safe installation. The furnace must be vented using an approved system‚ such as the SRJ series roof jack for manufactured homes. Ensure proper gas line connections‚ using certified materials and techniques to prevent leaks. Install the furnace on a level surface and maintain clearance from combustible materials as specified. Electrical connections must be grounded correctly to prevent hazards. Never modify the furnace or its components without authorization‚ as this can void warranties and certifications. Proper installation ensures efficient performance and safety. Consult a qualified technician if unsure about any step.

Safe Operation and Maintenance Practices

Regular maintenance is crucial for the safe and efficient operation of the Miller Mobile Home Furnace. Always turn off the power and gas supply before performing any maintenance tasks. Inspect the venting system for blockages or damage and ensure all connections are secure. Replace air filters as recommended to maintain airflow and efficiency. Check the heat exchanger for signs of wear or damage‚ and clean the burner compartment annually. Never use flammable materials near the furnace and keep the area clear of debris. Schedule annual professional inspections to identify potential issues early. Proper maintenance enhances safety‚ reduces energy costs‚ and prolongs the furnace’s lifespan.

Emergency Shutdown Procedures

In case of an emergency‚ such as overheating or a gas leak‚ immediately shut off the manual gas valve and disconnect the power supply to the furnace. Open windows for ventilation if safe to do so. Do not attempt to restart the furnace until a qualified technician has inspected and cleared it for operation. If you smell gas‚ evacuate the premises and contact your gas supplier or local authorities. Always follow the manufacturer’s guidelines for emergency situations‚ as outlined in the manual. Regular checks and adherence to safety protocols can help prevent emergencies and ensure the furnace operates safely and efficiently. Proper shutdown procedures are critical to protecting both the system and the occupants of the home.

Installation Requirements and Recommendations

Ensure the furnace is installed following local building codes‚ manufacturer instructions‚ and National Fuel Gas Code guidelines. Proper venting‚ gas line connections‚ and electrical grounding are essential for safe operation.

Location Requirements for the Furnace

The Miller Mobile Home Furnace must be installed in a well-ventilated area‚ away from flammable materials and ignition sources. Ensure proper clearance from walls and ceilings as specified in the manual. The furnace should be located in an area accessible for maintenance and repair‚ avoiding confined spaces. It must comply with local building codes and National Fuel Gas Code requirements. Proper venting systems‚ such as the SRJ series roofjack‚ are mandatory for manufactured housing installations. The furnace should not be installed in areas prone to flooding or excessive moisture. Always follow the manufacturer’s guidelines for placement to ensure safe and efficient operation.

Venting Systems and Compliance

The Miller Mobile Home Furnace requires a venting system that meets specific safety and regulatory standards. For manufactured housing‚ the SRJ series roofjack is mandatory for proper venting. The system must comply with the National Fuel Gas Code and local building regulations. Use approved materials like PVC or ABS for vent pipes to ensure durability and safety. The venting system must be installed to avoid leaks and ensure proper gas flow. Termination points should be at least 12 inches above the roof and 3 feet away from windows or doors. Proper venting prevents carbon monoxide hazards and maintains efficient furnace operation. Always follow the manufacturer’s guidelines for venting to ensure compliance and safety.

Gas Line Connections and Safety Measures

Proper gas line connections are critical for safe operation of the Miller Mobile Home Furnace. Always use approved materials and ensure connections are tight to prevent leaks. The gas line should be installed by a qualified technician‚ adhering to local codes and the National Fuel Gas Code. A shutoff valve must be installed near the furnace for emergency situations. Regular inspections of the gas line are essential to detect any wear or damage. If a leak is suspected‚ turn off the gas supply immediately and contact a professional. Never attempt repairs without proper training. Use a gas detector to monitor for leaks‚ ensuring the system remains safe and efficient. Follow the manufacturer’s instructions for all gas line connections to maintain safety and compliance.

Operating the Miller Mobile Home Furnace

Operating the Miller Mobile Home Furnace involves using the control panel and thermostat to adjust settings for efficient heating. Ensure all operations adhere to the manual’s guidelines safely.

Understanding the Control Panel and Thermostat

The control panel on the Miller Mobile Home Furnace features a digital display and buttons for adjusting settings like temperature and fan speed. The thermostat regulates heating by sensing room temperature and signaling the furnace to cycle on or off. Ensure the thermostat is properly connected and configured according to the manual. The control panel also includes indicators for system status and error codes‚ aiding in troubleshooting. Always refer to the manual for detailed instructions on operating these components safely and efficiently. Proper use of the control panel and thermostat ensures consistent heating and energy efficiency.

Starting the Furnace and Adjusting Settings

To start the furnace‚ ensure the manual gas valve is fully open and the thermostat is set to “heat” mode. Press the ignition button until the burner lights‚ then release. Adjust the thermostat to your desired temperature. The control panel allows you to set the fan speed and heating mode. For optimal performance‚ allow the furnace to complete its cycle without frequent adjustments. If issues arise‚ refer to the troubleshooting guide in the manual. Always follow safety guidelines when operating the furnace. Proper setup ensures efficient heating and extends the system’s lifespan.

Maintenance and Troubleshooting

Regularly inspect filters‚ vents‚ and burners for cleanliness and damage. Address unusual noises or smells promptly. Refer to the manual for diagnostic codes and repair guidance.

Routine Maintenance Steps for Optimal Performance

Regular maintenance is crucial for the Miller Mobile Home Furnace to function efficiently and safely. Start by inspecting and replacing the air filters monthly to ensure proper airflow. Clean the vents and ducts annually to remove dust and debris. Check the burner compartment for obstructions and ensure all connections are secure. Lubricate moving parts as specified in the manual. Schedule a professional inspection annually before the heating season begins. Additionally‚ monitor the furnace’s performance‚ watching for unusual noises or drops in heating efficiency. Addressing issues promptly prevents major repairs and extends the furnace’s lifespan. Always follow the manufacturer’s guidelines for routine maintenance tasks.

Common Issues and Troubleshooting Tips

Common issues with the Miller Mobile Home Furnace include the furnace not heating‚ unusual noises‚ or intermittent operation. If the furnace fails to heat‚ check if the manual gas valve is open and ensure the circuit breaker is not tripped. For noises‚ inspect for loose parts or blockages in the vents. If the furnace stops working‚ verify the gas supply and ensure the thermostat is functioning correctly. Consult the manual for reset procedures if the system shuts down unexpectedly. Regularly cleaning filters and ensuring proper ventilation can prevent many issues. Always refer to the troubleshooting section of the manual for specific guidance and address problems promptly to maintain efficiency and safety. Professional assistance may be required for complex issues.

The Miller Mobile Home Furnace Manual serves as a comprehensive guide to ensure safe‚ efficient‚ and reliable operation of the furnace. By following the installation‚ maintenance‚ and troubleshooting tips outlined‚ users can maximize performance while minimizing potential issues. Regular upkeep and adherence to safety protocols are crucial for long-term functionality. This manual underscores the importance of proper installation and compliance with safety standards‚ ensuring a comfortable and secure heating experience. For any unresolved issues‚ consulting a qualified technician is recommended to maintain the furnace’s optimal condition and extend its lifespan. Refer to this manual periodically to stay informed and ensure your Miller Mobile Home Furnace operates at its best for years to come.

behavioral interviews for software engineers pdf

Behavioral interviews assess how candidates handle past situations, revealing problem-solving skills, teamwork, and adaptability. They complement technical assessments, offering insights into a candidate’s fit for the role and company culture.

What Are Behavioral Interviews?

Behavioral interviews are a type of job interview where candidates are asked to provide specific examples from their past experiences to demonstrate their skills, attitudes, and behaviors. These interviews focus on how individuals have handled situations in previous roles, rather than solely on their technical expertise. Employers use this approach to gauge a candidate’s problem-solving abilities, teamwork, adaptability, and alignment with the company’s culture. Common questions often begin with prompts like “Tell me about a time when…” or “Describe a situation where…,” requiring applicants to share detailed anecdotes. The goal is to predict future performance by analyzing past actions and decisions. In the context of software engineering, behavioral interviews complement technical assessments, offering insights into how candidates collaborate, communicate, and approach challenges in real-world scenarios. This method helps employers identify candidates who not only have the technical skills but also the soft skills necessary for success in the role.

Why Behavioral Interviews Are Important for Software Engineers

Behavioral interviews are crucial for software engineers as they provide insights into a candidate’s problem-solving skills, teamwork, and adaptability, which are essential for success in the field. Unlike technical interviews that focus solely on coding or system design, behavioral interviews reveal how a candidate handles real-world challenges, making them a vital part of the hiring process. Employers use these interviews to assess whether a candidate aligns with the company’s culture and values, ensuring a better fit for the team. Additionally, behavioral interviews help predict future performance by examining past experiences, which is particularly important in dynamic and collaborative environments like software engineering. By understanding how candidates approach challenges, communicate ideas, and work under pressure, employers can make more informed hiring decisions, ultimately building a more cohesive and effective team.

Common Behavioral Interview Questions for Software Engineers

Behavioral interviews for software engineers often involve questions about teamwork, problem-solving, and past experiences. Examples include resolving conflicts, handling tight deadlines, and adapting to new technologies, with company-specific scenarios.

General Behavioral Questions in Software Engineering Interviews

General behavioral questions in software engineering interviews focus on understanding a candidate’s past experiences and how they handle common workplace scenarios. These questions are designed to assess skills like teamwork, problem-solving, and communication. Examples include:

  • Tell me about a time you worked on a team project.
  • Describe a situation where you faced a difficult technical problem.
  • How do you handle tight deadlines or multiple priorities?
  • Can you give an example of a time you had to learn a new technology quickly?
  • How do you approach debugging or troubleshooting issues?

These questions help interviewers evaluate a candidate’s ability to collaborate, think critically, and adapt to challenges, which are essential for success in software engineering roles.

Company-Specific Behavioral Questions (e.g., Amazon, Google, Facebook)

Company-specific behavioral questions are tailored to assess how well a candidate aligns with a particular company’s values and work environment. For example:

  • Amazon: “Tell me about a time you went beyond customer expectations.”
  • Google: “Describe a situation where you had to collaborate across teams to solve a problem.”
  • Facebook: “How do you approach building products that impact billions of users?”

These questions aim to evaluate a candidate’s experience with the company’s specific priorities, such as customer obsession, innovation, or scalability. By asking these tailored questions, interviewers can determine if the candidate’s past behavior aligns with the company’s culture and future goals.

How to Answer Behavioral Interview Questions

To effectively answer behavioral interview questions, align your experiences with the company’s values and role requirements, showcasing problem-solving skills, teamwork, and adaptability through specific examples.

The STAR Method: A Framework for Structuring Responses

The STAR (Situation, Task, Action, Result) method is a proven framework for answering behavioral interview questions effectively. It helps candidates organize their responses clearly and concisely. Begin by describing the Situation—the context of the story. Next, outline the Task or problem you faced. Then, detail the Actions you took to address it, focusing on your specific contributions. Finally, conclude with the Result, emphasizing the outcomes and what you learned. This structure ensures your answer is engaging, informative, and aligned with the interviewer’s expectations. By using STAR, you can showcase your skills, decision-making, and problem-solving abilities, making your responses memorable and impactful. It’s a simple yet powerful tool to convey your experiences effectively during behavioral interviews.

Example Answers to Behavioral Questions

Here are examples of how to answer common behavioral questions using the STAR method:

  • Question: “Tell me about a time you overcame a technical challenge.”
    Answer: “In a previous project, I encountered a bug that caused delays. I identified the issue, collaborated with the team to prioritize fixes, and implemented a solution that resolved the problem, ensuring the project stayed on track.”
  • Question: “Describe a situation where you worked in a team.”

    Answer: “During a group project, I took the lead in coordinating tasks. I ensured clear communication, delegated responsibilities, and managed conflicts, resulting in a successful project delivery and positive feedback from peers.”

  • Question: “Tell me about a time you received feedback and how you acted on it.”
    Answer: “After a code review, I was advised to improve my documentation. I updated the comments, created a documentation guide, and shared it with the team, enhancing our overall code quality and readability.”

These examples demonstrate how to structure responses effectively, highlighting skills, actions, and outcomes.

Preparing for Behavioral Interviews

Preparation involves researching the company, practicing the STAR method, and reviewing common questions. Focus on aligning your experiences with the company’s culture and values to stand out.

Tips for Preparing for Behavioral Interviews

To excel in behavioral interviews, focus on aligning your past experiences with the company’s values and role requirements. Research the company culture and review common behavioral questions. Practice the STAR method to structure your responses clearly. Reflect on specific challenges you’ve faced, how you approached them, and the outcomes achieved. Use examples that highlight your problem-solving skills, teamwork, and adaptability. Consider seeking feedback from peers or mentors to refine your answers. Additionally, review your resume and be ready to discuss your projects in detail. Mock interviews can also help simulate real scenarios, building confidence and reducing anxiety. Stay updated on industry trends and be prepared to discuss your long-term career goals. Lastly, ensure your responses are concise and emphasize your contributions and learning from each experience.

Resources and Practice Materials

Preparing for behavioral interviews requires access to the right resources and practice materials. Start with books like Cracking the Coding Interview and The STAR Method, which provide frameworks for structuring responses. Online platforms like LeetCode and Pramp offer mock interviews tailored to software engineers. Utilize websites such as Glassdoor and LinkedIn to find company-specific behavioral questions. Practice with tools like InterviewBit and HackerRank, which include behavioral and technical exercises. Additionally, review PDF guides like Behavioral Interviews for Software Engineers to understand common prompts and sample answers. Join online communities like Reddit’s r/cscareerquestions for feedback on your responses. Finally, leverage mock interview services like Interviewing.io to simulate real interview scenarios and refine your delivery. These resources will help you build confidence and readiness for your behavioral interviews.

star ocean 2 fishing guide

Fishing in Star Ocean: The Second Story is a rewarding mini-game that offers relaxation and strategic challenges, enhancing your gameplay experience with unique fish species to discover.

Overview of Fishing in Star Ocean: The Second Story

Fishing in Star Ocean: The Second Story is a dynamic mini-game that adds depth to your adventure. Players can catch over 43 unique fish species, each with specific habitats and traits. Fishing spots are scattered across the planet, requiring exploration to discover hidden areas. The activity is not just for relaxation but also serves strategic purposes, as certain fish can be sold or used in crafting. Managing your inventory is key, as you can carry up to 20 of each species. This feature enhances gameplay by encouraging exploration and offering a break from combat, making it a beloved aspect of the game’s design.

Importance of Fishing in the Game

Fishing in Star Ocean: The Second Story is more than a pastime; it plays a crucial role in gameplay. Catching fish provides valuable resources for crafting and selling, boosting your in-game economy. Rare species can fetch high prices, aiding in purchasing essential items. Fishing also encourages exploration, as hidden spots and unique fish are scattered across the planet. It adds depth to the game, offering a relaxing yet rewarding activity alongside the main storyline. By mastering fishing, players can unlock new opportunities, enhancing their overall experience and providing a strategic edge in their journey. This makes fishing an integral part of the game’s design and appeal.

Getting Started with Fishing

Fishing begins with basic gear and bait, allowing players to cast their lines in various bodies of water, setting the foundation for more advanced strategies later.

Basic Fishing Mechanics

Fishing in Star Ocean: The Second Story involves casting a line into eligible water areas and waiting for a bite. Once a fish bites, players must press a button to reel it in. Patience and timing are key, as larger fish may put up more of a struggle. The mechanics are straightforward, making it accessible for new players while still offering depth for veterans. Starting near towns like Kurik or Krosse City provides easy access to initial fishing spots. Equip your gear, find a suitable location, and cast your line to begin your fishing journey and uncover the game’s unique aquatic secrets.

Obtaining Fishing Gear and Bait

To start fishing in Star Ocean: The Second Story, you’ll need basic fishing gear and bait. These can be purchased from item shops in towns like Krosse City or Krosse Castle. Equip the fishing rod and bait in your inventory to begin. Different baits attract different fish, so experimenting with various types can improve your chances of catching rare species. Higher-quality gear increases your fishing efficiency and allows you to catch larger fish. Ensure your inventory has space, as each fish species can be collected up to 20 times. Acquiring the right gear and bait is essential for a successful fishing experience in the game.

Fishing Locations in Star Ocean 2

Fishing spots are scattered across the planet, with notable locations near Kurik and Krosse City. Each area offers unique fish species, making exploration essential for completing your collection.

Best Fishing Spots Across the Planet

The best fishing spots in Star Ocean: The Second Story are scattered across the planet, offering diverse fish species. Kurik’s elevated cliff near the ocean is a hotspot, while Krosse City’s waterways are teeming with rare fish. Exploring these locations is essential for completing your collection. Each spot offers unique challenges and rewards, making exploration a key part of the fishing experience. Players are encouraged to experiment with different baits and timing to maximize their catches in these prime locations.

Hidden or Less-Known Fishing Areas

Exploring hidden fishing areas in Star Ocean: The Second Story can lead to some of the game’s rarest fish. Areas outside Krosse and Kurik, such as secluded ponds and lesser-known coastal spots, often hold surprises. Players have reported finding unique species in these overlooked locations, which are not immediately obvious. Patience and persistence are key to discovering these secret fishing gems, as they may require specific baits or timing. These areas add depth to the fishing experience, rewarding adventurous players with exclusive catches that might otherwise go unnoticed.

Advanced Fishing Strategies

Mastering fishing in Star Ocean: The Second Story involves using the right bait, timing, and location to catch rare species, optimizing your inventory for maximum efficiency.

Tips for Catching Rare Fish

To successfully catch rare fish in Star Ocean: The Second Story, focus on using the right bait for specific species. Explore hidden fishing spots, such as the elevated cliff near Kurik, where rare fish are known to spawn. Timing is crucial, as certain fish appear during specific hours or weather conditions. Patience is key, as rare fish can be elusive and may require multiple attempts. Additionally, equipping better fishing gear and understanding fish behavior can significantly improve your chances. Keep your inventory organized to avoid missing out on unique catches, as you can carry up to 20 of each species. Experimenting with different locations and bait combinations will help you master the art of catching rare fish.

Maximizing Fishing Efficiency

To maximize fishing efficiency in Star Ocean: The Second Story, focus on using the right gear and bait for your target species. Explore various fishing spots, as certain areas yield better results depending on the fish. Timing is essential, as some fish appear during specific hours or weather conditions. Organize your inventory to avoid waste, as you can carry up to 20 of each species. Prioritize upgrading your fishing equipment to improve catch rates and reduce downtime. Additionally, familiarize yourself with fish behaviors and patterns to anticipate their movements. By optimizing your approach, you can efficiently catch a wide variety of fish and enjoy the game’s fishing mechanics to the fullest.

Fish Species and Inventory Management

In Star Ocean: The Second Story, players can catch over 40 unique fish species. The inventory allows up to 20 of each type, encouraging strategic management to avoid overflow and maintain a balanced collection for future use.

Unique Fish Species in the Game

Star Ocean: The Second Story features over 40 unique fish species, each with distinct characteristics and habitats. Players can discover rare fish like the elusive species found near Krosse City, adding depth to their collection. Certain fish are exclusive to specific locations, making exploration rewarding. The game’s encyclopedia provides clues about their habitats, aiding in the hunt. Catching these unique species requires patience and strategy, enhancing the overall fishing experience. Managing your inventory wisely is key, as you can hold up to 20 of each type. This variety encourages players to explore different fishing spots and master techniques to complete their collection.

Managing Your Fish Inventory

In Star Ocean: The Second Story, managing your fish inventory is crucial due to the 20-item limit per species. This cap encourages strategic decisions about which fish to keep or discard. Fish can be used for cooking, selling, or special recipes, making inventory management a key part of gameplay. Regularly clean out your inventory to avoid overcrowding, especially when pursuing rare species. Players can also use storage options to organize their collection effectively. Balancing your inventory ensures you have space for new catches while maintaining a diverse set of fish for future use.

Common Challenges and Solutions

Players often struggle with locating rare fish in Star Ocean 2. Patience and revisiting known fishing spots, like those near Krosse, can help overcome this challenge effectively.

Troubleshooting Fishing Issues

Experiencing difficulties while fishing in Star Ocean: The Second Story? Common issues include finding rare fish or locating specific fishing spots. Players often report struggling to locate certain species, particularly in areas like Krosse City and its surroundings. To resolve this, ensure you explore all nearby water bodies thoroughly, as some fish may appear in less obvious locations. Additionally, revisiting known fishing spots multiple times can increase your chances of encountering rare fish. Patience is key, as some species may only appear during specific times or under certain conditions. Utilize online guides or forums for tips on where to find elusive fish and optimize your fishing strategy.

Overcoming Difficult Fishing Spots

Mastering challenging fishing spots in Star Ocean: The Second Story requires persistence and strategy. Some areas, like the elevated cliff near Kurik or the water bodies around Krosse City, are known for being tricky. Players often struggle to locate specific fish, but thorough exploration and patience can help. Revisiting spots multiple times increases the chances of encountering rare species. Additionally, using the right bait and gear can make a significant difference. If stuck, consulting online guides or forums can provide valuable insights. Remember, perseverance is key to overcoming these challenges and successfully catching elusive fish.

Fishing in Star Ocean: The Second Story is a delightful and rewarding experience, offering relaxation and excitement. With 43 unique species to discover, it enhances gameplay and provides a sense of accomplishment, encouraging players to explore and enjoy this engaging mini-game.

Final Thoughts on Fishing in Star Ocean 2

Fishing in Star Ocean: The Second Story is a captivating mini-game that blends relaxation with strategic challenges, offering players a unique way to unwind and engage deeply with the game world. With 43 unique fish species to discover, each offering its own set of characteristics and challenges, the experience is both rewarding and diverse. The ability to collect and manage these species adds depth to gameplay, making it a memorable part of the adventure. Whether you’re a casual player or a completionist, fishing in Star Ocean 2 provides countless hours of enjoyment and satisfaction, enhancing the overall journey through its rich universe.

Encouragement for Players to Explore Fishing

Exploring fishing in Star Ocean: The Second Story is an enriching experience that offers both relaxation and excitement. Players are encouraged to venture into this unique mini-game, where they can discover 43 diverse fish species. Each fish has distinct traits, making every catch a thrilling achievement. Fishing not only provides a creative break from the main storyline but also contributes to character development and inventory management. With hidden spots and rare catches, the journey is as rewarding as it is challenging. Dive into the world of fishing in Star Ocean 2 and uncover its secrets—your adventure awaits beneath the waves!

hsk 1 pdf

Overview of HSK 1

HSK 1 is the first level of the Chinese proficiency test, assessing basic vocabulary and grammar. It focuses on simple communication for beginners, with resources like PDF textbooks, workbooks, and flashcards widely available online to aid preparation.

HSK 1 is the entry-level examination for Chinese language proficiency, designed for beginners. It assesses basic listening and reading skills, focusing on everyday communication. The test evaluates the ability to understand and use simple Chinese characters, phrases, and sentences. HSK 1 is ideal for learners who have just started studying Mandarin and want to measure their progress. Resources like PDF textbooks, workbooks, and practice tests are widely available online, providing comprehensive study materials. These resources include vocabulary lists, grammar guides, and sample test papers, ensuring learners are well-prepared for the exam. HSK 1 serves as the foundation for higher-level Chinese proficiency tests, making it a crucial starting point for language acquisition.

Importance of HSK 1 for Beginners

HSK 1 holds significant importance for beginners as it provides a solid foundation in Chinese language skills. It introduces basic vocabulary and grammar, essential for everyday communication. By mastering HSK 1, learners can confidently interact in simple scenarios, such as greetings and introductions. The exam also serves as a motivational tool, encouraging beginners to progress further in their Chinese studies. Moreover, HSK 1 certification is recognized internationally, enhancing career and academic opportunities. With resources like PDF textbooks and practice tests readily available, beginners can efficiently prepare and achieve their language goals. This initial level builds the necessary skills and confidence to advance to higher proficiency levels, making it a vital step in the learning journey.

HSK 1 Textbooks and Workbooks

The Standard Course HSK 1 Textbook and Workbook are essential resources, offering comprehensive lessons, exercises, and MP3 audio files. Available in PDF format, they can be downloaded or purchased online.

Standard Course HSK 1 Textbook

The Standard Course HSK 1 Textbook is a comprehensive resource designed for beginners. It covers 150 essential vocabulary words and basic grammar rules, providing a solid foundation for learning Chinese. The textbook includes dialogues, reading exercises, and cultural insights to enhance understanding. Available in PDF format, it can be downloaded from various educational websites or purchased from platforms like Amazon. Accompanying MP3 audio files are also accessible, aiding in pronunciation practice. This textbook is part of a series developed by Beijing Language and Culture University, ensuring alignment with HSK exam standards. It’s a must-have for anyone preparing for the HSK 1 test, offering clear structure and practical content.

HSK 1 Workbook and Exercise Books

HSK 1 workbooks and exercise books are essential for reinforcing language skills. These resources include practice exercises, reading comprehension, writing drills, and listening activities tailored to the HSK 1 syllabus. Available in PDF format, they can be downloaded from educational websites or purchased alongside textbooks. Many workbooks include answer keys and audio files to aid self-study. Designed to complement the Standard Course HSK 1 Textbook, these materials focus on applying vocabulary and grammar in practical scenarios. They are ideal for learners seeking structured practice to improve their proficiency and confidence before taking the HSK 1 exam. Regular use of these workbooks ensures thorough preparation and mastery of basic Chinese language skills.

HSK 1 Vocabulary and Grammar

  • HSK 1 requires mastery of 150 basic vocabulary words and simple sentence structures.
  • Common topics include greetings, family, and basic questions.
  • Grammar focuses on nouns, verbs, and basic question particles.

HSK 1 Vocabulary List

The HSK 1 vocabulary list includes 150 essential Chinese words and phrases for beginners. These words cover basic communication needs, such as greetings, family, numbers, and common expressions. The list is divided into 10 sections, each containing , along with their pinyin, English translations, and example sentences. Many online resources provide free PDF downloads of this list, making it easy to study on the go. Additionally, flashcards and mobile apps like Anki or Pleco can help learners memorize the vocabulary effectively. Mastering these words is crucial for passing the HSK 1 exam and building a strong foundation in Chinese.

Basic Grammar Rules for HSK 1

HSK 1 grammar focuses on basic sentence structures and rules essential for beginners. It introduces simple sentence patterns like Subject-Verb-Object, question formation using , and basic measure words like . Learners are also taught to use common particles like and to indicate completed actions. The grammar is straightforward, emphasizing clear and direct communication. Key topics include pronouns, basic interrogative sentences, and the correct use of adjectives and verbs in simple contexts. Mastering these foundational rules is crucial for constructing simple, clear sentences and progressing in Chinese language proficiency.

HSK 1 Practice Tests and Exercises

HSK 1 practice tests and exercises are essential for assessing proficiency. Sample test papers and online resources help learners evaluate their skills and prepare effectively for the exam.

Sample Test Papers for HSK 1

Sample test papers for HSK 1 are widely available in PDF format, providing learners with authentic exam questions to practice and assess their readiness. These resources include reading, writing, and listening sections, mirroring the actual test structure. Many official websites and platforms offer free downloads, such as Hanban or Chinese educational portals, ensuring accessibility for all learners. Additionally, some websites provide annotated answers and scoring guidelines, helping candidates understand their performance and identify areas for improvement. Regular practice with these sample papers enhances familiarity with the exam format and boosts confidence for the actual test. They are an indispensable tool for effective HSK 1 preparation.

Online Resources for HSK 1 Practice

Online resources for HSK 1 practice are abundant and easily accessible, offering a variety of tools to enhance learning. Websites like Hanban and other educational platforms provide free PDF downloads of practice tests, interactive exercises, and vocabulary lists tailored to the HSK 1 syllabus. These resources often include audio materials for listening exercises, ensuring comprehensive preparation. Many online platforms also feature progress-tracking systems and interactive quizzes to engage learners. Additionally, mobile apps and forums allow learners to connect with others preparing for the exam, fostering a collaborative learning environment. Utilizing these online resources can significantly improve reading, writing, and listening skills, ensuring a strong foundation for HSK 1 success.

HSK 1 Listening Materials

HSK 1 listening materials include audio resources like MP3 files and practice exercises, focusing on basic conversations, greetings, and simple questions to improve comprehension skills effectively.

Audio Resources for HSK 1

HSK 1 audio resources are essential for improving listening skills. These materials, often in MP3 format, include dialogues, pronunciation guides, and listening exercises. Many websites offer free downloads of HSK 1 audio files, such as the Internet Archive, which provides the HSK Standard Course with accompanying audios. Additionally, platforms like YouTube and mobile apps feature audio lessons tailored for HSK 1 preparation. These resources cover basic conversations, greetings, and simple questions, helping learners understand tones and spoken Chinese. Audio materials are frequently paired with PDF textbooks and workbooks, ensuring comprehensive study. They are also available on platforms like DigMandarin and FlipBuilder, making it easy to access and practice anywhere. Regular practice with these audios enhances listening comprehension and pronunciation skills.

Listening Exercises and Dialogues

HSK 1 listening exercises and dialogues are crucial for building foundational Chinese listening skills. These materials focus on basic greetings, introductions, and simple conversations. Many resources, such as PDF textbooks and online platforms, include listening exercises paired with transcripts or translations. Dialogues cover everyday topics like family, food, and numbers, helping learners understand spoken Chinese. Websites like the Internet Archive offer free HSK 1 audio and PDF materials, while mobile apps provide interactive listening exercises. Regular practice with these resources enhances comprehension and pronunciation, preparing learners for real-life conversations in Chinese. These exercises are designed to be engaging and accessible, making learning enjoyable and effective for beginners.

Additional HSK 1 Resources

Flashcards and mobile apps are popular for HSK 1 preparation. Apps like DigMandarins offer interactive exercises, while flashcards help memorize vocabulary effectively. These tools complement traditional study materials.

Flashcards and Mnemonics for HSK 1

Flashcards are an effective tool for memorizing HSK 1 vocabulary, with apps like Anki and Quizlet offering customizable decks. Mnemonics, such as associating words with images or sentences, enhance retention. PDF flashcard sets are widely available online, covering all 150 HSK . These resources are ideal for beginners, providing a structured way to practice and reinforce new vocabulary. Many flashcard sets include pinyin and English translations, making them accessible for learners at any stage. Mnemonics, such as creating stories or associations, help learners remember complex characters and their meanings. These methods are particularly useful for visual and auditory learners, making HSK 1 preparation more engaging and efficient. They complement traditional study materials, ensuring comprehensive understanding and active recall of vocabulary.

Mobile Apps for HSK 1 Preparation

Mobile apps are invaluable for HSK 1 preparation, offering flexible and interactive learning. Apps like Pleco and Memrise provide flashcards, quizzes, and spaced repetition systems to master vocabulary. Anki is another popular choice for creating custom flashcards with mnemonics. Many apps include audio clips to improve pronunciation and listening skills. They often feature progress tracking, helping learners stay motivated. Additionally, apps like HSK Online and ChinesePod offer comprehensive lessons and exercises tailored to HSK 1. These tools are especially useful for learners who prefer studying on-the-go. They complement traditional study materials, making HSK 1 preparation more accessible and efficient. With these apps, learners can practice anywhere, ensuring steady progress in their Chinese language journey.

Where to Download HSK 1 PDF Materials

HSK 1 PDF materials are available on official websites, online platforms like Amazon, and file-sharing sites. Resources include textbooks, workbooks, and practice tests for convenient download.

Official Websites and Platforms

Official HSK 1 PDF materials can be downloaded from reputable sources like the official HSK website, Amazon, and educational platforms. The HSK Standard Course textbooks and workbooks are widely available in PDF format, often accompanied by audio resources. Many websites offer free downloads of HSK 1 vocabulary lists, practice tests, and exercise books. Platforms like Internet Archive and FlipBuilder provide access to flip PDFs of HSK 1 materials. Additionally, some websites allow users to purchase and download PDF versions of textbooks and workbooks directly. These official resources ensure authenticity and comprehensive coverage of the HSK 1 syllabus, making them ideal for self-study and exam preparation.

Free and Paid Resources for HSK 1

HSK 1 resources are available in both free and paid formats to cater to different learning needs. Free resources include PDF downloads of HSK 1 vocabulary lists, practice tests, and flashcards from websites like Internet Archive and FlipBuilder. Paid resources, such as official HSK Standard Course textbooks and workbooks, can be purchased from platforms like Amazon or the official HSK website. These paid materials often include audio files and detailed answers, providing comprehensive preparation. Additionally, some platforms offer a mix of free and paid content, allowing learners to access basic materials for free while upgrading for more advanced tools. These resources ensure that learners can tailor their study materials to their budget and learning style.