ro troubleshooting guide pdf

Reverse osmosis (RO) systems are essential for water purification, but they can encounter issues like leaks, low pressure, or noise. This guide helps identify and resolve these problems efficiently, ensuring optimal performance and clean water output. By understanding common symptoms and using diagnostic tools, users can maintain their RO systems effectively and extend their lifespan. Troubleshooting is key to preventing breakdowns and ensuring continuous access to purified water.

What is RO?

Reverse Osmosis (RO) is a water purification technology that uses a semipermeable membrane to remove impurities like dissolved salts, bacteria, and chemicals from water. It operates by applying pressure to force water through the membrane, filtering out contaminants and producing clean, purified water. Commonly used in home and industrial systems, RO is effective for improving water taste, odor, and safety, making it a reliable solution for drinking water treatment.

Why RO Troubleshooting is Important

RO troubleshooting is crucial for maintaining water quality and system longevity. Identifying issues early prevents costly repairs, ensures continuous access to clean water, and optimizes system performance. Regular maintenance and troubleshooting also extend filter lifespan, reduce contamination risks, and safeguard health by ensuring the system operates effectively. Addressing problems promptly avoids downtime and guarantees consistent water purification, making troubleshooting an essential skill for RO system owners.

Purpose of an RO Troubleshooting Guide

An RO troubleshooting guide serves as a comprehensive resource for identifying and resolving common system issues. It provides step-by-step instructions, diagnostic tools, and maintenance tips to help users address problems effectively. The guide aims to empower individuals with the knowledge to maintain their RO systems, ensuring optimal performance, water quality, and longevity. By following the guide, users can troubleshoot independently, saving time and reducing reliance on external assistance.

Common Issues in RO Systems

Common issues in RO systems include water leaks, low pressure, and noisy operation. These problems can affect performance and water quality if not addressed promptly.

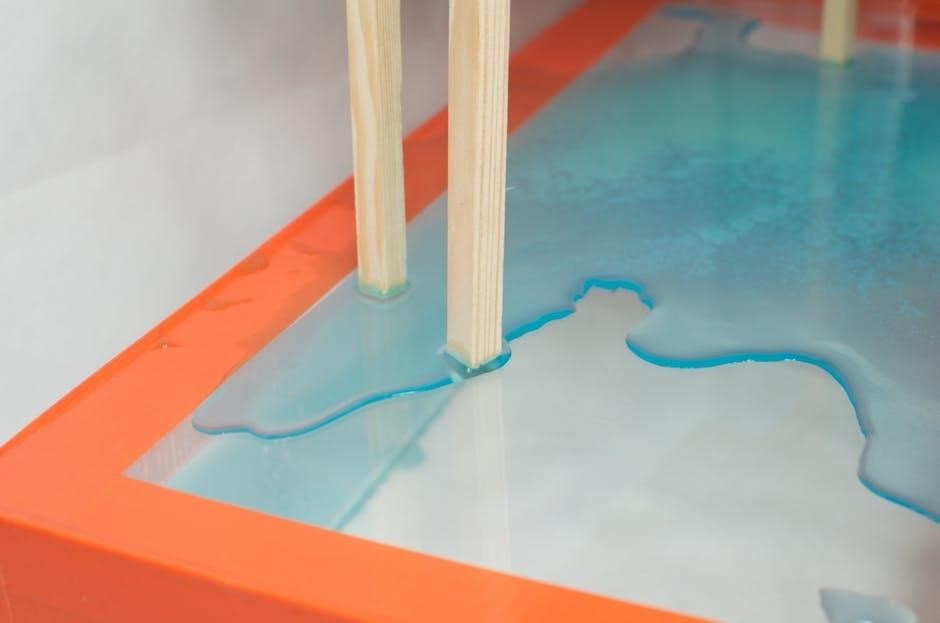
Water Leaks and System Damage

Water leaks in RO systems often occur at connections, tubing, or filter housings. These leaks can lead to system damage, reduced efficiency, and contaminated water. Regular inspections of O-rings, gaskets, and tubing are essential to prevent moisture buildup and structural issues. Tightening loose connections, replacing worn seals, and ensuring proper installation can mitigate these problems. Addressing leaks promptly prevents further damage and maintains optimal water quality and system performance.

Low Water Pressure

Low water pressure in RO systems can result from clogged filters, faulty valves, or kinked tubing. It may also occur due to improper installation or high water demand. Checking and cleaning pre-filters, ensuring all connections are secure, and replacing worn-out components can resolve the issue. Maintaining proper system setup and addressing blockages promptly helps restore water flow and efficiency, ensuring consistent performance and clean water output.
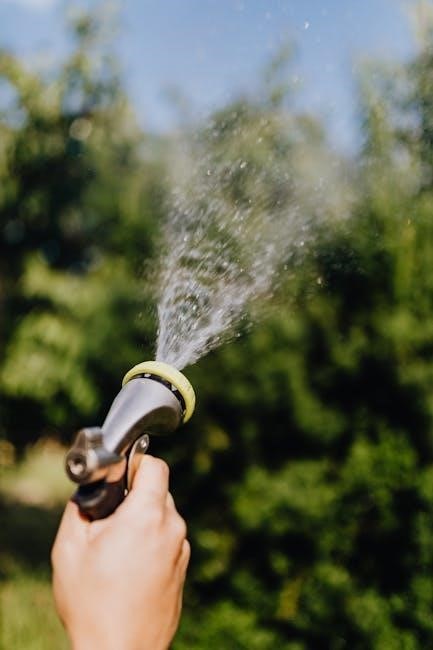
Noisy Operation

Noisy RO systems can be caused by faulty pumps, worn-out components, or improper installation. Vibrations from the unit or loose connections may also contribute. To address this, ensure all pipes and fittings are securely tightened. Lubricating moving parts and balancing water pressure can reduce noise. Regular maintenance, such as replacing worn-out washers or faulty valves, can also minimize operational noise. Always refer to the RO manual for specific guidance on diagnosing and resolving noise-related issues effectively.

Diagnosing RO Problems

Diagnosing RO issues involves identifying symptoms, reviewing the system manual, and using diagnostic tools like pressure gauges. This helps pinpoint problems efficiently and ensures effective troubleshooting.

Identifying Symptoms

Identifying symptoms is crucial for effective RO troubleshooting. Common issues include water leaks, low pressure, or unusual noises. Monitoring these signs helps detect problems early, preventing system damage. Regularly checking for visible leaks, testing water flow, and listening for abnormal sounds can reveal underlying issues. Being proactive ensures timely repairs, maintaining water quality and system efficiency. Early detection of symptoms is key to avoiding costly breakdowns and extending the lifespan of your RO system.

Using the RO Manual

The RO manual is a comprehensive resource for troubleshooting and maintaining your system. It provides detailed instructions for installation, maintenance, and repair. By referencing the manual, you can identify error codes, understand system components, and follow step-by-step solutions. Regularly reviewing the manual ensures familiarity with your RO system’s operation, helping you diagnose issues quickly and accurately. It’s an essential tool for resolving problems effectively and keeping your system running smoothly.

Basic Diagnostic Tools

Essential diagnostic tools for RO troubleshooting include a pressure gauge to measure water pressure, a multimeter for electrical checks, and a leak detector to identify system breaches. These tools help pinpoint issues like low pressure, electrical faults, or water leaks. Regular use of these tools ensures early detection of problems, preventing system damage and ensuring optimal performance. They are fundamental for maintaining your RO system’s efficiency and longevity.

Solving Common RO Issues

Addressing leaks, low pressure, and noise ensures smooth RO operation. Tightening connections, adjusting pressure settings, and insulating pumps are practical solutions to maintain efficiency and performance.

Fixing Leaks and Damages

Leakage in RO systems often occurs at connections or worn-out seals. Inspect pipes, fittings, and O-rings for damage. Tighten loose connections and replace damaged components. Apply food-grade silicone sealant to prevent future leaks. Regularly check for water droplets or puddles near the system. Addressing leaks promptly prevents system damage and ensures efficient operation. Replace any corroded or cracked parts immediately to maintain water quality and system integrity.

Adjusting Water Pressure

Adjusting water pressure in an RO system is crucial for optimal performance. Start by checking the incoming water supply to ensure it meets the system’s requirements. Use a pressure gauge to measure the current pressure and compare it to the recommended level. If the pressure is too low, inspect the filters for blockages and clean or replace them as needed. Straighten any kinked tubing and ensure all connections are secure. If equipped, adjust the pressure regulator carefully to avoid over-pressurizing the system. Regularly maintaining the storage tank and ensuring it is properly sealed will also help maintain consistent pressure. Consulting the system’s manual or a professional can provide additional guidance for specific models.

Reducing Noise Levels

Reducing noise levels in RO systems often involves addressing the source of the sound. Check the water pump for proper function and ensure it’s mounted securely to minimize vibrations. Inspect the tubing for kinks or blockages that could cause turbulent water flow. Adjusting the water pressure might also help if it’s too high, leading to noisy operation. Regular maintenance can prevent these issues and ensure quieter performance.

Maintenance Tips for RO Systems

Regular filter replacement every 6-12 months ensures optimal performance. Clean the system every 3-6 months to remove contaminants. Schedule annual professional inspections for long-term efficiency and reliability.

Filter Replacement

Regular filter replacement is crucial for maintaining water quality and system performance. Replace pre-filters every 6-12 months and RO membranes every 2-3 years. Use compatible filters to ensure optimal purification. Neglecting replacements can lead to reduced efficiency, contaminated water, and system damage. Always follow the manufacturer’s guidelines for replacement intervals and procedures to keep your RO system functioning effectively and prolong its lifespan.

Cleaning the System

Regular cleaning of the RO system ensures optimal performance and water quality. Clean the filters, membranes, and storage tank every 3-6 months. Use manufacturer-approved cleaners to sanitize and remove contaminants. Drain and rinse the storage tank thoroughly to prevent bacterial growth. After cleaning, flush the system with water to remove any cleaning solution residue. Proper maintenance prevents clogging and extends the lifespan of the system, ensuring consistent water purification efficiency and freshness.

Regular Checkups

Scheduling regular checkups ensures the RO system operates efficiently and effectively. Inspect filters, membranes, and connections for wear or damage. Check water pressure, flow rate, and quality to identify potential issues early. Replace components as needed to maintain optimal performance. A well-maintained system reduces the risk of breakdowns, extends longevity, and consistently delivers clean, safe drinking water. Regular checkups are crucial for maintaining peak performance and user satisfaction.

Advanced RO Troubleshooting

Advanced troubleshooting involves addressing complex technical issues, such as electrical malfunctions, software errors, and system integration problems. It requires a deep understanding of RO mechanics and diagnostics.

Understanding Technical Specifications

Understanding technical specifications is crucial for effective RO troubleshooting. Familiarizing yourself with flow rates, pressure requirements, and filter capacities ensures proper system operation. Knowing the compatibility of parts and optimal operating conditions helps prevent issues. Technical specs guide maintenance schedules and warranty claims. They also assist in identifying mismatches between system components and water quality, ensuring the RO system performs efficiently and effectively over time.

Troubleshooting Electrical Issues

Electrical issues in RO systems often stem from power supply problems or faulty components. Check circuit breakers, fuses, and wiring for damage or corrosion. Verify voltage levels match specifications. Sensors, solenoids, or pumps may malfunction due to electrical surges or wear. Use a multimeter to test connections and identify shorts or open circuits. Replace faulty parts promptly to restore system functionality and ensure safe operation. Always disconnect power before performing repairs to avoid hazards.

Resolving Software Glitches

Software glitches in RO systems can cause system freezes or error messages. Restart the system to resolve temporary issues. Check for firmware updates and install the latest version. If problems persist, reset the system to factory settings, ensuring all data is backed up. Contact customer support if glitches recur. Regular software maintenance prevents such issues, ensuring smooth operation and reliable water purification performance over time.

When to Call a Professional

Call a professional for complex RO issues like severe leaks, electrical faults, or system failures; Experts handle repairs requiring specialized tools or knowledge, ensuring safety and efficiency.

Identifying Complex Problems

Complex RO issues often involve advanced technical knowledge, such as system failures, electrical faults, or software glitches. These problems may require specialized tools or expertise to resolve safely and effectively. If symptoms persist despite basic troubleshooting, or if the issue is beyond your understanding, it’s crucial to seek professional assistance. Professionals can diagnose and repair intricate problems, ensuring your RO system operates correctly without causing further damage or safety risks.

Emergency Situations

In emergency situations, such as severe water leaks, electrical malfunctions, or sudden system failures, immediate action is necessary to prevent further damage or safety hazards. Turn off the power and water supply to the RO system to avoid risks like flooding or electrical shock. Contact a professional promptly, as these issues often require specialized expertise to resolve safely and effectively. Delaying action can lead to costly repairs or even render the system inoperable.

Warranty and Support Services

Understanding your RO system’s warranty and support services is crucial for troubleshooting. Most manufacturers offer warranties covering parts and labor for specific periods. Check your warranty terms to determine what is covered and for how long. Additionally, many companies provide dedicated customer support, including 24/7 helplines and online resources. Registered warranties often grant access to priority assistance, ensuring quicker resolutions for issues. Utilize these services to address complex problems and maintain your system effectively without incurring extra costs.

Effective RO troubleshooting ensures clean water and system longevity. Regular maintenance and quick issue resolution are key. Empowers users to handle common problems confidently for optimal performance and efficiency.

This guide provides a comprehensive approach to troubleshooting RO systems, addressing common issues like leaks, low pressure, and noise. It emphasizes the importance of regular maintenance, filter replacement, and proper diagnostic techniques. By following the outlined steps, users can identify and resolve problems efficiently, ensuring optimal system performance and clean water output. The guide also highlights when professional assistance is necessary, ensuring long-term functionality and reliability of the RO system.

Final Tips for Effective Troubleshooting

For effective RO troubleshooting, always follow manufacturer guidelines and maintain a clean system. Regularly inspect filters and replace them as needed. Use diagnostic tools to identify issues early and address them promptly. Keep the system well-maintained to prevent future problems. Consult the manual for specific instructions and consider upgrading components for improved performance. Routine checkups and proactive care ensure reliable operation and extend the lifespan of your RO system;

rheem tankless water heater installation manual pdf

This manual provides a comprehensive guide for installing and maintaining Rheem tankless water heaters, ensuring safety, efficiency, and optimal performance for both professionals and homeowners.

1.1 Overview of Rheem Tankless Water Heaters

Rheem tankless water heaters are innovative, energy-efficient solutions designed to provide continuous hot water. Available in electric, gas, and condensing models, they offer high performance, space-saving designs, and eco-friendly operation. These units are ideal for residential and commercial use, catering to varying water demand needs. Rheem’s tankless heaters are known for their durability, advanced technology, and user-friendly controls, making them a popular choice for modern households seeking reliable and sustainable water heating solutions.

1.2 Importance of Proper Installation

Proper installation of Rheem tankless water heaters is crucial for ensuring safety, efficiency, and longevity. Incorrect installation may lead to performance issues, increased energy consumption, or even safety hazards. Adhering to the manual’s guidelines ensures compliance with safety standards, optimal water temperature control, and reduced risk of malfunctions. Proper installation also validates the product warranty and guarantees reliable operation, making it essential to follow Rheem’s recommended procedures and guidelines during the setup process.

Safety Precautions and Guidelines

Ensure all safety measures are followed to prevent risks like scalding or electrical hazards. Proper venting is essential, and high water temperatures must be handled with care.

2.1 Important Safety Information

Adhering to safety guidelines is crucial to prevent hazards. Water temperatures above 125°F can cause severe burns, especially for children, the elderly, and disabled individuals. Ensure proper ventilation to avoid gas leaks and carbon monoxide risks. Always follow the manual’s instructions for electrical connections and venting. Keep the unit away from flammable materials and ensure it is installed in a well-ventilated area. Regular maintenance and inspections are essential to maintain safety and efficiency. Never attempt installation without proper training or tools.

2.2 Avoiding Hazardous Locations for Installation

Ensure the tankless water heater is not installed in areas prone to excessive moisture, humidity, or dust. Avoid locations where the unit could be splashed with water or exposed to flammable materials. Do not install near areas where flammable products are stored or used, unless the main burner flame is at least 18 inches above the floor. Additionally, avoid installing in areas subject to freezing temperatures or where proper ventilation cannot be maintained. Always follow local codes and manufacturer guidelines for safe installation.

System Requirements and Compatibility

Ensure compatibility with existing plumbing, electrical systems, and water pressure specifications. Check minimum/maximum working pressures (30-150 PSI) and optimal operating range (35-80 PSI) for proper functionality.

3.1 Checking Water Heater Compatibility

Ensure the Rheem tankless water heater aligns with your home’s plumbing, electrical, and water pressure systems. Verify the GPM flow rate, which varies by model, and check the minimum/maximum working pressure range of 30-150 PSI. Thermostatic models require specific temperature settings, while non-thermostatic models may need additional adjustments. Ensure electrical service matches the heater’s voltage and power requirements. Refer to the manual for specific compatibility guidelines to avoid installation issues. Proper compatibility ensures efficient performance and longevity of the unit.

3.2 Space and Clearance Requirements

Ensure adequate space and clearance around the Rheem tankless water heater for proper installation and maintenance. Measure clearances from the top, bottom, left, and right sides of the unit as per the manual. The area should be well-ventilated, avoiding locations prone to humidity, moisture, or dust. Keep the heater away from flammable materials or areas where water splashing may occur. Proper clearance ensures safe operation, easy service access, and compliance with local building codes. Always refer to the manual for specific spacing guidelines.

3.3 Plumbing and Electrical Requirements

Ensure the Rheem tankless water heater is installed with proper plumbing and electrical connections. Use flexible water heater hoses for secure connections, holding the unit firmly to avoid damaging the flow sensor. Electrical requirements vary by model, with some needing a dedicated 240V circuit. Verify compatibility with your existing electrical service, especially for higher kW models, and consult an electrician if necessary. Proper plumbing and electrical setup ensure safe and efficient operation, preventing potential hazards and maintaining warranty validity. Always follow local codes and manufacturer guidelines.

Choosing the Right Location for Installation

Select a location with proper clearance, away from humidity, and accessible for maintenance. Ensure it’s level, secure, and meets local codes for safe operation.

4.1 Factors to Consider for Optimal Placement

When selecting a location for your Rheem tankless water heater, consider factors such as proximity to water supply lines, electrical connections, and venting requirements. Ensure the area is well-ventilated, away from flammable materials, and protected from freezing temperatures. Proper clearance around the unit is essential for maintenance and safety. Additionally, consider accessibility for future servicing and adherence to local building codes to ensure compliance and optimal performance.

4.2 Recommended Locations for Tankless Water Heaters

Ideal locations for Rheem tankless water heaters include utility rooms, garages, or areas near existing water supply lines. Ensure the space is well-ventilated, dry, and protected from freezing temperatures. Keep the unit away from flammable materials, chemicals, and direct sunlight. Maintain minimum clearances of 12 inches from walls and 3 feet from windows or doors. Avoid installing near gas appliances or in confined, poorly ventilated spaces. Always follow local building codes and consult the manual for specific placement guidelines to ensure safe and efficient operation.

Step-by-Step Installation Process

Mount the unit securely, connect water supply lines, install electrical connections, and ensure proper venting. Follow manual instructions for safety and efficiency.

5.1 Mounting the Tankless Water Heater

Mounting the Rheem tankless water heater requires careful planning to ensure stability and compliance with safety standards. Select a location with proper clearance, away from flammable materials and moisture. Use a level to ensure the unit is straight, and secure it to the wall using the provided screws or compatible mounting hardware. Ensure the area is well-ventilated and accessible for future maintenance. Always follow the manufacturer’s guidelines for optimal positioning and stability to prevent damage or malfunction.

5.2 Connecting Water Supply Lines

Connect the water supply lines to the Rheem tankless water heater by attaching flexible hoses or copper lines to the inlet and outlet ports. Ensure all connections are secure to prevent leaks. Use a wrench to tighten fittings, but avoid over-tightening, which could damage the unit. Verify that the water flow direction matches the arrows on the heater’s ports. Install service valves if recommended for easier maintenance. After connections, perform a pressure test to ensure system integrity before activating the heater.

5.3 Electrical Connections and Venting

Connect the Rheem tankless water heater to a dedicated electrical circuit with appropriate GFCI protection. For gas models, ensure proper venting using approved materials like Category III stainless steel vent pipes. Follow local building codes and manufacturer guidelines for vent termination and clearance. Install vents vertically or horizontally, ensuring no blockages. Consult the manual for specific venting configurations. Proper electrical and venting connections are critical for safe and efficient operation, preventing hazards like carbon monoxide leaks or electrical malfunctions.

Post-Installation Checks and Maintenance

After installation, ensure the Rheem tankless water heater operates correctly by checking for leaks, verifying electrical connections, and testing water temperature. Schedule regular maintenance, including filter cleaning and scale buildup inspection, to ensure longevity and efficiency. Refer to the manual for detailed maintenance schedules and troubleshooting tips to maintain optimal performance and safety.

6.1 Ensuring Proper Functionality After Installation

After installation, check for leaks in water and gas connections. Verify electrical connections are secure and match the manual’s specifications. Test the water temperature to ensure it meets desired settings; Activate the unit and monitor its operation for unusual noises or performance issues. Ensure proper venting is maintained to avoid carbon monoxide risks. Refer to the manual for specific post-installation tests and adjustments. Regularly inspect and clean filters to maintain efficiency and prevent scale buildup, ensuring optimal functionality and safety over time.

6.2 Regular Maintenance for Longevity

Regular maintenance is crucial to extend the lifespan of your Rheem tankless water heater. Clean or replace filters every 6-12 months to ensure optimal airflow and efficiency. Check for scale buildup and descale as needed, especially in hard water areas. Inspect gas lines for leaks and ensure proper venting to prevent carbon monoxide risks. Monitor water pressure and temperature settings to avoid damage. Schedule annual professional servicing to address internal components and maintain warranty validity, ensuring consistent performance and safety over the years.

Troubleshooting Common Issues

Troubleshooting your Rheem tankless water heater involves identifying error codes, checking ignition failures, and addressing water temperature malfunctions. Regular maintenance can help prevent these issues.

7.1 Identifying and Resolving Common Installation Problems

Common installation issues include improper venting, electrical connection errors, and incorrect water pressure settings. Ensure all connections are secure and venting meets Rheem’s guidelines. Check for leaks in water supply lines and verify proper clearance around the unit. If error codes appear, refer to the manual for troubleshooting steps. Addressing these issues promptly prevents malfunctions and ensures safe, efficient operation. Always consult the manual or contact a professional if unresolved problems persist.

7.2 Addressing Post-Installation Malfunctions

Post-installation issues may include error codes, temperature fluctuations, or insufficient hot water. Check for proper venting, electrical connections, and water pressure. Ensure the unit is free from blockages and scale buildup. Refer to the manual for error code meanings and troubleshooting steps. Regular maintenance, such as descaling, can prevent malfunctions. If issues persist, consult the manual or contact a certified technician to resolve the problem and ensure optimal performance of your Rheem tankless water heater.

Proper installation and maintenance of Rheem tankless water heaters ensure safety, efficiency, and longevity. Always follow the manual for optimal performance and troubleshooting common issues effectively.

8.1 Summary of Key Installation Points

Proper installation of Rheem tankless water heaters requires adherence to safety guidelines, correct venting, and appropriate clearance. Ensure electrical and plumbing connections meet specifications. Use compatible materials to avoid leaks or damage. Follow the manual for optimal placement and functionality. Regular maintenance, like cleaning and checking sensors, ensures longevity. Compliance with local codes and manufacturer instructions is crucial for safety and efficiency. Always consult a professional if unsure about any step to guarantee a reliable and durable system performance.

8.2 Importance of Following the Manual

Adhering to the Rheem tankless water heater installation manual is crucial for ensuring safety, efficiency, and compliance with local codes. Proper installation prevents hazards like scalding, electrical issues, and gas leaks. The manual provides precise guidelines for venting, clearance, and electrical connections, ensuring optimal performance. Failure to follow instructions can void warranties, lead to malfunctions, or result in serious safety risks. Always prioritize the manual’s instructions to guarantee a safe, reliable, and efficient water heating system for years to come.

honda civic 2015 owners manual

Welcome to the official guide for your Honda Civic 2015․ This manual provides essential information to ensure optimal performance, safety, and maintenance of your vehicle․ It covers key features, troubleshooting, and maintenance tips to enhance your driving experience․ Available in digital formats, it offers convenient access to detailed specifications and warranty details․

Purpose and Coverage of the Manual

The Honda Civic 2015 Owner’s Manual serves as a comprehensive guide to help owners understand and maintain their vehicle effectively․ It covers essential aspects such as proper vehicle operation, maintenance schedules, safety features, and technical specifications․ The manual also includes details on warranty coverage and troubleshooting common issues․ Available both in print and digital formats, it ensures accessibility for all users․ By following the manual, owners can optimize their driving experience and ensure the longevity of their Honda Civic․ Regular updates are provided to keep the information accurate and relevant․

Key Features of the Honda Civic 2015

The 2015 Honda Civic boasts a range of innovative features designed to enhance performance, comfort, and safety․ It comes with a 1․8L i-VTEC engine, offering a balance of power and fuel efficiency․ Available in both manual and automatic transmissions, the Civic also features a sleek interior with optional leather upholstery․ Advanced Driver Assistance Systems, such as Pack 2, provide enhanced safety․ The model also supports optional upgrades like HDD navigation, ensuring a modern driving experience․ These features make the Honda Civic 2015 a versatile and reliable choice for drivers seeking both style and functionality․

Maintenance and Servicing

Regular maintenance is crucial for the longevity and performance of your Honda Civic․ Follow the recommended schedule for checks and servicing to ensure optimal vehicle health․

Routine Maintenance Schedule

Your Honda Civic 2015 requires regular maintenance to ensure optimal performance․ The recommended schedule includes oil changes every 5,000 to 7,500 miles, tire rotations every 6,000 to 8,000 miles, and fluid checks․ Brake inspections should occur every 12,000 miles, while spark plugs should be replaced at 100,000 miles․ The schedule may vary based on driving conditions, such as frequent city driving or extreme temperatures․ Refer to the manual for a detailed timetable to keep your vehicle in peak condition and maintain warranty compliance․

DIY Maintenance Tips and Recommendations

Performing routine maintenance yourself can save time and money․ Check oil levels regularly and top up as needed․ Replace the air filter every 15,000 miles to improve fuel efficiency․ Inspect and rotate tires for even wear, and monitor tire pressure monthly․ Battery terminals should be cleaned to prevent corrosion․ For oil changes, use Honda-approved filters and oil grades․ Refer to the manual for specific guidelines and safety precautions․ Always use genuine Honda parts to ensure compatibility and longevity of your vehicle․

Troubleshooting Common Issues

The manual helps identify and resolve common problems like engine light issues or transmission concerns․ It provides step-by-step solutions and preventive maintenance tips for optimal performance․

Identifying and Diagnosing Problems

The Honda Civic 2015 Owner’s Manual guides you through diagnosing common issues․ It provides detailed symptom guides and error code explanations to help pinpoint problems․ Use the manual to identify warning lights, unusual noises, or performance issues․ Diagnostic steps include checking dashboard indicators, reviewing error codes, and performing basic inspections․ For example, if the “Check Engine” light appears, the manual explains how to use a code reader to determine the cause․ This section helps you understand when to address issues yourself or consult a professional․ Regular checks can prevent minor problems from becoming major repairs․

  • Review warning lights and their meanings․
  • Learn how to interpret error codes․
  • Follow step-by-step diagnostic procedures․

Common Issues and Solutions

The Honda Civic 2015 Owner’s Manual outlines common issues and their solutions․ It addresses frequent concerns like dashboard warning lights, transmission issues, and battery problems․ For example, if the “Check Engine” light appears, the manual provides steps to scan error codes and diagnose the issue․ Solutions range from simple fixes, such as tightening a loose gas cap, to more complex repairs requiring professional assistance․ The manual also covers maintenance-related problems, ensuring you can resolve issues promptly and effectively․ Regular checks and timely repairs help maintain your vehicle’s performance and longevity․

  • Dashboard warning lights and their meanings․
  • Transmission issues and troubleshooting steps․
  • Battery maintenance and common electrical problems․

Technical Specifications

The Honda Civic 2015 features a 1․8L i-VTEC engine, available in automatic or manual transmission․ It offers fuel efficiency of up to 31 mpg city and 41 mpg highway, delivering smooth performance and reliability․

Engine and Transmission Details

The 2015 Honda Civic is equipped with a 1․8-liter, 4-cylinder i-VTEC engine, offering a perfect blend of power and efficiency․ Available transmission options include a 5-speed manual and a continuously variable automatic transmission (CVT)․ The engine delivers 143 horsepower at 6,300 rpm and 129 lb-ft of torque at 4,300 rpm, ensuring responsive acceleration and smooth driving․ The i-VTEC technology optimizes valve timing for enhanced performance across the rpm range, making it suitable for both city commutes and highway drives․

Fuel Efficiency and Performance

The 2015 Honda Civic excels in fuel efficiency, with EPA ratings of up to 31 mpg in the city and 41 mpg on the highway for the CVT-equipped model․ The manual transmission version achieves 29 mpg city and 38 mpg highway․ The Eco Assist system helps optimize fuel consumption by providing real-time feedback․ The i-VTEC engine ensures smooth power delivery, with 143 horsepower and 129 lb-ft of torque, making it both efficient and responsive for daily driving․ Proper maintenance, as outlined in the manual, further enhances performance and fuel economy․

Warranty and Customer Support

The Honda Civic 2015 comes with a comprehensive warranty program, including a 3-year/36,000-mile new vehicle limited warranty and a 5-year/60,000-mile powertrain warranty․ Owners can access detailed warranty terms and contact customer support through Honda’s official website for assistance and inquiries․

Warranty Coverage and Conditions

The Honda Civic 2015 is backed by a comprehensive warranty program․ It includes a 3-year/36,000-mile new vehicle limited warranty and a 5-year/60,000-mile powertrain warranty․ The warranty covers repairs and replacements for defective parts and labor under normal use․ Certain conditions, such as maintenance neglect or modifications, may void the warranty․ For detailed terms, owners should refer to the official Honda website or contact customer support․ Proper maintenance and adherence to guidelines ensure warranty validity and optimal vehicle performance throughout ownership․

Contacting Honda Customer Service

For assistance with your Honda Civic 2015, visit owners․honda․com․ Create or log in to your account to access resources, including warranty details and service schedules․ You can also request a printed owner’s manual within the first six months of ownership at no cost․ For direct support, contact Honda’s customer service team through the website or phone․ Their representatives are available to address inquiries, provide guidance, and ensure a smooth ownership experience․ This service is designed to help you maintain and enjoy your vehicle to its fullest potential․

Accessing the Owner’s Manual Digitally

The Honda Civic 2015 Owner’s Manual is available for free download as a PDF or text file, or for online viewing at owners․honda․com․

Downloading the Manual as a PDF

To download the Honda Civic 2015 Owner’s Manual as a PDF, visit the official Honda website at owners․honda․com․ Log in or create an account to access the manual․ Once logged in, navigate to the “Manuals & Guides” section and select the 2015 Honda Civic․ Choose the “Download as PDF” option to save the file to your device․ This ensures you have a convenient, offline copy for easy reference․ The PDF format is compatible with most devices, making it ideal for on-the-go access․

Navigating the Digital Version

The digital version of the Honda Civic 2015 Owner’s Manual offers a user-friendly experience․ Once downloaded, you can easily navigate through sections using bookmarks or the search function․ Key features include hyperlinked tables of contents, detailed diagrams, and quick access to troubleshooting guides․ The manual is fully searchable, allowing you to find specific information quickly․ Additionally, sections can be printed individually for convenience․ Compatible with computers, tablets, and smartphones, the digital manual ensures you have access to vital information wherever you go, enhancing your overall ownership experience․

Thank you for referencing the Honda Civic 2015 Owner’s Manual․ This guide is designed to enhance your ownership experience․ Regular maintenance and proper care will ensure optimal performance․ For further assistance, contact Honda Customer Service․ Happy driving!

Final Tips for Maximizing Your Honda Civic Experience

Regularly check and maintain fluid levels, tires, and brakes for optimal performance․ Refer to your owner’s manual for specific guidance tailored to your vehicle․ Schedule routine servicing as recommended to prevent potential issues․ Stay informed about warranty coverage and utilize Honda’s customer support for any concerns․Downloading the manual as a PDF ensures easy access to detailed information․ By following these tips, you can enhance your driving experience, ensure longevity, and enjoy the full capabilities of your Honda Civic 2015․

rpi transfer course guide

The RPI Transfer Course Guide is a comprehensive resource designed to help students navigate the transfer credit process. It provides detailed information on transfer policies‚ course equivalency‚ and the steps required to ensure a smooth transition. This guide is essential for students seeking to transfer credits from other institutions to RPI‚ ensuring they understand the requirements and procedures for transfer credit approval. By using this guide‚ students can plan their academic path effectively and maximize the credits transferred‚ aligning with RPI’s academic standards and degree progression requirements.

1.1 Overview of RPI Transfer Policies

RPI’s transfer policies are designed to ensure a seamless transition for incoming students. The institute requires prior approval for all transfer credits‚ with specific guidelines on course equivalency and credit limits. Students must submit a Transfer Credit Approval Form and provide detailed course descriptions for evaluation. While the Transfer Course Guide aids planning‚ it does not guarantee credit approval. Credits are evaluated based on alignment with RPI’s curriculum and academic standards.

1.2 Importance of Transfer Credit Approval

Obtaining transfer credit approval is crucial for academic planning and progress; It ensures that credits earned elsewhere align with RPI’s curriculum‚ preventing unnecessary coursework repetition. Approved credits contribute directly to degree requirements‚ enabling students to graduate on time. Without approval‚ credits may not transfer‚ potentially delaying graduation. Securing approval early helps students avoid setbacks and plan their academic journey efficiently at RPI.

Understanding the Transfer Process

The transfer process involves submitting the Transfer Credit Approval form for evaluation. Students work with advisors to align credits with RPI’s curriculum and policies‚ ensuring a smooth transition;

2.1 Steps to Request Transfer Credit

To request transfer credit‚ students must complete the Transfer Credit Approval form and submit it to the appropriate academic department. They should review the Transfer Course Guide to identify equivalent courses and ensure alignment with RPI’s curriculum. Official course descriptions and syllabi must be provided for evaluation. Once submitted‚ the request is reviewed‚ and students are notified of the approval status. Monitoring the process ensures timely credit application.

2.2 Required Documentation for Transfer Credit

Students must submit a completed Transfer Credit Approval form‚ official transcripts‚ and detailed course descriptions or syllabi for evaluation. Additional documentation‚ such as course outlines or instructor credentials‚ may be requested. All submissions must be official and complete to ensure proper evaluation. Incomplete applications may result in delays or denial of transfer credit requests.

Preparing for Course Registration

Review the RPI Course Catalog and Class Schedule to identify offered courses. Familiarize yourself with HASS Core Guidelines and schedule a meeting with an academic advisor to plan your enrollment effectively.

3.1 Reviewing the RPI Course Catalog

Reviewing the RPI Course Catalog is essential to map transfer credits to RPI courses. It outlines degree requirements‚ course descriptions‚ and availability. Use it to identify equivalent courses‚ plan your enrollment‚ and ensure alignment with your degree program. This step helps maximize transfer credits and streamlines your academic progression at RPI. Always cross-reference with the Transfer Credit Guide for accuracy.

3.2 Familiarizing with HASS Core Guidelines

Familiarizing yourself with HASS Core Guidelines is crucial for transfer students to understand RPI’s general education requirements. These guidelines outline essential courses in humanities‚ arts‚ and social sciences that must be completed for graduation. Reviewing them helps ensure your transfer credits align with RPI’s curriculum and fulfillment of HASS requirements. Understanding these guidelines prevents gaps in your degree progression and ensures a smooth academic transition.

3.3 Scheduling a Meeting with an Academic Advisor

Scheduling a meeting with an academic advisor is crucial for transfer students to plan their coursework effectively. Advisors help ensure your transfer credits align with RPI’s degree requirements and provide guidance on HASS Core Guidelines. Meeting with an advisor before registering for classes ensures a smooth transition and helps create a tailored academic plan that maximizes your transfer credits and aligns with RPI’s curriculum.

Transfer Credit Approval Process

The transfer credit approval process involves submitting the Transfer Credit Approval Form and providing detailed course descriptions. Courses are evaluated for equivalency‚ and some may require additional review or documentation to determine eligibility for transfer credit.

4.1 Submitting the Transfer Credit Approval Form

Students must complete the Transfer Credit Approval Form prior to enrolling in external courses. The form requires course details‚ including name‚ number‚ and description‚ and must be submitted to the appropriate academic department for evaluation. Ensure all sections are filled accurately and include multiple forms if necessary‚ labeling each (e.g.‚ “1 of 2”) to prevent missed submissions. This step is crucial for smooth credit approval.

4.2 Evaluating Course Equivalency

RPI evaluates course equivalency by comparing external courses to its own offerings. The Transfer Credit Guide lists pre-approved courses‚ but equivalency is not guaranteed. For unlisted courses‚ students must submit detailed descriptions for review. Final approval is determined by academic departments‚ ensuring alignment with RPI’s curriculum. This process ensures transferred credits meet RPI’s academic standards and contribute appropriately to degree requirements.

4.3 Handling Courses Not Listed in the Guide

Courses not listed in the Transfer Course Guide are reviewed on a case-by-case basis. Students should submit detailed course descriptions and syllabi for evaluation. The academic department will determine if the course aligns with RPI’s curriculum. While there is no guarantee of approval‚ this process allows for flexibility in transferring credits from institutions or courses not pre-approved in the guide.

Institutional Policies and Regulations

RPI has specific policies regarding transfer credits‚ including credit limits and GPA requirements. Students must adhere to deadlines for submitting transfer requests and ensure all documentation is complete. Compliance with these regulations is essential for a seamless transfer process and to maintain academic eligibility.

5.1 Credit Limits and GPA Requirements

RPI has specific credit limits for transferable courses‚ typically capping the number of credits accepted. A minimum GPA is required for transfer eligibility‚ ensuring academic alignment. Students must meet these criteria to qualify for credit transfer‚ though meeting them doesn’t guarantee admission or full credit acceptance.

5.2 Deadlines for Transfer Credit Requests

Adhering to RPI’s deadlines for transfer credit requests is crucial for a seamless transition. Prospective transfer students must submit all necessary documentation by specified dates to ensure timely evaluation. Missing deadlines may delay credit application and impact academic planning. Submitting requests early helps avoid complications and ensures credits are applied before the start of the semester or academic year.

5.3 Impact of Transfer Credits on Degree Progression

Transfer credits can significantly influence a student’s degree progression at RPI. Approved credits may reduce the number of courses needed to graduate‚ allowing students to accelerate their studies. However‚ equivalency of transfer courses to RPI’s curriculum is crucial. Students should review their transfer credits with academic advisors to ensure they align with degree requirements and avoid unnecessary delays in graduation.

Tips for a Smooth Transfer Experience

Plan ahead‚ understand the transfer process thoroughly‚ and utilize RPI’s resources to ensure a seamless transition. Early preparation and awareness of policies can prevent delays and streamline your academic journey.

6.1 Communicating with Academic Advisors

Regular communication with academic advisors is crucial for a smooth transfer experience. They provide guidance on transfer credit approval‚ help plan coursework‚ and ensure credits align with degree requirements. Schedule meetings early to discuss your academic goals and any concerns regarding course equivalency. Advisors can also offer insights into RPI-specific policies and help you avoid potential issues with credit transfers.

6.2 Planning Coursework in Advance

Planning your coursework ahead ensures a seamless transition and maximizes transfer credits. Review RPI’s course catalog and use the Transfer Credit Guide to identify equivalent courses. Consult with academic advisors to align your credits with degree requirements. This proactive approach helps avoid unnecessary credits and ensures a smooth academic progression‚ making the most of your transfer experience at RPI.

6.3 Utilizing RPI Resources for Transfer Students

Transfer students at RPI can utilize the Transfer Credit Guide and academic advisors to navigate the transfer process effectively. Departments like HASS‚ Lally School of Management‚ and Architecture provide specialized support. Submitting course descriptions and approval forms to the designated offices ensures proper evaluation. These resources are crucial for a seamless transition and academic success at RPI.

Common Mistakes to Avoid

Avoid assuming course equivalency without verification and missing deadlines for credit approval. Not checking course transferability can delay degree progression. Always verify requirements before enrolling.

7.1 Not Checking Course Transferability

One common mistake is not verifying if a course will transfer before enrolling. This can lead to unnecessary credits and delayed graduation. Always use the Transfer Credit Guide to confirm course equivalency and consult with advisors to ensure courses align with RPI’s requirements. Assuming a course will transfer without verification can result in lost time and additional coursework.

7.2 Missing Deadlines for Credit Approval

Missing deadlines for transfer credit approval can significantly delay your academic progress. Ensure you submit all required documents and forms by the specified dates to avoid complications. Late submissions may result in denied credits or delayed registration‚ impacting your degree timeline. Always review the RPI Transfer Course Guide for cutoff dates and plan accordingly to maintain your academic momentum.

7.3 Assuming Credit Equivalency Without Verification

Assuming a course is equivalent without verification can lead to denied credits or unexpected academic delays. Always verify course equivalency through RPI’s Transfer Credit Guide and consult with academic advisors. Even if courses appear similar‚ equivalency isn’t guaranteed. Proper verification ensures credits are applied correctly‚ avoiding potential setbacks in your degree progression.

Post-Transfer Academic Life

After transferring‚ students must adapt to RPI’s curriculum and monitor their transfer credits to ensure proper application. Maintaining communication with academic advisors is crucial for a seamless transition and academic success.

8.1 Adjusting to RPI Curriculum

Transfer students must adapt to RPI’s rigorous academic structure‚ including its 4-credit course system and applied focus. Meeting with advisors and reviewing degree requirements helps ensure a smooth transition. Students should also complete any necessary prerequisites and familiarize themselves with RPI’s unique curriculum to align their academic goals with institutional expectations.

8.2 Monitoring Transfer Credit Application

After submitting transfer credits‚ students should regularly monitor their application status. Check your RPI transcript to ensure credits are accurately applied. If discrepancies arise‚ contact the Registrar’s Office promptly. Follow up with academic advisors to confirm credits align with degree requirements. Ensure all documentation‚ like course descriptions‚ is submitted to avoid delays in processing your transfer credit application.

8;4 Maintaining Communication with Advisors

Regular communication with academic advisors is crucial for transfer students. Schedule meetings to discuss your academic progress and ensure transfer credits align with your degree requirements. Advisors can provide guidance on course selection and help resolve any issues related to credit equivalency. Maintaining open lines of communication ensures a smooth transition and helps you stay on track to graduate.

Special Programs and Considerations

This section covers specialized scenarios‚ including transfer credits for specialized majors‚ handling international or online credits‚ and considerations for study abroad programs. It serves as a resource for students navigating unique academic situations.

9.1 Transfer Credits for Specialized Majors

Transfer credits for specialized majors at RPI require careful evaluation due to unique curriculum requirements. Students must submit detailed course descriptions and syllabi for review. Credit equivalency is determined based on alignment with RPI’s program-specific courses. Direct equivalency isn’t guaranteed‚ and additional approvals may be needed. Consulting with academic advisors early is crucial to ensure transfer credits align with major requirements effectively.

9.2 Handling International or Online Credits

International or online credits require additional documentation for evaluation. Students must submit detailed course descriptions‚ syllabi‚ and transcripts. International credits may need evaluation by recognized agencies like WES or ECE. Online courses must be from accredited institutions. Credits not listed in the guide can still be reviewed. Early submission is recommended to ensure timely processing and proper application of transfer credits.

9.3 Transfer Credits for Study Abroad Programs

Credits earned through study abroad programs must be pre-approved using the Transfer Credit Approval Form. Submit detailed course descriptions and transcripts for evaluation. Credits are granted based on alignment with RPI’s academic standards. Ensure courses are accredited and relevant to your degree. Submit materials well in advance to avoid delays in processing and transferring credits.

Financial Aid and Transfer Credits

Transfer credits impact financial aid eligibility and merit aid consideration. Scholarships are available for transfer students‚ ensuring continued support for academic success at RPI.

10.1 Impact of Transfer Credits on Aid Eligibility

Transfer credits can affect financial aid eligibility as they influence the calculation of degree completion and remaining semesters. Institutions may adjust aid packages based on transferred credits‚ potentially impacting merit aid and scholarship opportunities. Students must ensure transferred credits align with degree requirements to maintain full eligibility for financial assistance programs.

10.2 Understanding Merit Aid for Transfer Students

Mert aid for transfer students at RPI is awarded based on academic performance‚ such as GPA and course rigor. Transfer students with strong academic records may qualify for merit-based scholarships‚ which can significantly reduce tuition costs. Merit aid is competitive and varies annually‚ with awards ranging from $10‚000 to $20‚000 or more per year‚ depending on individual qualifications and institutional policies.

10.3 Scholarships Available to Transfer Students

RPI offers various scholarships specifically for transfer students to support their academic pursuits. These include institutional scholarships‚ external funding opportunities‚ and departmental awards. Transfer students are encouraged to apply for scholarships by submitting required documents like transcripts and recommendation letters. Early application is recommended to maximize eligibility. Visit the RPI financial aid website for detailed criteria and deadlines.

RPI’s Transfer Course Guide provides a clear roadmap for transfer students‚ ensuring a smooth transition. By following the outlined steps‚ students can maximize their academic success and opportunities.

11.1 Final Tips for Success

Plan coursework early‚ communicate regularly with advisors‚ and utilize RPI resources to ensure a seamless transition. Stay organized‚ monitor credit applications‚ and align courses with degree requirements for optimal success. Proactively seek support and clarification to avoid delays‚ ensuring all credits are accurately applied and meet RPI standards for your academic progression.

11.2 RPI Support for Transfer Students

RPI provides comprehensive support to ensure transfer students thrive. Academic advisors offer personalized guidance‚ while the Transfer Course Guide helps plan coursework. Dedicated departments handle credit evaluations‚ and students can reach out to HASSInfo@rpi.edu‚ fletck3@rpi.edu‚ or belldr@rpi.edu for assistance. RPI’s resources foster a smooth transition‚ helping transfer students integrate seamlessly into the academic community and achieve their educational goals.

resume node.js -templates -samples filetype:pdf

Node.js resume templates are essential for showcasing skills in JavaScript and backend development. They highlight technical expertise and professional experience, ensuring compatibility with Applicant Tracking Systems (ATS).

Overview of Node.js and Its Importance in Modern Web Development

Node.js is an open-source, cross-platform runtime environment for JavaScript, enabling server-side execution. Since its release in 2009, it has become pivotal in modern web development, fostering real-time applications and microservices. Its lightweight, scalable nature makes it ideal for building efficient backend systems. Developers leverage Node.js to create responsive, data-driven solutions, particularly in industries like e-commerce and social media, where high performance and rapid development cycles are essential.

Why Use Templates for a Node.js Resume?

Using Node.js resume templates ensures a professional and structured presentation of your skills and experience. Templates help organize information effectively, making it easier for hiring managers to assess your qualifications. They also improve compatibility with Applicant Tracking Systems (ATS), increasing your chances of passing automated screenings. Additionally, templates provide a clean and visually appealing format, allowing you to highlight your expertise in Node.js, JavaScript, and related technologies while maintaining a focus on relevance and clarity in your application.

Key Sections of a Node.js Resume

A Node.js resume should include essential sections like Professional Summary, Technical Skills, and Professional Experience to effectively showcase expertise in JavaScript and backend development.

Professional Summary

A passionate full-stack developer with 8+ years of experience in Node.js, specializing in building scalable and efficient backend solutions. Proficient in frameworks like Express.js and Koa.js, with a strong foundation in modern web technologies such as MongoDB, Socket.IO, and RESTful APIs. Proven track record of delivering high-performance applications, including real-time chat systems and enterprise-level platforms. Committed to clean code, best practices, and continuous learning in the evolving JavaScript ecosystem.

Technical Skills

Professional Experience

Served as a Full Stack Developer at Design Awaken Arts (2020-Present), co-founding the studio and leading projects using Node.js and React. Developed responsive web applications with modern frameworks, ensuring security and scalability. Prior experience includes working as a Web Developer (2017-2020), building real-time chat applications with Socket.IO and enhancing UI/UX with Angular.js. Utilized Docker for deployment and Kubernetes for orchestration, improving system efficiency and reliability. Collaborated on microservices architecture, streamlining development and deployment processes.

Best Practices for Node.js Resume Writing

Focus on clarity and relevance, tailoring your resume to the job description. Use action verbs and quantify achievements to demonstrate impact and proficiency in Node.js development.

Highlighting Relevant Projects

Include detailed descriptions of projects showcasing Node.js expertise, such as real-time chat applications or scalable backend solutions. Mention technologies like Docker and Kubernetes, and quantify outcomes, such as improved performance or user engagement. Emphasize your role in the project, collaboration with teams, and the impact of your contributions. Use specific metrics to demonstrate success, like reducing load times or increasing API efficiency. This helps hiring managers understand your practical skills and problem-solving abilities in Node.js environments.

Emphasizing Full-Stack Development Skills

Highlight your proficiency in both front-end and back-end technologies, showcasing how Node.js integrates with frameworks like React, Angular, or Next.js. Mention expertise in databases such as MongoDB and real-time communication tools like Socket.IO. Include experience with RESTful APIs, microservices, and modern deployment practices like Docker and Kubernetes. Demonstrating a holistic understanding of the development stack positions you as a versatile candidate capable of managing end-to-end web applications effectively.

Quantifying Achievements

Highlight specific accomplishments by including measurable outcomes, such as improving application performance by 30% or reducing server response time by 25%. Mention the number of users impacted, like “deployed a real-time chat application serving 10,000+ users.” Quantify contributions to code quality, such as reducing bugs by 15% or improving code coverage to 90%. Use metrics like “optimized RESTful API endpoints, increasing throughput by 40%” to demonstrate tangible results and technical proficiency in Node.js development.

Popular Node.js Resume Templates

Popular Node.js resume templates feature clean designs, emphasizing technical skills and professional experience. They are tailored to highlight proficiency in JavaScript and backend development, ensuring ATS compatibility.

Modern and Clean Templates

Modern and clean Node.js resume templates are designed to present information clearly. They use minimalistic layouts with a focus on readability and professional appeal. These templates often feature simple color schemes, sans-serif fonts, and ample white space to make your skills and experience stand out. Many include sections tailored for technical details like frameworks and libraries. They are ideal for developers who want a polished yet straightforward presentation of their qualifications, ensuring a professional first impression.

Minimalist Designs

Minimalist Node.js resume templates prioritize simplicity and functionality. They feature clean layouts, neutral color schemes, and simple typography to ensure readability. These designs avoid clutter, focusing on essential information like technical skills and work experience. Minimalist templates are ideal for developers who prefer a straightforward, professional presentation. They often include subtle accents or section headers for organization without overwhelming the reader. This style ensures your qualifications stand out clearly, making it easy for hiring managers and ATS systems to scan your resume efficiently.

Industry-Specific Templates

Industry-specific Node.js resume templates cater to particular sectors like tech startups, fintech, or enterprise software development. These designs emphasize relevant skills and experiences tailored to the industry, ensuring alignment with job requirements. For example, a backend-focused template might highlight Node.js frameworks, while a real-time application template could emphasize Socket.IO or WebSocket expertise. These templates often include industry-specific keywords and formatting, making them highly effective for targeted job applications in competitive fields.

Sample Node.js Resume Content

Discover how to craft a compelling Node.js resume with tailored templates, showcasing technical skills like JavaScript, Express.js, and MongoDB, along with real-world project implementations.

Example of a Professional Summary

A dedicated and results-driven Node.js developer with 5+ years of experience in building scalable web applications. Proficient in JavaScript, Express.js, and RESTful APIs. Strong background in full-stack development, with expertise in modern frameworks like React and Next.js. Adept at deploying applications using Docker and Kubernetes. Committed to delivering efficient, maintainable, and high-performance solutions. Passionate about continuous learning and staying updated with industry trends.

Sample Technical Skills Section

  • Node.js: Expertise in developing scalable server-side applications and RESTful APIs.
  • JavaScript/TypeScript: Strong proficiency in both languages for frontend and backend development.
  • Frameworks: Experienced with Express.js, Next;js, and React for building efficient web applications.
  • Databases: Skilled in MongoDB, PostgreSQL, and Redis for robust data management.
  • Cloud Platforms: Knowledgeable in AWS, Docker, and Kubernetes for seamless deployment.
  • Testing: Familiarity with Jest and Mocha for ensuring code quality and reliability.
  • Version Control: Proficient in Git for collaborative development and version management.

Example of Work Experience

Senior Node.js Developer, Tech Innovators Inc. – New York, NY (2020–Present)

  • Led a team in developing scalable Node.js applications, improving performance by 40%.
  • Designed RESTful APIs using Express.js, enhancing integration with frontend frameworks.
  • Implemented microservices architecture with Docker and Kubernetes, reducing deployment time by 30%.
  • Collaborated with cross-functional teams to deliver real-time chat applications using Socket.IO.
  • Optimized database queries with MongoDB, reducing latency by 25%.

Optimizing Your Resume for ATS

Use keywords from the job description to pass ATS screenings. Ensure proper formatting and avoid special characters or graphics that may confuse systems.

Using Keywords Effectively

Incorporate relevant Node.js terms like “JavaScript,” “full-stack development,” and “RESTful APIs” to align with job descriptions. Tailor your resume to match the skills employers prioritize, ensuring ATS compatibility and higher visibility. Using industry-specific keywords enhances your chances of passing automated screenings and reaching hiring managers. Always review job postings to identify key phrases and integrate them naturally into your resume sections, such as the professional summary and technical skills.

Formatting Tips for ATS Compatibility

Use simple, clean formats without overly creative designs. Avoid graphics, tables, or columns, as ATS systems may struggle to parse them. Stick to standard fonts like Arial or Calibri, and ensure consistent spacing. Use clear section headings and bullet points for readability. Save your resume as a PDF or Word document, as these are ATS-friendly. Avoid special characters and ensure proper alignment to prevent misinterpretation. Keep formatting consistent across all sections to improve readability for both ATS and hiring managers.

Common Mistakes to Avoid

Avoid using overly creative layouts or graphics, as ATS systems may misinterpret them. Steer clear of special characters, such as bullet points made with symbols, and ensure proper alignment. Refrain from using tables or columns, as they can confuse parsing algorithms. Don’t include unnecessary fluff or irrelevant information that doesn’t align with the job description. Avoid inconsistent spacing or font sizes, as this can disrupt readability. Keep the formatting simple and clean to ensure compatibility with ATS and improve your chances of getting noticed.

Final Tips for a Standout Node.js Resume

Customize your resume to match the job description, emphasizing relevant projects and skills. Proofread for errors and add a personal touch to make your resume memorable.

Customizing Your Resume for the Job Description

Customizing your resume for the job description is crucial for standing out. Analyze the job requirements and align your technical skills, experience, and projects with the keywords used. Highlight relevant Node.js frameworks like Express.js or Next.js, and emphasize full-stack development if required. Tailor your professional summary to reflect the role’s demands, ensuring your resume mirrors the employer’s needs. This targeted approach increases your chances of passing ATS screenings and catching the hiring manager’s attention.

Proofreading and Editing

Proofreading and editing are essential steps in creating a polished Node.js resume. Ensure all sections are free from typos and grammatical errors, as these can detract from your professionalism. Pay attention to consistent formatting, such as date formats and bullet points. Use tools like Grammarly or have a colleague review your resume to catch overlooked mistakes. A well-edited resume not only enhances readability but also demonstrates attention to detail, a critical skill for developers. This step is vital for making a strong first impression on hiring managers.

Adding a Personal Touch

Add a personal touch to your Node.js resume by including a brief statement about your passion for development or open-source contributions. Highlight what drives you as a developer, such as solving complex problems or building scalable solutions. Mentioning personal projects or community involvement can make your resume stand out. This personal statement should align with your professional goals and showcase your unique perspective as a Node.js developer, making your application more memorable to hiring managers.